
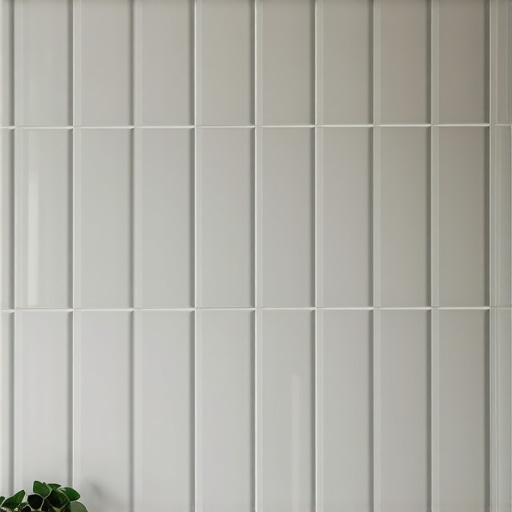
The drafting table in my office is covered in blueprints that tell a story of shifting architectural priorities. For twenty years, the horizontal offset of the 3 by 6 subway tile was the default setting for every bathroom and kitchen in the country. It was safe. It was traditional. It was also, quite frankly, a way to hide mediocre craftsmanship. As an architect who has seen the rise and fall of countless flooring and wall trends, I can tell you that the shift toward vertical stacked tile is not just a visual preference. It is a demand for structural precision. When you stack tiles vertically, you are creating a grid that is unforgiving. If your wall is out of plumb or your substrate has a belly in it, the vertical line will scream that failure to anyone who looks. This transition represents a move away from the busy, staggered lines of the past and toward a clean, engineered aesthetic that celebrates the geometry of the room. I smell the sharp tang of graphite and the faint scent of old floor wax as I review these new specifications. We are moving away from the safety of the offset and into the discipline of the grid.
The structural reality of vertical tile alignment
Vertical stacked tile replaces the subway look by emphasizing ceiling height and creating a modern, minimalist grid that requires perfect substrate flatness. Unlike traditional staggered patterns, vertical stacking aligns all grout joints into continuous straight lines, which visually elongates the space and demands a higher level of installation precision and structural integrity. Most guys skip the leveling compound. They think the underlayment will hide the dip. It won’t. I spent three days grinding concrete on a job last month just so the floor wouldn’t click like a castanet. That same obsession with flatness applies to your walls. If you are putting tile in showers, the backer board must be shimmed to a tolerance of 1/8 inch over 10 feet. If you miss that mark, your vertical lines will look like a bolt of lightning hitting the floor. Vertical stacking is the ultimate test of a flat wall. When you stagger tiles, the eye jumps across the joints. When you stack them, the eye follows the grout line from the floor to the ceiling without interruption. This is why the preparation phase is the most expensive part of a high-end job. You are not just paying for the tile. You are paying for the geometry of the substrate.
“A floor is only as good as the subfloor beneath it; deflection is the enemy of every joint.” – Master Flooring Axiom
The chemistry of the bond is where the battle for a vertical stack is won or lost. When you are hanging large format porcelain or even standard ceramics in a vertical stack, gravity is your constant adversary. You cannot rely on the mechanical interlock of a staggered pattern to hold the weight. You need a high-polymer modified thin-set that offers high grab and zero sag. We are talking about the molecular lattice of the adhesive. The polymers in the thin-set must form a bridge between the non-porous back of the porcelain and the cementitious surface of the backer board. If the moisture content in the room is too high during installation, that bond is compromised. This is especially true in humid environments like Houston or Miami, where the air itself feels like a wet blanket. In those regions, the drying time for the grout and the thin-set can double. If you rush the process, the weight of the tiles will cause the bottom rows to compress, resulting in lippage that you can feel with your fingernails. It is a disaster that starts at the molecular level.
The transition from horizontal tradition to vertical modernity
The shift toward vertical stacking is driven by the desire for unbroken lines and a sense of architectural volume that horizontal patterns cannot provide. By rotating the tile ninety degrees, designers can trick the eye into perceiving a taller room, which is a common strategy in compact urban dwellings where square footage is at a premium. [image] In my years of practice, I have seen homeowners try to replicate this look with cheap laminate or builder-grade materials. It never works. The vertical stack requires a certain density of material. You want a tile that has rectified edges. A rectified tile has been mechanically finished to a precise size, allowing for much tighter grout joints. We are talking about 1/16 of an inch. If you try to do a vertical stack with a standard pressed-edge tile, the slight variations in size will accumulate. By the time you reach the ceiling, your grid will be out of alignment by half an inch or more. This is where the physics of the material meets the vision of the architect. You cannot cheat the math of a rectified edge.
| Feature | Horizontal Subway | Vertical Stacked | Structural Impact |
|---|---|---|---|
| Visual Weight | Grounding and heavy | Lifting and airy | Verticality emphasizes height |
| Lippage Risk | Moderate (hidden by offset) | High (revealed by grid) | Requires 1/8 inch flatness |
| Grout Consumption | Standard | Higher (more continuous lines) | Requires epoxy or high-grade polymer |
| Installation Speed | Fast | Slow and precise | Calibration is essential |
| Substrate Demand | Standard backer board | Shimmed/Leveled substrate | Zero tolerance for deflection |
We must also discuss the role of grout in this new era. In a vertical stack, the grout is not just a filler. It is a design element that defines the grid. People often ask me about the best grout for showers. I always point them toward high-performance, rapid-setting cementitious grouts or full epoxy systems. Epoxy grout is chemically inert and waterproof, making it the gold standard for vertical applications where water runoff is constant. However, it is a nightmare to work with. It has a short pot life and requires a level of cleanliness that most residential crews struggle to maintain. If you leave a haze of epoxy on your tile, it is permanent. You will be looking at that smear for the next twenty years. The interaction between the grout and the tile edge is where the aesthetics of the room are finalized. A dark grout with a light tile creates a bold, graphic look that highlights the verticality. A matching grout color creates a monolithic surface that feels like a single sheet of stone.
The physics of expansion and movement joints
Expansion joints are mandatory in vertical tile installations to prevent the cracking and tenting that occurs when the structure naturally shifts or settles. According to TCNA guidelines, movement joints must be placed every 20 to 25 feet in interior installations, and even more frequently if the area is exposed to direct sunlight or moisture. It is a common misconception that tile is a static material. It isn’t. Hardwood floors expand and contract with humidity. Concrete slabs heave with temperature changes. Even the studs in your walls move. In a vertical stack, that movement is channeled along the straight grout lines. If you do not have a flexible sealant at the perimeters and at the change of planes, the tile will eventually pop off the wall. This is what I call the ghost in the expansion gap. It is the invisible force that ruins a beautiful installation because the installer forgot that the building is a living, moving thing. You cannot fight physics. You can only accommodate it.
- Ensure the substrate is free of all contaminants like oil or old adhesive.
- Check the wall for plumb using a six-foot level.
- Use a laser level to establish the primary vertical and horizontal axes.
- Apply thin-set using the back-buttering method to ensure 95 percent coverage.
- Install T-spacers at every corner to maintain a perfect 1/16 inch gap.
- Allow the thin-set to cure for at least 24 hours before applying grout.
A contrarian data point that I often share with my clients is that a 1/16 inch grout joint is actually more difficult to maintain than a slightly wider 1/8 inch joint in a vertical stack. While everyone wants the thinnest line possible, a 1/16 inch joint is prone to grout cracking because there is not enough volume of material to handle the structural micro-movements of the house. You are better off with a slightly wider joint and a high-quality sanded or unsanded grout that matches the tile perfectly. This gives you a buffer. It gives the installation a chance to breathe without failing. When we talk about showers, this becomes even more critical. The constant thermal cycling from hot water to cold air creates a massive amount of stress on the tile bond. If your joints are too tight, the tile has nowhere to go but out, resulting in the dreaded tenting effect.
“Deflection under a live or dead load should not exceed L/360 for ceramic tile and L/720 for natural stone.” – TCNA Handbook for Ceramic, Glass, and Stone Tile Installation
I remember a project in the Pacific Northwest where the humidity was so high that the green-board the contractor used started to sag before the tile was even up. We had to rip it all out and install cement-based backer boards with a vapor barrier behind them. That is the kind of detail that separates a professional from an amateur. If you are choosing between laminate and tile for a vertical application, there is no contest. Laminate is a photographic representation of wood or stone printed on a fiberboard core. It is susceptible to moisture and has no structural value. Tile, specifically porcelain, is a metamorphic product of heat and pressure. It is essentially man-made stone. When you stack it vertically, you are creating a surface that will outlast the mortgage on the house. But only if the subfloor and the wall studs are prepared with the respect they deserve. The beauty of the vertical stack is a reward for the discipline of the preparation.