
How to Fix a Squeak in the Middle of a Floating Floor
Most guys skip the leveling compound. They think the underlayment will hide the dip. It won’t. I spent three days grinding concrete on a job last month just so the floor wouldn’t click like a castanet. That sound is a death rattle for a floor. When you hear a chirp or a groan every time you step near the sofa, you are not just hearing a noise. You are hearing the mechanical failure of a locking system under stress. Floating floors like laminate and engineered hardwood floors are designed to move as a single unit, but when the substrate is uneven, the planks perform a vertical dance that eventually snaps the delicate tongue and groove joints. I smell like WD-40 and oak dust most days because I spend my life chasing these ghosts. If you think a squirt of WD-40 in the crack is a fix, you are wrong. You need to understand the physics of deflection and the chemistry of the bond before you can stop the noise.
The physics of the ghost sound
A squeak in the middle of a floating floor occurs when two planks rub together or when the floorboard makes contact with the subfloor due to a hollow spot. This movement is caused by improper expansion gaps at the perimeter, an unlevel subfloor that exceeds 3/16 of an inch over a 10-foot radius, or environmental fluctuations that cause the material to swell. To fix this without tearing up the entire room, you must identify if the sound is friction-based or movement-based. Friction happens at the joint. Movement happens because of a void. If you ignore it, the friction will eventually wear down the wear layer and the HDF core, leading to structural failure of the plank.
I have seen $15,000 wide-plank walnut floors ruined because the installer didn’t check the crawlspace humidity. In the case of floating floors, the issue is almost always a lack of prep. When you walk across a floor and it dips, you are compressing the air and the underlayment. The underlayment is meant to provide a vapor barrier and slight sound dampening, not to bridge a canyon in your plywood or concrete. If the subfloor has a birdbath, the floating floor will bridge it until the weight of a human body forces it down. That is when the groan happens. The friction at the locking mechanism is intense. We are talking about pounds per square inch of pressure concentrated on a piece of milled wood or plastic no thicker than a matchstick.
Why your subfloor is lying to you
Subfloor flatness is the most ignored specification in the flooring industry. People think a floating floor is a magic carpet that hides all sins. It is actually the opposite. Because a floating floor is not nailed or glued down, it is hypersensitive to the topography of the room. If your concrete slab has a high spot, the floor will teeter like a seesaw. If it has a low spot, it will trampoline. Both scenarios lead to squeaks. You need a 6-foot or 10-foot straightedge to truly see what is happening. A level is not enough. You are looking for gaps. Even a gap the thickness of two credit cards can cause a laminate floor to click. The click is the sound of the locking profile rubbing against the adjacent plank. It is a microscopic battle of materials.
“A floor is only as good as the subfloor beneath it; deflection is the enemy of every joint.” – Master Flooring Axiom
When I am on a job site, I check the moisture content of the subfloor first. If you are installing hardwood floors or even laminate over a concrete slab that is still off-gassing moisture, that vapor will hit the bottom of your planks and cause them to cup. Cupping creates tension. Tension creates noise. You might think the squeak is just a loose board, but it might be the entire floor system screaming because it is being squeezed by the walls. This is why the expansion gap is a law, not a suggestion. You need at least 1/4 inch to 1/2 inch of space around every single wall, pipe, and cabinet. If the floor hits the drywall, it has nowhere to go but up. When it goes up, it squeaks.
The 1/8 inch that ruins everything
Expansion gaps are the lungs of a floating floor. If the floor cannot breathe, it will choke and groan. I often find that homeowners have installed heavy kitchen islands directly on top of their floating floors. This locks the floor in place. A floating floor must be free to move as a single raft. If you pin it down with a heavy object on one side and it hits a wall on the other, the tension in the middle will be immense. This tension manifests as a squeak. Sometimes the fix is as simple as removing the baseboards and checking if the floor is tight against the studs. If it is, you take a multi-tool and cut back the edge. Suddenly, the floor relaxes, the tension dissipates, and the squeaks in the center of the room vanish.
| Metric | Tolerance Requirement | Impact of Failure |
|---|---|---|
| Subfloor Flatness | 3/16 inch per 10 feet | Vertical movement and joint snapping |
| Expansion Gap | 1/4 inch minimum | Buckling and center-room squeaks |
| Relative Humidity | 35 percent to 55 percent | Gapping or cupping of planks |
| Underlayment Density | High Density (20+ psi) | Crushing of the locking mechanism |
The Janka Hardness Scale matters here too. A softer wood or a cheap laminate with a low-density core will compress more easily underfoot. This compression increases the likelihood of the tongue and groove rubbing. If you are using a high-density fiberboard (HDF) core laminate, the tolerances are even tighter. These cores do not like to bend. They are brittle. If you force an HDF core to bend over a subfloor dip, it will either squeak or it will snap. Once the tongue snaps, the floor is toast. You can try to glue it, but you are just putting a band-aid on a broken bone.
Surgical repairs for the center of the room
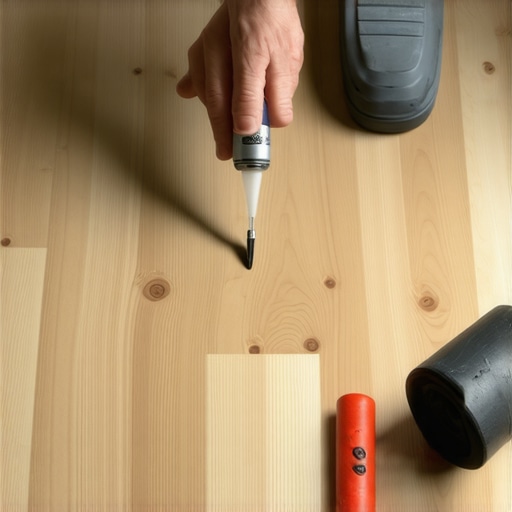
When the squeak is in the dead center of the room and you cannot reach it from the perimeter, you have to perform surgery. This is not for the faint of heart. You are going to use a repair kit that involves a very fine drill bit and a specialized adhesive injection system. You want a low-viscosity, high-strength floor adhesive. Something that flows like water but dries like steel. You drill a tiny hole, usually 1/16 of an inch, through the plank into the void beneath. You have to be careful not to drill all the way through the subfloor. You only want to reach the pocket of air that is causing the movement.
- Identify the exact spot of the squeak by walking slowly and marking it with blue tape.
- Drill a pilot hole in a dark grain line or a knot to hide the repair.
- Inject the specialized floor adhesive into the void until you feel resistance.
- Place a heavy weight, like a 40-pound bag of salt or a stack of tiles, over the spot for 24 hours.
- Fill the tiny hole with a matching wood putty or wax filler.
The adhesive fills the birdbath in the subfloor. It creates a solid pillar of support that stops the vertical movement. No movement means no squeak. I have used this method on dozens of high-end jobs where the client didn’t want to pay for a full tear-out. It works, but only if you use the right glue. If you use standard wood glue, it will shrink and the squeak will return in six months. You need something that remains slightly flexible but is incompressible. This is the chemistry of flooring. You are essentially creating a custom shim in situ.
The locking mechanism failure
Sometimes the squeak is not from a void. Sometimes it is the sound of the plastic or wood locking profiles rubbing against each other. This is common in cheaper click-lock floors. The tolerances from the factory might be off by a fraction of a millimeter. When the planks are joined, they are too tight. As you walk, the friction creates a high-pitched chirp. In these cases, a topical lubricant can sometimes help, but it must be dry. Do not use oils. Use a specialized Teflon or silicone-based dry lubricant designed for floors. You puff the powder into the joints and work it in by walking on the floor. This reduces the coefficient of friction enough to silence the noise.
“Friction is the silent killer of the floating floor; without room to move, the floor will find its own space through force.” – Master Flooring Axiom
Wait until you see what happens when someone tries to fix a squeak by putting grout in the cracks. Yes, I have seen it. They think it will act like a shim. Instead, the grout is abrasive. It acts like sandpaper inside the joint. Every time you step on the floor, the grout grinds away the locking mechanism. Within a month, the planks are separated and the floor is ruined. If you have a squeak, stay away from the tile aisle. Showers and floors are different beasts. You don’t use grout for something that is meant to move.
Environmental warfare and humidity
If you live in a place like New Orleans, the humidity is your enemy. If you are in Phoenix, the dry air is the problem. Wood is hygroscopic. It wants to be as wet or as dry as the air around it. When the humidity spikes, your planks grow. If they grow too much, they press against each other. This pressure is a major cause of squeaks. I always tell people to keep their HVAC system running year-round. You cannot turn off the AC and go on vacation for two weeks in August and expect your floors to be fine when you get back. They will have buckled and the squeaks will be the least of your worries.
Acclimation is the step everyone skips because they are in a hurry. You cannot bring the flooring from a cold warehouse and install it the same day. It needs to sit in the room where it will be installed for at least 48 to 72 hours. This allows the moisture content of the planks to stabilize with the ambient air. If you skip this, the floor will move significantly after installation. That movement leads to gaps, and gaps lead to noise. I have walked into jobs where the floor was cupping so bad it looked like a potato chip because the installer didn’t check the humidity. It is a heartbreaking waste of money.
The 1/8 inch gap in the doorway
Transitions are another failure point. Most people hate the look of T-moldings in doorways. They want a seamless look from the bedroom to the hallway. But a floating floor has a limit on how far it can run before it needs a break. Usually, that limit is about 30 feet. If your run is longer than that, the weight of the floor itself becomes too much for the locking mechanisms to pull. The floor gets bogged down and starts to pull apart at the weakest point, which is usually the doorway. This tension causes the floor to squeak near the threshold. Installing a proper transition strip allows the two rooms to move independently. It might not look as clean as a continuous floor, but it will be silent. Silence is the true mark of a quality installation.
I have spent 25 years on my knees fixing the mistakes of people who thought they knew better than the NWFA. A squeak is a symptom of a deeper problem. Whether it is a subfloor dip, a lack of expansion space, or a humidity issue, you have to treat the cause. Don’t just spray some lubricant and hope for the best. Grab your straightedge, check your perimeters, and if necessary, get ready for some surgical adhesive injection. That is how a pro does it. That is how you ensure the floor stays quiet for the next twenty years. You treat it like an engineering project, not a weekend craft. If you respect the physics, the floor will respect your feet.