
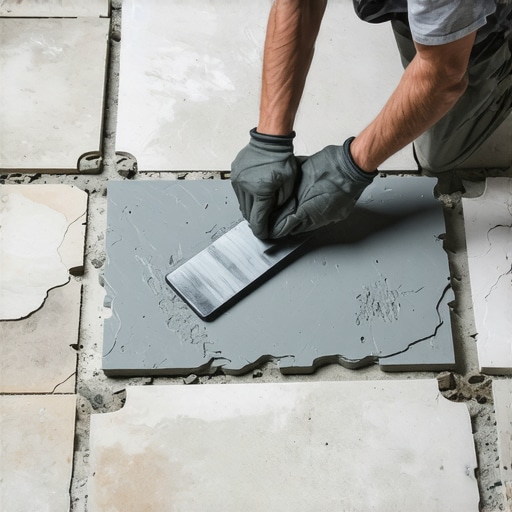
The myth of the flat concrete slab
Installing tile over old concrete requires mechanical surface preparation, moisture vapor testing, and the application of an uncoupling membrane to prevent crack transmission. You must ensure the Concrete Surface Profile (CSP) is between 2 and 3. This process involves grinding the surface to remove laitance, sealers, and contaminants that inhibit the chemical bond of polymer-modified thin-set.
I spent three days grinding concrete on a job last month just so the floor wouldn’t click like a castanet. Most guys skip the leveling compound. They think the underlayment will hide the dip. It won’t. I was in a basement in the humid suburbs where the previous installer just slapped down large format porcelain. Three months later, the grout was turning to powder and the tiles sounded hollow. It was because they didn’t address the moisture coming through the slab or the unevenness of the old pour. My hands were vibrating for a week after that grinder work, but that floor is now flatter than a pool table. If you skip the prep, you are just waiting for a failure. I can smell the WD-40 and the fine grey dust of a properly prepared slab from a mile away. It is the scent of a job that will actually last thirty years.
The hidden danger of hydrostatic pressure
Concrete is a sponge that holds water through capillary action which can blow tile off the floor. You must use an ASTM F1869 calcium chloride test or ASTM F2170 relative humidity probes to measure the Moisture Vapor Emission Rate (MVER). If the slab exceeds 5 lbs per 1,000 square feet, a moisture mitigation epoxy is required to protect the thin-set bond and prevent efflorescence in the grout joints.
When you look at an old slab, you see a grey rock. When I look at it, I see a breathing, moving organism. If that concrete was poured in the 1970s, it likely lacks a vapor barrier underneath. That means the soil moisture is constantly trying to move upward. If you seal that moisture under a non-porous porcelain tile without a path for it to go, the pressure builds. It will eventually find the weakest link, which is usually the bond line between your mortar and the concrete. The chemistry of the thin-set is vital here. You need a high-polymer content that can handle the slight movements of an aging slab without shearing. We are talking about the molecular level where the crystals of the cement interlock with the pores of the concrete. If those pores are clogged with old paint or oil, the crystals have nowhere to go. It is like trying to glue two pieces of glass together with school glue. It might hold for a day, but the first time someone walks on it, it is over.
“A floor is only as good as the subfloor beneath it; deflection is the enemy of every joint.” – Master Flooring Axiom
The 1/8 inch that ruins everything
Subfloor flatness is measured by the 10-foot straightedge rule requiring no more than 1/8 inch deviation. High spots must be ground down with a diamond cup wheel and low spots filled with cementitious self-leveling underlayment. This ensures large format tile (LFT) has at least 95 percent mortar coverage to prevent point-load cracking and lippage.
If you have ever tripped on the edge of a tile, that is lippage. It happens because the installer was lazy with the level. On an old concrete floor, you have settled areas and heaves. You cannot fix a 1/2 inch dip with more thin-set. Thin-set is meant to be a bond, not a filler. When thin-set is applied too thick, it shrinks as the water evaporates. This shrinkage pulls the tile down, creating an uneven surface even if it looked perfect when you wet-set it. This is why I use a self-leveling compound after I have ground the slab. I want a surface that is so flat that the tile almost installs itself. I also despise those cheap plastic spacers. I use a mechanical leveling system that locks the tiles together during the curing process. It ensures that the edges are perfectly flush. It is a structural engineering challenge, not a craft project. You are building a wear surface that has to handle thousands of pounds of pressure over its lifetime.
| Substrate Type | Required Prep | Recommended Adhesive | Moisture Limit |
|---|---|---|---|
| Old Slab | Grind CSP 3 | Modified Thin-set | 5 lbs / 1000sqft |
| New Concrete | 28-day Cure | Uncoupling Membrane | 3 lbs / 1000sqft |
| Post-Tension | No Drilling | Lateral Flex Mortar | 85% RH |
| Radiant Heat | Thermal Wrap | S1 Rated Mortar | 75% RH |
The ghost in the expansion gap
Perimeter expansion joints must remain open to allow the concrete and tile to expand independently. You should leave a 1/4 inch gap at all vertical surfaces which is then covered by baseboards or shoe molding. Filling these gaps with hard grout causes tenting where tiles pop up in the center of the room due to thermal expansion.
I have seen entire kitchen floors pop up like a tent because the installer pushed the tile tight against the drywall. Concrete expands and contracts with temperature changes. Tile does the same, but at a different rate. If there is no room for that energy to go, it goes up. I call it the ghost in the floor. You will hear a loud crack in the middle of the night, and suddenly your floor is a mountain range. Use a 100 percent silicone sealant in the corners and at the base of the walls instead of grout. Silicone is flexible. Grout is rigid. It is a simple law of physics that people ignore because they want the color to match perfectly. Buy the matching silicone from the grout manufacturer. It is the only way to ensure the floor doesn’t tear itself apart. In places like Phoenix where the dry heat makes everything move, or the swampy humidity of Houston where wood and concrete swell, these gaps are the difference between a floor and a pile of broken ceramic.
The chemical bond of modern grout
High-performance grout utilizes acrylic resins and rapid-setting cement to prevent staining and cracking. For wet areas like showers or entryways, use epoxy grout which is impervious to water and chemicals. Modern single-component grouts offer color consistency without the need for periodic sealing after the installation is complete.
Grout is the most misunderstood part of the flooring system. People think it is just for looks. It is actually there to support the edges of the tile and keep debris out of the joints. If you use too much water when mixing or cleaning, you wash out the pigments and the polymers. That leads to soft, chalky grout that stains the first time you spill coffee. I prefer the new high-tech grouts that don’t require sealing. They are a pain to work with because they set fast, but the result is a joint that is as hard as the tile itself. You have to work in small sections. If you let that stuff dry on the face of the tile, you are going to be scrubbing with acid for a week. It requires discipline. It requires a clean bucket of water every ten minutes. It is the final stage of the architecture of the floor, and it is where most amateurs fail because they are tired and want to go home.
- Check the slab for any existing cracks and apply isolation membranes.
- Remove all old adhesive, paint, and wax with a floor maintainer and grit paper.
- Vacuum the floor twice to remove every microscopic particle of dust.
- Prime the concrete to ensure the self-leveling compound doesn’t lose water to the slab.
- Layout the room from the center to ensure even cuts at the perimeters.
- Back-butter every tile to ensure 100 percent contact with the mortar.
Thermal movement in regional climates
Regional temperature fluctuations dictate the specific type of uncoupling membrane needed for concrete installations. In areas with extreme seasonal shifts, the shear stress on the bond line can exceed the tensile strength of standard thin-set. An uncoupling mat allows the tile to float independently of the slab’s lateral movements.
If you are in a place where it is 100 degrees in the summer and 20 degrees in the winter, your concrete slab is a moving target. The tile is stable, but the concrete is shifting. Without a membrane, those two forces are fighting each other. The concrete will always win. The membrane works like a shock absorber. It has a hollow structure that allows the concrete to move underneath while the tile stays rock solid on top. This is especially vital if you are installing over radiant heat. The heat makes the concrete expand rapidly. If you don’t have that layer of protection, you will see cracks telegraphing through your grout lines within one season. I have seen it a thousand times. A guy thinks he can save five hundred bucks by skipping the mat. Then he spends five thousand bucks a year later to rip the whole thing out and start over. It is the most expensive shortcut you can take. You have to respect the physics of the materials you are working with.
“Deflection is not just a wood floor problem; concrete slabs flex under load and shift with the earth.” – TCNA Handbook Insight
The anatomy of a perfect mortar bed
A proper mortar bed involves the use of a notched trowel to create ridges that collapse into a solid layer. You must trowel in one direction to allow air to escape from under the tile. This prevents air pockets that lead to cracked tiles when heavy furniture or appliances are moved across the surface.
I see guys swirling the trowel like they are frosting a cake. That is a recipe for disaster. When you swirl, you trap air. When you set the tile, those air bubbles have nowhere to go. They create voids. A void is a weak spot. If a heavy refrigerator wheel rolls over a void, the tile snaps. You have to comb the lines straight. Then, when you push the tile down and move it slightly perpendicular to the ridges, they collapse and create a solid bed of support. It is a simple mechanical process, but it requires a level of focus that most people don’t have. You have to be consistent with the angle of your trowel. If you change the angle, you change the amount of mortar. That leads to uneven tiles. It is a game of millimeters. It is about the resistance you feel in your wrist when you pull that trowel across the floor. You can hear it when it is right. It has a specific rasping sound against the concrete. That is the sound of a floor that isn’t going anywhere.