
Tile grout is not a decorative filler. In the world of structural flooring, grout is a cementitious joint designed to absorb the microscopic movements of your subfloor and protect tile edges from chipping under load. When grout becomes discolored or stained with mold, mildew, or mineral deposits, it is more than just an aesthetic annoyance. These stains represent organic accumulation or chemical reactions occurring within a highly porous cement matrix. To restore these joints without degrading the structural integrity of your tile installation, you must understand both the chemistry of the stains and the physics of the cleaning tool.
The mechanics of porous cement joints
Grout cleaning requires an understanding of porous, cement-based materials that absorb water and harbor organic pathogens like mold or mildew. To restore these lines, you must apply a targeted pH neutralizer or mild acid solution directly to the affected pores, using a mechanical tool like a stiff toothbrush to agitate and lift the particulate matter out of the joint without scratching the surrounding glazed tile surface.
Most residential showers feature cementitious grout, which is essentially a mixture of Portland cement, graded sand or silica, and water. When this mixture cures, it forms a lattice of microscopic pathways. These pathways act like hard sponges, drawing in dirty water, body oils, soap scum, and mineral salts from hard water. If you live in high-humidity regions like Houston or Miami, these damp pores become breeding grounds for mold spores. Conversely, in dry climates like Phoenix or Denver, mineral evaporation leaves behind hard calcium crusts that trap dirt. Treating these issues requires understanding the physical structure of the joint before applying brute force.
The subfloor secret that ruins tile installations
Most guys skip the leveling compound. They think the underlayment will hide the dip. It won’t. I spent three days grinding concrete on a job last month just so the floor wouldn’t click like a castanet. When subfloors dip, tiles flex underfoot. This flexing creates microscopic cracks in your grout joints. Those tiny fractures are not just cosmetic flaws. They act as superhighways for moisture, channeling soapy water directly under your tile. Once water gets beneath the tile, it rots the thin-set adhesive, breeds black mold, and causes the grout lines to discolor from the bottom up. No amount of surface scrubbing will fix a grout stain that is fed by a wet, flexing subfloor. You must ensure the structural base is rock solid and perfectly flat before you ever lay a single tile.
“A floor is only as good as the subfloor beneath it; deflection is the enemy of every joint.” – Master Flooring Axiom
The toothbrush trick for spot cleaning stubborn grout
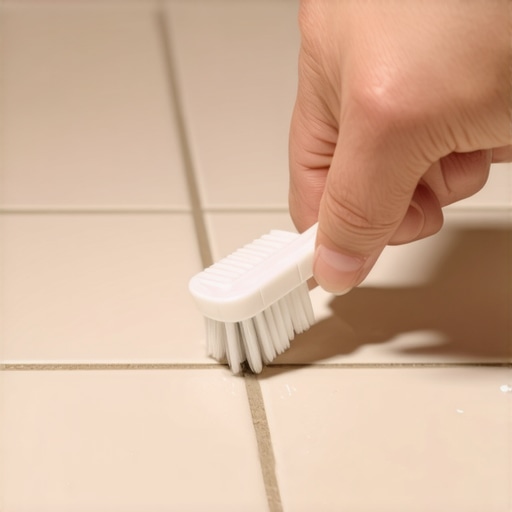
The toothbrush trick works because the nylon bristles of a manual toothbrush are small enough to enter the concave profile of a grout joint. Unlike large scrubbing brushes with thick bristles that bridge across the tile edges, a toothbrush allows you to apply concentrated, localized mechanical pressure directly inside the grout valley, breaking the physical bond of the stain without scouring the polished surface of the tile.
To execute this method, you need the right tool. Do not use a soft toothbrush meant for sensitive gums. You need a medium or stiff nylon bristle brush. Angled bristles are highly effective because they wedge into the corners where the tile meets the grout. If you use a brush that is too soft, the bristles will simply bend and slide over the surface of the stain. If you use a metal wire brush, you will gouge the grout, create deep grooves that collect even more dirt, and scratch the glaze off your ceramic or porcelain tiles. The goal is mechanical agitation, not destruction.
The chemical battlefield of grout cleaners
Cleaning solutions must match the chemical composition of the specific stain you are targeting inside the grout lines. Organic stains from mold, mildew, and skin oils require alkaline or enzymatic cleaners to break down the proteins, while inorganic stains from rust, hard water, and calcium scale require mild acids to dissolve the mineral bonds before physical agitation.
Using the wrong chemical can ruin your tile installation. Many homeowners reach for straight muriatic acid or heavy bleach solutions. This is a mistake. Strong acids dissolve the Portland cement binder in the grout, slowly eating away the joint until it crumbles into sand. Bleach kills mold spores but does nothing to remove the organic binder holding the stain, meaning the discoloration will return within weeks. Instead, start with a paste of sodium bicarbonate, which is common baking soda, mixed with hydrogen peroxide. This creates an oxygenating reaction that lifts organic matter out of the cement pores without damaging the alkaline structure of the grout itself.
Comparing grout types and chemical resistances
| Grout Type | Porosity Level | Acid Resistance | Best Cleaning Compound | Recommended Tool |
|---|---|---|---|---|
| Sanded Cement Grout | Very High | Poor | Baking Soda and Peroxide | Stiff Nylon Toothbrush |
| Unsanded Cement Grout | High | Poor | Oxygenated Bleach Paste | Medium Nylon Toothbrush |
| Epoxy Grout | Zero | Excellent | Neutral pH Cleaner | Soft Microfiber Cloth |
| Furan Resin Grout | Zero | Outstanding | Heavy Alkaline Cleaner | Stiff Scrub Brush |
A step by step guide to restoring grout lines
Restore your shower grout by applying a chemical lifting agent, letting it dwell, and then agitating the joints with a toothbrush. This process ensures that you do not strip the grout while removing years of accumulated soap scum, hard water minerals, and mold from the tile joint.
- Clear the tile surface of all loose dust, hair, and soap residue using a dry microfiber cloth.
- Mix baking soda and 3 percent hydrogen peroxide into a thick, wet paste with the consistency of wet sand.
- Apply the paste directly to the stained grout lines using a gloved finger or a spatula, packing it into the joints.
- Allow the paste to sit on the grout lines for fifteen minutes to let the oxygen bubbles break down organic matter.
- Scrub the grout lines in circular motions using your stiff nylon toothbrush, applying moderate downward pressure.
- Wipe away the spent paste using a damp sponge, rinsing the sponge frequently in clean, warm water.
- Inspect the grout after it dries completely, as wet grout always looks darker than dry, clean grout.
The danger of excessive cushioning under floors
While most people want the thickest underlayment, too much cushion actually causes the locking mechanisms on LVP to snap under pressure. The same structural principle applies to tile and grout. If your tile underlayment is too soft, or if you apply a thick, spongy membrane beneath your tile, the floor will flex when walked on. This deflection pulls the tile away from the grout. The grout, being rigid and cementitious, cannot stretch. It cracks, crumbles, and falls out. Always use a rigid, non-compressible underlayment like cement backer board or a specialized uncoupling membrane. These materials are engineered to isolate lateral movement while preventing vertical deflection, keeping your tile flat and your grout joints intact.
Why your subfloor is lying to you
Your subfloor may look flat to the naked eye, but micro-dips will ruin your tile installation over time. Even a tiny variance of one-eighth of an inch over ten feet is enough to create hollow spots beneath your tiles, leading to cracked grout lines, loose tiles, and water penetration that compromises the subfloor beneath.
To check your subfloor properly, you must use a ten-foot straightedge or a laser level. Do not trust your eyes, and do not trust a standard two-foot level. Slide the straightedge across the floor and look for gaps beneath the bar. If you find low spots, fill them with a self-leveling underlayment. If you find high spots on a concrete slab, grind them down using a diamond-cup grinding wheel. If you are working over a wood subfloor, make sure the plywood sheets are properly spaced with an eighth-inch gap to allow for natural expansion and contraction as seasonal humidity shifts. Tight joints between plywood sheets will swell, telegraphing a ridge up through your tile and cracking your grout.
“Deflection under a live load must not exceed L divided by 360 for ceramic tile, or L divided by 720 for natural stone installations.” – Tile Council of North America Guidelines
The ghost in the expansion gap
Hardwood floors, laminate, and luxury vinyl tile all require a clean, unblocked expansion gap around the perimeter of the room. If you push these floating floors tight against your drywall or baseboards, or if you pack the perimeter gap with rigid grout or caulking, the floor will buckle, warp, and destroy its own locking joints when the weather changes.
Wood is a hygroscopic material. It breathes. When the relative humidity in your home rises, the wood cells absorb moisture from the air and expand. When the humidity drops, they contract. A typical oak floor can expand up to a quarter of an inch across a fifteen-foot room. If you did not leave an expansion gap, the expanding floor will hit the wall. With nowhere else to go, the planks will lift off the subfloor, creating a hollow dome in the middle of your room. This is why you must always leave a minimum of a half-inch expansion gap around the entire perimeter of the room, covering the gap with baseboards or quarter-round molding nailed only to the wall, never to the floor itself.
The final sealing protocol
Once your grout is clean and completely dry, you must seal it to prevent future staining and water absorption. Unsealed grout is an open invitation for dirty water to penetrate the cement, making your cleaning efforts temporary and ensuring that mold and mildew will return within months.
Use a high-quality penetrating sealer rather than a topical membrane sealer. Penetrating sealers enter the pores of the grout and chemically bond with the cement, leaving the surface slip-resistant and breathable while repelling water and oils. Apply the sealer carefully to the grout lines using a small foam brush or roller. Avoid letting the sealer dry on the face of glazed ceramic or porcelain tiles, as it will leave a cloudy, sticky residue that is extremely difficult to remove. After fifteen minutes, wipe any excess sealer off the tile faces with a clean, dry microfiber cloth. Let the sealer cure for twenty-four hours before exposing the floor to moisture or foot traffic. This simple step protects your hard work and keeps your grout lines looking pristine for years to come.