
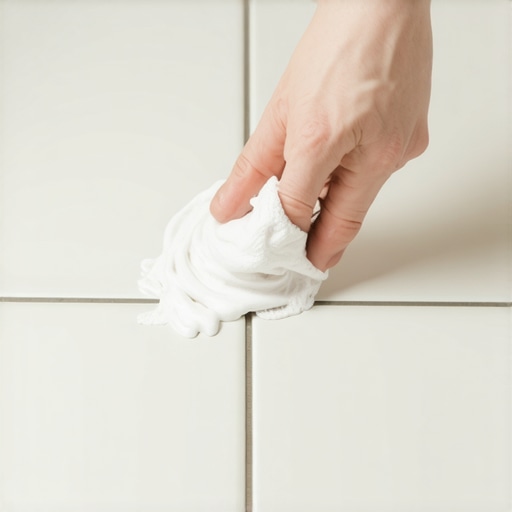
The science behind shaving cream on glazed surfaces
Shaving cream removes minor tile scuffs because it acts as a high-performance, non-abrasive lubricating polish containing triethanolamine, stearic acid, and glycerin. These active surfactants surround surface debris, lift metal transfers from shoes or furniture, and suspended particles so they can be wiped clean without scratching the delicate glaze of your ceramic or porcelain tiles.
Most homeowners panic when they see a dark streak across their pristine bathroom floor. They assume the glaze is permanently ruined. They run to the garage for steel wool or grab harsh abrasive powders that will permanently etch the surface. I spent three days grinding concrete on a job last month just so the floor wouldn’t click like a castanet, and during that job, the drywallers dragged a heavy aluminum ladder across my fresh porcelain install. It looked like a crime scene of silver metal transfer. Instead of panicking, I reached for a cheap can of classic foamy shaving cream. Within ten minutes, the metal lines were gone and the glaze remained completely untouched. This is not magic. It is simple surface chemistry.
To understand why this works, you have to look at the microscopic structure of tile glaze. Glazed porcelain and ceramic are essentially topped with a thin layer of liquid glass fired at temperatures exceeding two thousand degrees Fahrenheit. This glaze is incredibly hard but it has microscopic pores and fissures. When a metal object, a hard rubber boot heel, or a piece of furniture drags across it, the tile glaze acts like a file. It shears off microscopic particles of the softer material, leaving them embedded in the surface texture. This is what we call a scuff or metal transfer. It is not a scratch. A scratch is a physical groove carved into the tile. A scuff is an addition of material on top of the tile. Shaving cream is uniquely formulated to lift these stubborn surface deposits without attacking the silicon dioxide structure of the glaze itself.
The secret lies in the emulsion of stearic acid and triethanolamine. When sprayed onto the tile, these ingredients form a stable foam that clings to vertical surfaces, making it ideal for tiled shower walls and backsplashes. The glycerin acts as a lubricant, reducing friction as you buff the area with a microfiber cloth. The soap molecules lower the surface tension of the water, allowing the mixture to penetrate the microscopic valleys of the tile glaze. It surrounds the embedded metal or rubber particles, releasing their mechanical grip on the glass. You are not scraping the scuff away. You are chemically suspending it.
Why your subfloor is lying to you
A subfloor that looks flat to the naked eye is often a warped landscape of deflections and high spots that will inevitably cause tiles to crack and laminate to separate. True floor preparation requires checking for flatness within three-sixteenths of an inch over a ten-foot radius using a certified straightedge.
I have spent twenty-five years on my knees with a level and a moisture meter. I can tell you that ninety percent of flooring failures have nothing to do with the surface material itself. They are caused by subfloor ignorance. When a client complains that their laminate floors feel bouncy or their grout lines are cracking in the shower, the culprit is almost always hidden beneath. A subfloor must be rigid, flat, and dry. If you lay tile over a bouncy plywood subfloor, the micro-movements will shear the thin-set bond, pulverize the grout, and eventually crack the tile. This structural movement is called deflection, and it is the ultimate enemy of any hard surface installation.
“A floor is only as good as the subfloor beneath it; deflection is the enemy of every joint.” – Master Flooring Axiom
When dealing with plywood or oriented strand board subfloors, you must calculate the joist spacing and subfloor thickness. For natural stone or ceramic tile, the Tile Council of North America specifies a maximum deflection limit of L over three hundred and sixty under a design load. If your floor joists are spaced sixteen inches on center, your subfloor must be a minimum of nineteen-thirty-seconds of an inch thick, and preferably topped with an underlayment grade plywood or a cement backer board. Simply screwing down loose plywood is not enough. You must address the low spots with a high-quality cementitious self-leveling underlayment. While most people want the thickest underlayment, too much cushion actually causes the locking mechanisms on laminate and LVP to snap under pressure. You need density, not pillowy softness.
Concrete slabs present a different set of challenges. Concrete is essentially a giant sponge. It looks solid, but it is constantly breathing moisture vapor. If you lay hardwood floors or laminate over a concrete slab without a proper moisture barrier, that vapor will rise, collect on the underside of the flooring, and cause the wood to cup or mold to grow. Before any installation, you must conduct an anhydrous calcium chloride test or use an in-situ relative humidity probe. If the relative humidity within the slab exceeds seventy-five percent, you must apply a specialized epoxy moisture mitigation system. Ignoring this step is a recipe for catastrophic floor failure.
The step by step buffing protocol
Buffing out tile scuffs with shaving cream requires applying a thick layer of original white foaming cream, letting it dwell for five minutes to allow the surfactants to penetrate, scrubbing firmly with a non-scratch nylon pad, and rinsing thoroughly with warm water. This process preserves the delicate surface glaze while lifting stubborn deposits.
Before you begin, you must ensure you are using the correct product. Do not use shaving gels. Gels do not have the same surfactant structure or moisture density as traditional foaming creams. Avoid shaving creams that contain heavy artificial dyes, as blue or green dyes can stain porous grout lines, especially in older showers. Stick to classic, cheap, white foaming shaving cream. You will also need a clean microfiber cloth, a non-scratch white nylon scrubbing pad, a bucket of warm water, and a dry microfiber towel. Do not use green scouring pads, as they contain aluminum oxide abrasives that will permanently scratch glazed ceramic tile.
- Inspect the scuff to ensure it is a transfer of material and not a deep physical scratch in the glaze.
- Spray a generous dollop of white foaming shaving cream directly over the scuff, covering it completely.
- Allow the foam to sit on the surface for five to seven minutes so the surfactants can emulsify the metal or rubber particles.
- Use a non-scratch white nylon scrubbing pad to buff the area in a tight, circular motion with moderate downward pressure.
- Wipe away the shaving cream residue with a damp microfiber cloth dipped in warm water.
- Dry the area completely with a fresh towel and inspect the tile at an angle under strong light.
If the scuff is particularly stubborn, you can repeat the process. For heavy metal transfers on commercial porcelain tiles, you can mix a small amount of baking soda into the shaving cream to create a very mild, temporary abrasive paste. The baking soda will gently scrub the surface and then completely dissolve in water, ensuring no scratching occurs. Once the scuff is gone, rinse the area with clean water to remove any soapy residue that could make the tile slippery. This method is incredibly safe and costs pennies compared to commercial specialty cleaners.
The structural comparison of common flooring substrates
Selecting the right flooring substrate depends on understanding the specific density, moisture resistance, and structural stability of each material under real-world conditions. This comparison helps prevent common installation mistakes and material failures.
Different flooring materials react uniquely to environmental factors like humidity, temperature, and subfloor deflection. Solid hardwood floors require a wood joist subfloor system where they can be nailed down, allowing them to expand and contract naturally. Laminate and luxury vinyl planks are floating systems that require an exceptionally flat surface to prevent their tongue-and-groove locking joints from failing. Tile demands absolute rigidity to prevent grout cracking. The following table highlights the critical engineering specifications for each common flooring type to help you make an informed structural decision.
| Flooring Type | Subfloor Requirement | Max Allowable Deflection | Moisture Tolerance | Acclimation Period |
|---|---|---|---|---|
| Solid Hardwood | Plywood or OSB Only | L/360 under standard load | Low (requires 6-9% MC) | 7 to 14 days in-room |
| Glazed Ceramic & Tile | Cement Board / Uncoupling Membrane | L/360 for ceramic, L/720 for stone | High (waterproof if sealed) | None (adhesive must cure) |
| Laminate Flooring | Flat Concrete, Plywood, or Vinyl | 3/16 inch over 10 feet | Moderate (susceptible to standing water) | 48 hours in sealed boxes |
| Engineered Hardwood | Concrete or Plywood Subfloors | L/360 under standard load | Moderate to High | 72 hours in-room |
The ghost in the expansion gap
An expansion gap is a physical space of one-quarter to one-half inch left around the entire perimeter of a room during laminate or hardwood installation to accommodate natural movement caused by seasonal humidity changes. Without this gap, the flooring will buckle, peak, and separate as it presses against the walls.
Wood is a living material, even after it has been milled into flooring planks. It behaves like a bundle of microscopic straws. When the humidity rises during the summer, these straws absorb water vapor from the air and swell. When the dry winter air arrives, they release that moisture and shrink. A hundred-square-foot floor can expand by up to a quarter of an inch across its width over the course of a single year. If you butt your hardwood or laminate tight against the drywall, the wood has nowhere to go when it swells. It will press against the wall, build up immense internal pressure, and eventually lift off the subfloor. This is what we call buckling or peaking. It will ruin a floor in a single season.
“Every floating floor must have room to breathe; locking it down is the quickest way to tear it apart.” – NWFA Installation Guidelines
Many DIY installers try to skip the expansion gap because they think it looks ugly. They do not realize that the baseboards and shoe moldings are designed specifically to hide this gap. When installing your baseboards, you must nail them into the wall studs, not into the flooring itself. If you nail the baseboard into the flooring, you lock the floor in place, defeating the entire purpose of the expansion gap. The floor must be allowed to slide freely underneath the trim. The same rule applies to heavy kitchen islands. You should never install a floating laminate or vinyl floor first and then build a heavy island on top of it. The weight of the island pinches the floor to the subfloor, preventing expansion and causing the joints to separate elsewhere in the room.
For rooms larger than thirty feet in any direction, you must also install transition moldings, such as T-moldings. These moldings break the floor up into smaller, independent sections that can expand and contract without putting too much stress on the locking joints. I know people hate the look of T-moldings. They want a smooth, continuous floor throughout their entire open-concept home. But ignoring transition rules is a gamble you will eventually lose. The physical forces of expansion are stronger than any glue or locking joint.
The wet environment warning for tiled showers
Tiled showers require a continuous, chemically bonded waterproofing membrane behind the tile and grout to prevent water from penetrating the wall cavity and rotting the structural framing. Grout and tile alone are not waterproof and will pass water through capillary action.
Many people believe that because tile is glazed and grout is hard, a tiled shower is naturally waterproof. This is a dangerous misconception that has rotted out thousands of wood subfloors and framing walls. Grout is cement-based and highly porous. Water will easily seep through the grout joints and travel down to the subfloor. If you do not have a robust waterproofing system behind the tile, that moisture will get trapped, leading to wood rot, toxic black mold, and structural failure. The shower pan and walls must be treated as a sealed wet-area system before a single tile is set with thin-set mortar.
The traditional method of building a shower pan involved a thick sloped mortar bed over a PVC liner. While this method still works if done by a skilled artisan, modern waterproofing technology has shifted toward topical bonded membranes. These systems, such as liquid-applied elastomeric membranes or sheet-applied polyethylene membranes, are applied directly under the tile. This prevents water from saturating the mud bed underneath, allowing the entire system to dry much faster. It reduces the organic load in the shower base, preventing that musty, swampy smell that older showers often develop. Whenever you are renovating a bathroom, spend your money on the waterproofing system, not just the expensive decorative tile. What is behind the tile is always more important than the tile itself.