
The ghost in the expansion gap
Cleaning between the planks of your hardwood floors involves using a high-powered vacuum with a crevice tool to extract abrasive grit, followed by a soft-bristle brush for stubborn debris. Never use steam or excessive water, as moisture trapped between boards triggers cellular swelling, finish failure, and permanent structural cupping in the wood.
I once walked into a house where a $15,000 wide-plank walnut floor was cupping so bad it looked like a potato chip because the installer didn’t check the crawlspace humidity. The homeowner thought they were doing the right thing by scrubbing the gaps with a wet rag. They were actually feeding the wood’s thirst for destruction. Hardwood is a living, breathing material. It is hygroscopic, meaning it constantly exchanges moisture with the surrounding air. When you let dirt, pet dander, and skin cells settle into those tiny gaps between your 3/4 inch solid oak planks, you aren’t just looking at an aesthetic problem. You are looking at a mechanical failure in the making. That dirt acts like sandpaper. Every time you walk across the floor, the boards shift slightly. The grit grinds against the tongue and groove joints, wearing down the structural integrity of the floor from the inside out. This is not like cleaning the grout in showers where you can scrub with abandon. Wood requires a surgeon’s touch and a mechanic’s understanding of physics.
“A floor is only as good as the subfloor beneath it; deflection is the enemy of every joint.” – Master Flooring Axiom
The physics of the gap is simple. Wood expands in the summer and shrinks in the winter. This is why we leave expansion gaps at the perimeter of a room. If those gaps between the planks become packed with solidified gunk, the wood has nowhere to go when the humidity spikes. It will buckle. I have seen hardwood floors literally lift off the subfloor because the gaps were too full of debris to allow for natural movement. This is a common issue in regions like the Pacific Northwest, where the damp air keeps wood in a perpetual state of expansion. Unlike laminate, which is a photographic layer glued over a high-density fiberboard core, real hardwood has a cellular structure. Each cell contains a lumen and a cell wall made of cellulose and lignin. When water hits these cells, they swell. If there is dirt in the way, that pressure has to go somewhere. Usually, it goes up, creating a lippage that you will trip over in the middle of the night.
The 1/8 inch that ruins everything
Debris extraction from narrow floor seams requires a focused airflow strategy and a mechanical agitation process that does not compromise the protective polyurethane or oil finish. A vacuum with a felt-lined head is mandatory to prevent scratching the surface while the narrow nozzle creates the necessary static pressure.
Most people make the mistake of using a standard broom. A broom is a primitive tool. It simply pushes the dust deeper into the voids. To truly clean between the planks, you need to understand the Janka Hardness Scale. A soft wood like Eastern White Pine has a Janka rating of about 380, while a hard wood like Brazilian Cherry sits at 2,350. The harder the wood, the more brittle the edges of the planks can be. If you use a metal tool to dig out dirt, you will chip the finish. Once the finish is chipped, the wood is vulnerable to oxidation and moisture. I prefer a stiff nylon brush or even a specialized toothpick for the deep bits. You must be careful. The goal is to remove the inorganic matter without disturbing the organic fibers of the wood itself.
| Wood Species | Janka Hardness | Acclimation Time | Expansion Risk |
|---|---|---|---|
| White Oak | 1360 | 7-10 Days | Medium |
| Brazilian Walnut | 3680 | 14-21 Days | Low |
| American Cherry | 950 | 5-7 Days | High |
| Black Walnut | 1010 | 7-10 Days | Medium |
When you are dealing with moisture, think about the chemistry of the bond. In a bathroom, you might have showers with tile set in a modified thin-set. That environment is designed for water. Your living room is not. Even the humidity from a nearby bathroom can migrate through the air and settle into your floor gaps. If you live in a place like New Orleans, your floor is fighting a daily battle against the swamp. You need to maintain a consistent indoor climate. If the gaps are consistently wider than 1/16 of an inch during the humid months, you have a structural issue or a failed acclimation process. Cleaning these gaps becomes a diagnostic tool. If you see white powder in the gaps, it might not be dust. It could be finish failure or even wood-boring insects. Pay attention to what the vacuum pulls out.
Why your subfloor is lying to you
Subfloor irregularities manifest as hollow sounds and shifting planks which eventually trap more dirt in the resulting uneven gaps between the flooring units. Addressing the root cause involves checking for joist deflection and ensuring the subfloor is flat within 3/16 of an inch over a ten foot radius.
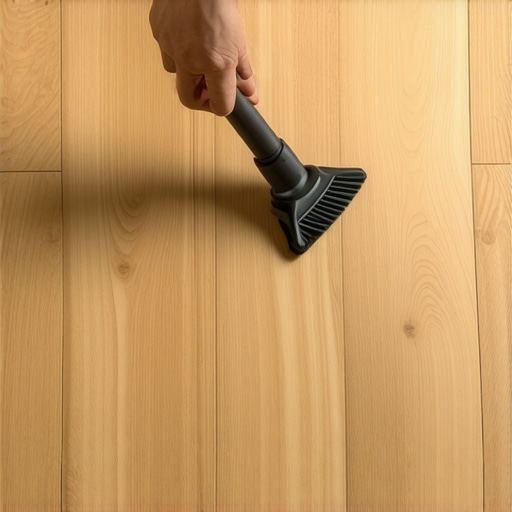
I spent three days grinding concrete on a job last month just so the floor wouldn’t click like a castanet. If your subfloor isn’t flat, the planks will move every time you step on them. This movement creates a bellows effect, sucking dust and hair into the gaps. You can clean those gaps every day, but if the floor is moving, they will just fill back up. It is a losing game. You need to stabilize the environment. Use a humidifier in the winter and a dehumidifier in the summer. Keep the relative humidity between 30 and 50 percent. This keeps the wood stable and the gaps at a minimum. When the gaps are tight, the dirt has no place to hide. It stays on the surface where a simple microfiber mop can pick it up. [image-placeholder] This image shows the precise angle required for a crevice tool to maximize suction within a 2mm floor gap without marring the wood finish.
- Vacuum the floor using a dedicated hard-surface setting to disable the beater bar.
- Use a soft-bristled brush to agitate the dirt inside the gaps.
- Apply a dry, compressed air canister to blow out stubborn particles from deep seams.
- Follow up with a slightly damp, pH-neutral wood cleaner on a microfiber cloth.
- Dry the area immediately with a clean towel to prevent water infiltration.
“A floor is only as good as the subfloor beneath it; deflection is the enemy of every joint.” – Master Flooring Axiom
Do not use vinegar. I will say it again. Do not use vinegar. The acid in vinegar breaks down the molecular bonds of the polyurethane finish. It makes the floor look dull over time. Once that finish is gone, the wood is naked. Naked wood absorbs smells. It absorbs spills. It becomes a breeding ground for bacteria. Use a cleaner specifically formulated for the chemistry of your finish. Whether it is a water-based finish or an oil-based one, the cleaner must be pH neutral. This ensures that the surface tension of the liquid doesn’t allow it to seep into the gaps you just cleaned. We want the cleaner to stay on top, do its job, and evaporate quickly. This is the difference between a floor that lasts ten years and one that lasts a century. Take care of the gaps, and the planks will take care of you.