
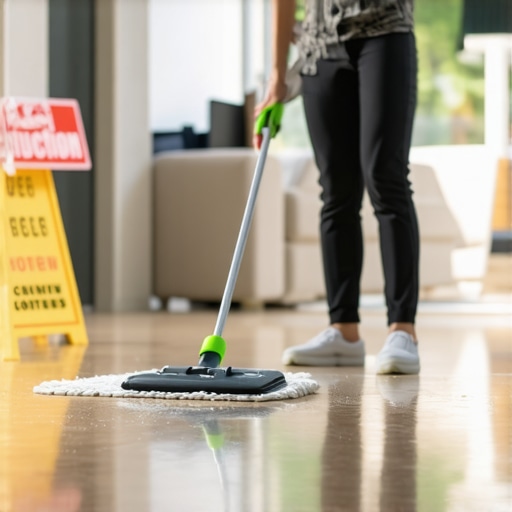
The grit that grinds your investment to dust
Look, I have seen it all. I smell like oak dust and the WD-40 I used to fix my miter saw this morning. You spend twenty thousand dollars on a premium floor and then let a cleaning crew with a dirty plastic bucket and a crusty string mop go to town on it. It makes my blood boil. Most people treat a finished floor like a piece of plastic furniture, but it is a living, breathing structural component. When you finish a renovation, that floor is covered in microscopic daggers. Drywall dust, silica from the grout work in the nearby showers, and tiny shards of ceramic from the laminate cutting station are all waiting to be pressed into your finish. If you do not extract that debris correctly, you are essentially sanding your floor with the weight of your own boots. I once walked into a house where a 15,000 dollar wide-plank walnut floor was cupping so bad it looked like a potato chip because the installer did not check the crawlspace humidity, but even worse, the owner had tried to clean the construction dust with a soaking wet mop. The water seeped into the grain, carrying the fine white dust deep into the pores. It was a total loss. You cannot just wipe this away. You have to understand the physics of the particulate matter before you ever touch a cleaning agent.
Microscopic daggers in the drywall dust
Cleaning hardwood floors after construction requires a HEPA-filtered vacuum extraction method to remove silica dust and drywall particulates without dragging them across the polyurethane finish. You must avoid traditional mopping because water turns fine gypsum dust into a grinding paste that destroys lumber integrity and ruins the aesthetic sheen of the wood. Drywall dust is not like regular house dust. It is composed of gypsum, limestone, and perlite. On the Mohs scale of mineral hardness, these components are relatively soft, but when they are concentrated in a fine powder, they act like a high-grit sandpaper. If you apply downward pressure with a damp cloth, you are performing a mechanical abrasion of the topcoat. This is especially dangerous for site-finished floors that have not had 30 days to fully chemically cure. Even a factory-finished aluminum oxide coating, which is incredibly hard, can be dulled by the sheer volume of construction debris. You have to remove the bulk of the material through lift and suction, not through friction and liquid. When you are dealing with the aftermath of a project that involved showers or tile work, the grout dust is even more dangerous. Grout contains sand. Sand is silica. Silica is harder than your floor finish. If you drag a single grain of silica across a plank of white oak, it will leave a permanent micro-trench that will catch light and look like a smudge for the rest of the floor’s life.
“A floor is only as good as the subfloor beneath it; deflection is the enemy of every joint.” – Master Flooring Axiom
Why your shop vac is failing you
HEPA filtration systems are the only way to effectively manage post-construction cleanup because standard shop vacuums often exhaust the finest silica particles back into the air. This airborne dust eventually settles back onto the hardwood surface, creating a never-ending cycle of contamination that can irritate the respiratory system and ruin finish clarity. Most guys on the job site have a big five-gallon vacuum. They think because it is loud and powerful, it is doing the job. It is not. Standard filters allow particles smaller than 10 microns to pass right through the paper and out the exhaust. You are basically just a localized dust storm at that point. You need a vacuum that is rated for lead paint or asbestos. These units have sealed canisters and multi-stage filtration. When you move the wand across the floor, use a brush attachment with natural horsehair bristles. Synthetic nylon bristles are too stiff and can actually flick the dust into the air before the suction can grab it. You want to move in slow, deliberate lines, overlapping each pass by at least two inches. Do not forget the expansion gaps at the perimeter. Construction dust loves to hide under the baseboards and in those 1/4 inch gaps we leave for seasonal movement. If that dust stays there, it will migrate out every time someone walks near the wall, keeping your floors feeling gritty for months.
The molecular chemistry of construction debris
Chemical reactions between alkaline drywall compounds and acidic wood tannins can cause permanent staining if moisture is introduced during the cleaning process. Understanding the pH balance of your cleaning solution is essential to prevent finish delamination and wood cell collapse in open-grain species like red oak or ash. When drywall mud gets wet, it becomes highly alkaline. Wood is naturally slightly acidic. If you use a standard floor cleaner that has not been pH-neutralized, or heaven forbid you use vinegar and water, you are creating a chemical soup on your floor. Vinegar is an acid. It will eat away at the polyurethane over time, making it soft and susceptible to footprints. You need a professional-grade, pH-neutral cleaner specifically formulated for hardwood. But before that liquid ever touches the floor, you need to use a tack cloth. A tack cloth is a cheesecloth treated with a tacky resin. It picks up the microscopic film that the vacuum missed. This is the stage where most people fail. They vacuum and then go straight to the mop. You have to do the tack-cloth wipe first. If you see white residue on the cloth, the floor is still dirty. If you mop a floor that still has a white film, you are just painting the floor with a thin layer of liquid drywall mud.
“The primary cause of finish failure in post-construction environments is the mechanical abrasion of silica-based particulates underfoot.” – Master Flooring Axiom
The physics of the scratch and the friction coefficient
Static electricity plays a massive role in how construction dust adheres to hardwood planks, making static-charged microfiber a superior tool compared to cotton mops. The surface tension of the topcoat must be respected to avoid swirl marks and hazing during the final polishing phase of the cleanup. When a floor is installed, the friction of the boards being moved creates a static charge. This charge acts like a magnet for the fine dust generated by miter saws and grout mixing. If you use a cotton mop, you are just pushing the dust around because cotton has no inherent charge to hold the particles. Microfiber is engineered with a star-shaped cross-section that traps debris within the fiber itself. Think of it like a thousand tiny fingers grabbing the dust. When you are cleaning, you should never use a circular motion. Always follow the grain of the wood. If you do happen to have a rogue piece of grit under your pad, a scratch that follows the grain is much harder to see than a circular swirl mark. This is the difference between a floor that looks professional and one that looks like it was cleaned by a teenager with a wet rag.
| Flooring Material | Dust Sensitivity | Best Extraction Method | Moisture Tolerance |
|---|---|---|---|
| Solid White Oak | Extreme | HEPA Vacuum and Tack Cloth | Very Low |
| Engineered Walnut | High | Microfiber Static Pad | Moderate |
| High Pressure Laminate | Medium | Damp Microfiber | Low to Moderate |
| LVP (Rigid Core) | Low | Soft Bristle Brush | Minimal Risk |
Extraction over agitation as a core philosophy
Mechanical extraction of debris is the only way to ensure the structural longevity of engineered flooring and solid hardwoods after a major renovation. You must avoid steam cleaners at all costs because the high-pressure vapor forces moisture into the tongue and groove joints, leading to rot and mold growth. I have seen people use steam mops on hardwood and it makes me want to retire. You are basically pressure-washing the edges of your boards. Wood is a bundle of straws. If you force steam into the ends of those straws, the wood swells. When it dries out, it doesn’t always shrink back to its original shape. This leads to what we call “crushing of the cells,” where the edges of the boards stay raised, creating a permanent lippage that will catch your socks. Instead of agitation and heat, use a spray-mist system. You should never have a bucket of water on a hardwood floor. Use a spray bottle to lightly mist a microfiber pad. The pad should be damp to the touch, not dripping. If you see any standing moisture on the wood that does not evaporate within thirty seconds, you are using too much liquid. This is especially true for laminate floors, where the core is often made of high-density fiberboard that will swell like a sponge if moisture hits the seams.
The step by step tactical extraction checklist
- Conduct a perimeter sweep to remove large chunks of debris, wood offcuts, and dropped screws that can gouge the floor if caught in a vacuum head.
- Execute a primary HEPA vacuum pass using a horsehair brush attachment, moving slowly to allow the airflow to lift fine silica from the grain.
- Apply a dry microfiber dust mop to the entire surface to engage the static charge and pull up the secondary layer of fine particulates.
- Perform a tack-cloth test in high-traffic areas to verify that no white gypsum film remains on the surface of the finish.
- Mist a pH-neutral cleaner onto a clean microfiber pad and wipe in the direction of the grain, changing the pad frequently as it becomes soiled.
- Inspect the floor with a high-lumen flashlight held at a low angle to check for any remaining hazing or micro-scratches that require attention.
Why your subfloor dust is rising from the dead
Subfloor contamination often manifests as persistent dust that appears on hardwood surfaces days after the initial cleaning due to vibration and airflow through the floor vents. You must seal your HVAC registers during construction to prevent the ductwork from becoming a reservoir for drywall mud and sawdust. If you didn’t cover your vents during the remodel, you’re in trouble. Every time the furnace kicks on, it is blowing a fresh layer of 10-micron dust onto your clean floors. This is why people get frustrated and think their cleaning isn’t working. You also have to consider the air pressure in the house. If you open a window, the change in pressure can pull dust out from under the baseboards. I always recommend that my clients have their ducts professionally cleaned after any project that involved sanding or drywall. It is the only way to stop the cycle. And don’t forget the closets. People always skip the closets, but as soon as you walk in there to get your shoes, you’re tracking that dust back out onto the main floor. Clean every square inch, or don’t bother cleaning at all.
The final buff and the truth about wax
Polyurethane finishes should never be waxed or polished with oil-based soaps because these products create a sticky residue that traps future construction dust and makes re-coating impossible. If your hardwood floor looks dull after cleaning, it is likely due to micro-abrasions or residual film, not a lack of wax. There is a whole industry of “floor restorers” sold in big-box stores that are basically just watered-down acrylic. They look great for a week, but then they start to peel and smudge. Once you put that junk on your floor, you can never put a fresh coat of professional finish on it again because the new finish won’t bond. If the floor is dull after you’ve cleaned it properly, it means the construction dust already did its damage. At that point, you don’t need a wax; you need a screen and recoat. This involves a professional lightly abrading the top layer of finish and applying a fresh one. It is a one-day job and it makes the floor look brand new. But if you’ve been using oil soaps like Murphy’s, the pro won’t be able to help you without a full sand down to raw wood. Keep it simple. pH-neutral cleaner, microfiber, and a lot of patience. That is the only way to survive a post-construction cleanup without ruining your investment.