
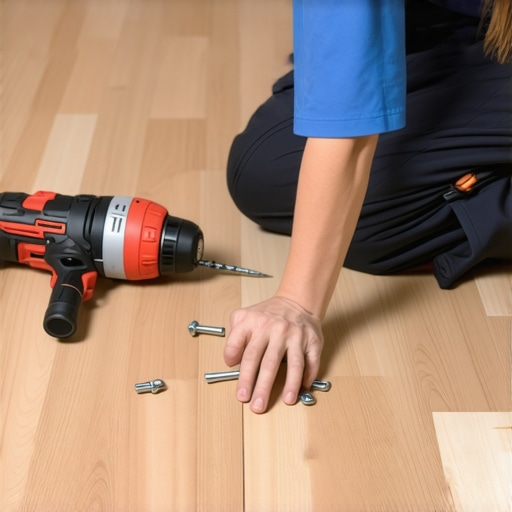
I spent three days grinding concrete on a job last month just so the floor wouldn’t click like a castanet. Most guys skip the leveling compound. They think the underlayment will hide the dip. It won’t. I walked into a house last spring where the homeowner had just laid down five thousand dollars worth of wide plank hickory. Every time they stepped near the kitchen island, it sounded like a door hinge in a horror movie. They didn’t check the subfloor. They didn’t tighten the fasteners. They just covered the problem with expensive wood. Now, that wood is coming up because you cannot fix a squeak from the top down once the floor is locked in. My hands still smell like the WD-40 I used to clean my saw and the oak dust is caked under my nails, but that is the price of doing it right. You have to respect the structure or the finish will fail you every single time.
The ghost in the expansion gap
A squeaky subfloor is the result of mechanical friction between plywood sheets, floor joists, or nails that have lost their withdrawal resistance. To fix this, you must secure the subfloor using construction adhesive or structural screws that pull the wood tight against the joists. This stops the vertical movement that creates the noise. When you hear a squeak, you are hearing the sound of wood rubbing against metal or wood rubbing against wood. It is a sign of a loose connection. In my twenty five years of experience, the primary culprit is almost always the original builder using smooth shank nails. Over time, as the house settles and the seasons change, those nails pull out just a fraction of an inch. That tiny gap is all it takes to turn a floor into a percussion instrument. If you are preparing for hardwood floors, laminate, or even setting up the substrate for grout and tile in showers, you have to address this movement first. A floor is a system, and the subfloor is the foundation of that system. If the foundation moves, the system breaks. It is as simple as that.
“A floor is only as good as the subfloor beneath it; deflection is the enemy of every joint.” – Master Flooring Axiom
The 1/8 inch that ruins everything
The National Wood Flooring Association requires that a subfloor be flat within 1/8 inch over a 6 foot radius or 3/16 inch over a 10 foot span. If your subfloor has a dip or a crown, the hardwood planks will flex over the void, leading to tongue and groove failure. This is not a suggestion, it is a structural requirement. When you have a low spot, the wood planks act like a bridge. Every time you walk over that bridge, the wood bends. Eventually, the friction between the tongue and the groove creates a new squeak that you cannot fix without tearing the floor apart. I see people try to use extra underlayment to fill these holes. That is a mistake. Too much cushion under a floor creates a trampoline effect. It actually causes the locking mechanisms on laminate or LVP to snap under pressure because they were never designed to bend that way. You need a solid, flat surface. This means using a self leveling compound or a high quality floor patch. I prefer the stuff that sets up fast and has a high compressive strength. You want something that will not crumble under the weight of a heavy refrigerator or a stone kitchen island ten years down the road.
| Fastener Type | Withdrawal Strength | Recommended Use | Material Cost |
|---|---|---|---|
| Smooth Shank Nail | Low | Temporary Bracing | Very Low |
| Ring Shank Nail | Medium | General Subflooring | Low |
| Wood Screw | High | Cabinetry | Moderate |
| Structural Subfloor Screw | Very High | Professional Flooring | High |
The physics of fastener withdrawal
Subfloor fasteners fail when the moisture content of the joists changes, causing the wood fibers to shrink away from the nail shank. Using screws with a smooth upper shank allows the screw to pull the subfloor panel tight against the joist without jacking. When you use a screw that is threaded all the way to the head, it can actually hold the plywood away from the joist if it catches the wood early. This creates a permanent gap that will squeak forever. You need screws that are specifically engineered for subfloors. These screws have a special tip that prevents splitting and a head that sinks flush with the wood. I always tell my guys to go every six inches on the edges and every twelve inches in the field. If you are extra paranoid, go every eight inches in the field. It is cheap insurance. Also, you need to look at the chemistry of the bond. Modern polyurethane adhesives are a miracle. They don’t just sit on the wood, they expand into the pores. A bead of subfloor adhesive combined with the right screws makes the subfloor and the joist act as a single, monolithic unit. That is how you get a floor that stays silent for fifty years.
Why your subfloor is lying to you
A visual inspection of a subfloor is never enough because microscopic gaps and sub-surface voids are invisible to the naked eye. You must use a long straightedge and a moisture meter to verify the structural integrity of the plywood or OSB panels before installation. I once worked a job in the humid climate of the Gulf Coast where the subfloor looked perfect. But when I put my moisture meter on it, the plywood was sitting at 14 percent while the hardwood was at 6 percent. If I had laid that floor down, the moisture from the subfloor would have migrated into the hardwood planks. Within a month, the edges of the boards would have started to lift. We call that cupping. It is a nightmare to fix. In dry places like Phoenix, the opposite happens. The wood shrinks and the gaps between the boards open up until you can fit a nickel between them. You have to let the wood acclimate to the specific environment of the house. This means bringing the wood inside, opening the boxes, and letting it sit for at least a week, sometimes two. You have to match the moisture content of the floor to the subfloor within a 2 percent margin for wide plank boards.
Subfloor Preparation Checklist
- Locate all floor joists using a stud finder or the old fashion hammer tap method.
- Drive structural screws into every joist where a squeak is detected.
- Check the entire perimeter for expansion gaps of at least 1/4 inch.
- Sand down any high spots or ridges at the plywood seams.
- Apply a moisture barrier if installing over a crawlspace or concrete.
- Verify the subfloor is clean of all drywall mud, wax, and debris.
“The subfloor must be clean, dry, and flat; skip any one of these and you are inviting a callback.” – NWFA Technical Manual
The chemistry of the modern adhesive bond
When you are dealing with engineered hardwood or laminate, the adhesive chemistry determines the longevity of the installation. Using a moisture-cure urethane adhesive provides a flexible bond that allows for natural expansion and contraction without cracking or losing adhesion. Water-based glues are common in big box stores, but they are dangerous for subfloors. The water in the glue can cause the edges of OSB to swell. That swelling creates a permanent ridge that you will feel through the floor. I prefer the heavy duty, moisture-cure stuff. It is harder to clean off your hands, but it never lets go. It also acts as a secondary moisture vapor retarder. This is essential if you are installing over a concrete slab. Concrete is like a sponge. It might look dry, but it is constantly pulling moisture up from the ground. If you don’t use a proper barrier or a high grade adhesive, that moisture will eventually destroy the glue bond. I have seen entire floors delaminate because the installer used a cheap, water-based adhesive on a damp slab. It is a mistake that costs thousands to fix. You have to think about the molecular level of the bond. You want something that grips the wood fibers and the concrete pores simultaneously.
The regional climate factor
In regions with high humidity like Houston or Miami, the subfloor panels will expand and contract significantly, requiring larger expansion gaps at the perimeter walls. Failure to provide a 1/2 inch gap can lead to buckling where the floor lifts off the subfloor entirely. In the dry heat of the desert, you have to worry about the subfloor drying out too much and becoming brittle. This makes the wood more prone to splitting when you drive screws. In those areas, I always pre-drill my holes near the edges of the panels. It takes longer, but it prevents the wood from failing. If you are in the Pacific Northwest, you deal with constant moisture. You need to make sure your crawlspace has a heavy vapor barrier, at least 6 mil poly, covering every inch of the dirt. If the crawlspace is wet, the subfloor will rot from the bottom up. You won’t even know it’s happening until your foot goes through the floor. It is all about managing the environment. You are not just laying a floor, you are engineering a climate-controlled system.