
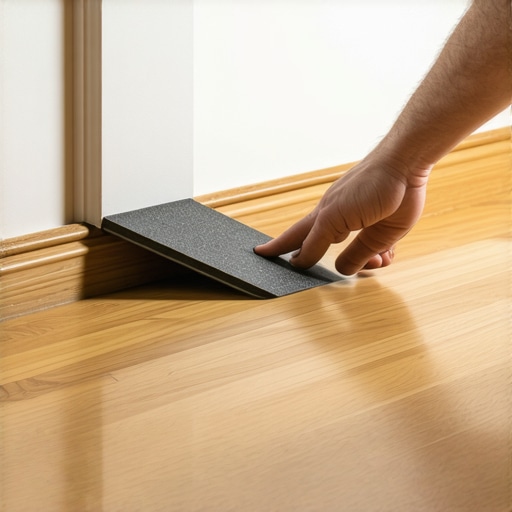
I have spent twenty five years on my knees with a moisture meter and a levels. I have the smell of WD-40 and oak dust permanently stuck in my nostrils. I view a floor as a performance surface, not a piece of decoration. I once walked into a house where a $15,000 wide-plank walnut floor was cupping so bad it looked like a potato chip because the installer did not check the crawlspace humidity. The gaps at the walls were nearly an inch wide because the wood was trying to crawl away from the moisture below. It was a tragedy written in sawdust and wasted money. People think they can just slap down some boards and be done with it. They are wrong. If you do not respect the physics of wood, the wood will disrespect your bank account. Dealing with wide gaps at the perimeter is a common headache, but it is one that requires an engineering mindset rather than just an aesthetic touch.
The structural reality of the perimeter gap
Hardwood floors require a perimeter space of at least 3/4 inch to allow for natural expansion and contraction caused by humidity changes. This gap is not a mistake, it is a mechanical necessity for solid oak or engineered maple installations. Without this space, your floor has nowhere to go when the air gets humid, which leads to buckling and tenting. The wood contains cellulose fibers that swell when they absorb water molecules from the air. This is basic biology. When those cells expand, the entire mass of the floor grows in width. If that floor is jammed tight against a wall, the force of expansion will either crush the wood fibers or lift the floor off the subfloor. I have seen entire sections of flooring rise three inches off the ground because some DIY guy wanted a tight fit at the wall. You need the gap, but you do not want to see it.
“A floor is only as good as the subfloor beneath it; deflection is the enemy of every joint.” – Master Flooring Axiom
Why your subfloor is lying to you
Subfloor levelness and moisture content are the two most common reasons why gaps become uneven or excessively wide over time. A concrete slab or plywood subfloor must be flat within 3/16 of an inch over a 10 foot radius to ensure the hardwood planks sit correctly. If the subfloor dips near the wall, the plank will tilt, making the gap at the top look twice as wide as it actually is. You have to use a 10 foot straightedge. Do not guess. If you find a dip, you fill it with a high compressive strength leveling compound. If you find a hump, you grind it down. I spent three days grinding concrete on a job last month just so the floor would not click like a castanet. It is dirty work, but it is the difference between a floor that lasts a century and one that fails in a year. Moisture is the other ghost in the room. You must use a pin-type meter to check the planks and a calcium chloride test for the concrete. If the subfloor is wet, the wood will move, and those gaps will change every single week.
Baseboard upgrades for wider coverage
Thicker baseboards provide the most effective way to cover a wide expansion gap without sacrificing the structural integrity of the floor. Most builder grade baseboards are only 1/2 inch thick, which leaves very little room for error if your hardwood floor needs a full 3/4 inch gap. By switching to a 3/4 inch or 1 inch thick baseboard, you provide a massive overhang that hides the gap completely while still allowing the wood to breathe. You should look for solid wood profiles rather than MDF if you want longevity. Solid wood can be scribed and sanded to match the contours of a wavy wall. When you install these, you nail them into the wall studs, never into the floor. If you nail the baseboard into the floor, you have essentially locked the floor in place, which defeats the entire purpose of the expansion gap. It is a common mistake that leads to split boards and popped nails.
The hidden power of the backer rod
A foam backer rod is a flexible filler that supports the structural movement of the wood while preventing drafts and debris from filling the expansion gap. You shove this round foam cord into the gap before you apply any decorative trim. It acts as a bridge. If the gap is particularly deep, the backer rod prevents your finish materials from sinking into the abyss. It also provides a secondary moisture barrier at the edges of the room. This is especially important if you are installing floors near showers or kitchens where grout lines might be nearby. You want a material that can compress to 25 percent of its original size and then bounce back. This ensures that as the wood moves through the seasons, the gap remains protected. It is a cheap insurance policy that most installers skip because they are lazy. Do not be lazy.
Quarter rounds and shoe moldings
Quarter round molding is the traditional solution for covering perimeter gaps that are too wide for the baseboard alone. While some minimalists hate the look, a well installed base shoe provides a 1/2 inch of extra coverage that can hide even the messiest laminate or hardwood edges. The key is the profile. A base shoe is taller and thinner than a standard quarter round, which gives it a more refined look. It is flexible enough to follow the undulations of a floor that isn’t perfectly flat. Again, nail this only into the baseboard. I see guys shoot nails straight down into the hardwood all the time. That is a crime. When the floor tries to shrink in the winter, that nail will either bend, snap, or pull the shoe molding away from the wall, leaving an ugly scar on your expensive walnut or oak. You have to allow the floor to slide underneath the trim like a piston in an engine.
Custom scribing for wonky walls
Scribing wood planks involves using a compass or marking tool to transfer the irregularity of a wall directly onto the hardwood board. No wall is perfectly straight. If you are dealing with a 1920s bungalow, the walls are going to look like a mountain range. If you just cut a straight line on your last row of boards, you will have a 1/4 inch gap in one spot and a 1 inch gap in another. By scribing, you cut the board to match the wall’s curve exactly. You then maintain your consistent 1/2 inch or 3/4 inch expansion gap along the entire length. You use a jigsaw with a fine tooth blade to make these cuts. It takes time. It requires patience. But when you are done, the gap is uniform, and your baseboard will cover it perfectly without any daylight showing through. It is the mark of a master installer.
“Wood is a hygroscopic material; it will always reach an equilibrium with its environment, regardless of the installer’s intent.” – NWFA Technical Guide
Regional humidity and wood movement
Relative humidity in places like Houston or Phoenix dictates how you handle floor gaps because of the Equilibrium Moisture Content of the wood. In a swampy environment, your wood is going to arrive at the job site with a high moisture level. If you install it in the summer when the AC is cranking and the air is dry, those boards are at their smallest. When the humidity spikes, they will grow. In a place like Phoenix, the dry heat will shrink your boards until they show a gap in the middle of the room, not just at the walls. You must acclimate the wood to the living conditions of the home for at least 7 to 10 days. I have seen guys dump wood at a site and start nailing the next morning. That is how you end up with gaps so wide you could lose a coin in them. You have to let the lignin and cellulose fibers stabilize before you ever reach for the nailer.
The checklist for a gap free appearance
- Verify subfloor moisture levels with a calibrated meter before starting.
- Ensure the subfloor is flat within 3/16 inch over 10 feet.
- Acclimate flooring for at least 7 days in the room where it will be installed.
- Use a 3/4 inch expansion gap for solid wood installations.
- Install baseboards that are at least 1/4 inch thicker than the expansion gap.
- Use a backer rod for gaps exceeding 1/2 inch to prevent draft and dust.
- Never nail trim or molding into the flooring material.
- Scribe the final row of planks to match the wall profile.
Expansion gap data and specs
| Material Type | Recommended Gap | Coverage Solution | Movement Potential |
|---|---|---|---|
| Solid White Oak | 3/4 Inch | Thick Baseboard | High |
| Engineered Maple | 1/2 Inch | Standard Baseboard | Medium |
| Laminate Flooring | 3/8 Inch | Quarter Round | Low |
| Luxury Vinyl Plank | 1/4 Inch | Base Shoe | Moderate |
Why flexible caulking is a temporary fix
Flexible color matched caulk is often used to fill small gaps between the hardwood and the wall, but it is not a permanent solution for wide openings. Caulk has a limited stretch capacity. If the wood moves more than the caulk can handle, the bead will tear away from either the wood or the wall, creating an even uglier mess of sticky residue. It also attracts pet hair and dust like a magnet. I only use caulk for tiny gaps where the scribe was a hair off. If you are trying to fill a 1/2 inch gap with silicone or acrylic, you are just masking a structural failure. Real pros use wood and trim to solve gap problems, not a tube of goop. You have to think about how the floor will look in five years, not just five minutes after you pack up your tools. The chemistry of the adhesive and the physics of the expansion must work together. If you ignore one, the other will fail you eventually.