
The ghost in the expansion gap
To measure your room for flooring accurately, multiply the length by the width of the floor area and add a waste factor of 5 to 15 percent depending on the material type. Account for closets, doorways, and transitions by measuring each sub-section separately and totaling the square footage before rounding up to the nearest full box.
Most guys skip the leveling compound. They think the underlayment will hide the dip. It won’t. I spent three days grinding concrete on a job last month just so the floor wouldn’t click like a castanet. I walked into that job after a homeowner tried to ‘eyeball’ his square footage. He was short three boxes of wide-plank white oak. By the time the new boxes arrived, the dye lot had changed. The floor looked like a checkerboard. Measuring isn’t just about a tape measure. It is about understanding the physics of the room. You have to account for the way wood moves and the way tile sits. If you don’t respect the subfloor, the subfloor will humiliate you. I have seen fifteen thousand dollar walnut floors cup until they looked like potato chips because the installer didn’t check the crawlspace humidity or the perimeter gaps. This is a structural engineering task disguised as a home improvement project.
The math of the subfloor reality
Calculating square footage requires breaking the room into basic geometric shapes and summing their areas while adding a buffer for cutting errors and structural irregularities. Precise measurements must include the depth of closets and the area beneath door jambs where the flooring will terminate.
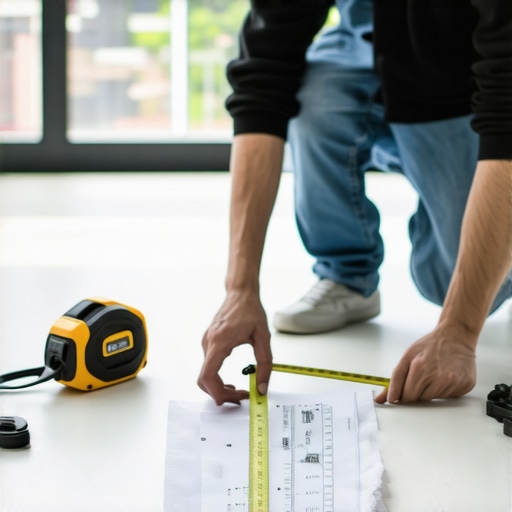
You start by clearing the room. If you measure with furniture in the way, you are guessing. I use a laser measure for the long runs and a fat-blade tape for the alcoves. A room is rarely a perfect square. It is a collection of rectangles and triangles. You measure the longest wall first. Then you measure the width. If there is an L-shape, treat it as two separate boxes. I write everything down on a gridded notepad. Do not trust your memory. The sawdust in your brain will cloud the numbers. Once you have the base area, you have to look at the subfloor. Is it concrete? Is it plywood? The thickness of your material affects the vertical transition. If you are installing hardwood floors, you are dealing with a biological material. It breathes. It expands. If you measure right to the drywall, you are setting yourself up for a buckle. You need a quarter inch gap. That gap is part of your calculation. It is the lungs of the floor.
“A floor is only as good as the subfloor beneath it, deflection is the enemy of every joint.” – Master Flooring Axiom
The 1/8 inch that ruins everything
Floor flatness is measured by checking for deviations greater than 1/8 inch over a 10 foot radius using a straightedge or laser level. Subfloors that exceed this tolerance must be ground down or filled with self-leveling underlayment before any material measurement or installation begins.
I have seen guys try to install laminate over a subfloor that looked like the rolling hills of Kentucky. It does not work. The locking mechanisms are made of high-density fiberboard. They have a specific shear strength. If the floor deflects every time you walk on it, those tabs will snap. You can’t just buy more laminate to fix a bad floor. You have to measure the dip. I use a ten foot box beam level. If I see a gap under that level, I mark it with a wax pencil. If you have a half-inch dip, you need a specific volume of leveling compound. That is a different kind of measurement. You are measuring volume, not just area. For a standard bag of self-leveler, you might get 40 square feet at a quarter inch thick. If you miscalculate that, you end up with a half-finished floor that is drying while you race back to the store. It is a nightmare. The chemistry of the bond depends on a continuous pour. You don’t get a second chance once the hydration process starts.
The physics of the perimeter expansion gap
Expansion gaps are required at every vertical obstruction to allow for the natural expansion and contraction of flooring materials due to changes in relative humidity. Wood floors typically require a 1/2 inch to 3/4 inch gap, while laminate and LVP require 1/4 inch to 3/8 inch.
People think waterproof means indestructible. It doesn’t. Even a waterproof vinyl plank is subject to thermal expansion. If the sun hits a dark floor through a sliding glass door, that floor is going to grow. If you didn’t measure for the gap, the floor hits the wall. Then it has nowhere to go but up. That is how you get peaks. I once saw a floor lift four inches off the subfloor because the installer pinned it under the baseboards. You measure the room, then you subtract the gap area for your ‘net’ floor, but you still buy for the ‘gross’ floor because you need the off-cuts. For hardwood floors, the NWFA specifies acclimation times. You don’t just measure and install. You measure the moisture content of the wood and the subfloor. If the difference is more than 2 percent for wide plank, you wait. You are measuring the invisible water inside the cells of the oak. That is the level of detail required for a floor that lasts a century.
| Material Type | Standard Waste Factor | Herringbone Waste | Diagonal Waste |
|---|---|---|---|
| Hardwood Floors | 10% | 15% | 20% |
| Laminate | 5% | 10% | 15% |
| Ceramic Tile | 10% | 15% | 20% |
| Natural Stone | 15% | 20% | 25% |
Why your subfloor is lying to you
Subfloors often hide structural issues like rot, loose fasteners, or uneven joists that can only be identified through a thorough inspection with a moisture meter and a level. Assuming a subfloor is ready for installation without testing will lead to material failure and voided warranties.
The subfloor is a liar. It looks flat until you put a light across it at an angle. Then you see the shadows. If you are doing showers, the measurement gets even more complex. You aren’t just measuring the floor. You are measuring the pitch. The TCNA has strict rules for this. You need a slope of 1/4 inch per foot toward the drain. If you measure the floor of a shower and buy flat tile without accounting for the envelope cut, you are in trouble. Large format tiles don’t like to bend. You have to cut them into triangles to hit that drain. That increases your waste factor significantly. Grout lines also matter. If you are doing a 1/16 inch joint versus a 1/4 inch joint, your grout volume changes. I have seen guys run out of grout on the last four square feet. It is a specialized color. You can’t just grab a bag of whatever is on the shelf. The pigment won’t match. Measuring for grout is about the depth of the tile and the width of the gap. It is a cubic calculation.
“Deflection of the substrate should not exceed L/360 for ceramic tile or L/720 for natural stone under all concentrated and uniform live loads.” – TCNA Handbook
The geometry of waste factors
Waste factors compensate for the loss of material during the cutting process, especially at the end of rows or around complex architectural features. A higher waste factor is mandatory for intricate patterns like herringbone or when working with lower-grade materials that contain more knots and defects.
If you buy exactly what the tape measure says, you will fail. There is no such thing as a zero-waste job. Every time you hit a wall, you cut a board. Sometimes the left-over piece is too short to start the next row. You throw it away. That is waste. If you are installing hardwood floors, you might find a board with a massive knot or a split end. You cut it out. That is waste. I tell people to buy 10 percent extra for a straight lay. If you want herringbone, you better buy 20 percent extra. You are making twice as many cuts. Every cut is a chance to mess up. I have been doing this for 25 years and I still mis-cut a board occasionally. The difference is I have the extra stock to cover it. The guy who overbuys is a genius. The guy who underbuys is a customer of the rental truck company twice. While most people want the thickest underlayment, too much cushion actually causes the locking mechanisms on LVP to snap under pressure. It creates a trampoline effect. You measure the underlayment to fit the room exactly, but you don’t overlap the seams. If you overlap, you create a hump. A hump is a trip hazard. It is a point of failure.
- Measure each rectangular section separately and add them up.
- Add 10 percent for waste on standard installations.
- Account for closet interiors and the space under appliances.
- Check for subfloor levelness before ordering material.
- Verify the moisture content of the subfloor with a calibrated meter.
- Measure the height of existing baseboards to ensure they cover the expansion gap.
Transition zones and threshold logistics
Transitions between different flooring types require specific T-moldings, reducers, or thresholds that must be measured by linear foot. These components ensure a stable bridge between materials of different heights and allow for independent expansion of each surface.
I hate bulky T-moldings. They look like a speed bump in your house. But if you have a run longer than 30 feet, you usually need one for laminate or LVP. You have to measure the linear footage of every doorway. If you are moving from hardwood floors to tile in a shower, you need a transition that handles the height difference. This is where people get cheap. They try to caulk the gap. Caulk is not a structural transition. It will crack and peel. You need a solid marble or wood threshold. You measure the width of the jamb. You cut it to fit tight. If you don’t, you leave a gap for dust and hair to collect. It is disgusting. A professional floor is about the details at the edges. The middle part is easy. The edges are where the masters are separated from the amateurs. You have to think about the door swings too. If your new floor is higher than the old one, the door won’t close. Now you are measuring the door to cut the bottom off. It is a chain reaction of measurements.
The final walk through
Once the measurements are done and the material is on site, you do one last check. You verify the square footage on the boxes against your notepad. You check the dye lots. You make sure the subfloor hasn’t absorbed moisture from a recent rain. If you skip this, you are gambling with your labor. A floor is a massive investment. It is the only part of your house you touch every single second you are in it. Respect the math. Respect the physics. Do not buy just enough. Buy enough to do it right. The sawdust under my nails is a reminder that precision pays off. If you measure twice, you only have to sweat once. Always round up. Always check your level. And for heaven’s sake, stay away from the discount big-box closeout aisles unless you want a floor that looks like a mistake. Your home deserves better than a cheap click-lock floor that was measured by a guess. Focus on the structural integrity. The aesthetics will follow the engineering.