The chemistry of perfect grout integration
Most guys skip the leveling compound. They think the underlayment will hide the dip. It won’t. I spent three days grinding concrete on a job last month just so the floor wouldn’t click like a castanet. This level of precision is exactly what is required when you decide to mix custom grout colors. You cannot just wing it with a bucket and a stick. Custom grout mixing requires pigment load calculations, distilled water ratios, and polymer-modified cement chemistry to ensure a color-matched tile joint that provides structural integrity and moisture resistance in showers. When you are transitioning from hardwood floors to a tiled entryway, the grout line is the first thing people see. If the color is off, the whole transition looks like a cheap hack job. I have seen guys try to match laminate textures with stock grout from a big-box store. It never works. You need to understand the molecular level of how these materials interact.
The physics of pigment saturation in cementitious binders
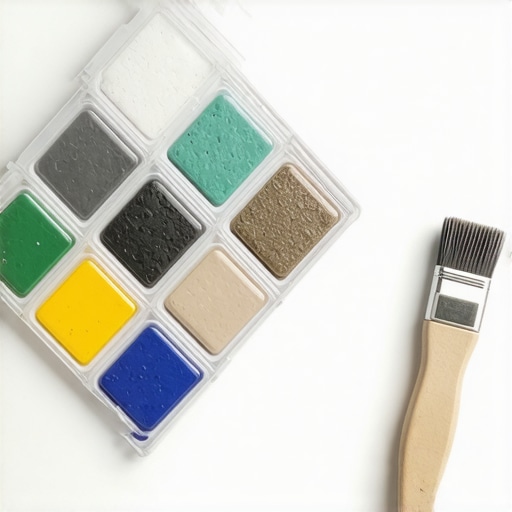
Pigment saturation is the process of adding iron oxide powders or synthetic colorants to Portland cement to achieve a specific hexadecimal color match for ceramic or porcelain tile. This requires a calibrated digital scale and low-speed mixing to prevent air entrapment and efflorescence in the grout joint. The cement particles must be thoroughly coated by the pigment. If you over-saturate the mix, you weaken the bond. If you under-saturate, the color will look washed out once the hydration process is complete. I remember a job where a guy tried to use wood stain to tint his grout. The oil in the stain prevented the cement from curing. The whole floor had to be scraped out. It was a mess that smelled like a chemical plant. You have to use dry, powdered pigments specifically designed for masonry. These pigments are heavy. They want to sink to the bottom of your bucket. You need to keep the mixture in a state of constant suspension during the application phase.
“A floor is only as good as the subfloor beneath it; deflection is the enemy of every joint.” – Master Flooring Axiom
The 1/8 inch that ruins everything
Grout joint width determines the structural stability of the tile assembly and dictates whether you should use sanded grout or unsanded grout for your custom color project. Joints wider than one-eighth of an inch require silica sand to prevent shrinkage cracks and pigment migration during the curing cycle. Most people think they can just use unsanded grout for everything because it looks smoother. That is a lie. Without the sand, the grout will pull away from the tile edges as the water evaporates. This creates a gap where mold can grow. I have seen showers that looked beautiful on day one but turned into a nightmare of black spots by month six because the installer ignored the physical requirements of the gap. You have to respect the geometry. Sand acts as an internal skeleton. It holds the pigment in place so the color stays consistent from the top of the joint to the bottom.
| Factor | Impact on Color | Mitigation Strategy |
|---|---|---|
| Water Ratio | High water lightens color | Use precision measuring cups |
| Mixing Speed | High RPM introduces air | Keep drill under 350 RPM |
| Substrate Porosity | Wicks moisture away | Dampen tile edges |
| Slaking Time | Ensures chemical bond | Wait full 10 minutes |
Why your subfloor is lying to you
Subfloor moisture levels and concrete slab alkalinity directly impact the final color of custom mixed grout by causing calcium carbonate deposits to rise to the surface. This efflorescence ruins the visual match of luxury tile installations and requires acidic cleaning or sealer application to fix. You might think your subfloor is dry. You are probably wrong. I always carry a moisture meter. If that slab is pushing more than three pounds of vapor per thousand square feet, your grout is going to turn white in patches. This is a common failure in basement renovations. The moisture travels up through the thin-set and into the grout. It carries minerals with it. These minerals dry on the surface as a white crust. It does not matter how perfect your custom mix was if the substrate is dumping salt into your joints. You must use a moisture barrier if the readings are high. There is no shortcut. I spent a week once just waiting for a slab to dry because I knew the dark mahogany grout would look like chalk if I rushed it.
- Calibrate your digital scale to 0.1 gram accuracy.
- Always use distilled water to avoid mineral contamination.
- Pre-dampen the tile edges with a sponge.
- Mix only what you can apply in 30 minutes.
- Maintain a consistent slake time for every batch.
The ghost in the expansion gap
Expansion joints are essential structural gaps placed at the perimeter of a room or between different flooring materials like hardwood floors and tile to prevent buckling and grout failure. These gaps should be filled with color-matched 100 percent silicone sealant rather than rigid grout to allow for thermal expansion. If you grout the gap where the tile meets the baseboard, it will crack. I guarantee it. Houses move. They breathe. In the summer, the wood swells. In the winter, it shrinks. If your grout is locked tight against a wall, the pressure has nowhere to go but up. That is how you get tenting. I have seen entire floors pop off the thin-set because the installer forgot to leave a half-inch gap at the walls. You can buy color-matched caulk that matches your custom grout exactly. Use it. It stays flexible. It protects the integrity of the installation. This is especially true in regions like the Pacific Northwest where humidity swings are drastic. The wood will move more than the tile ever will.
“Surface preparation is the essential foundation for all successful ceramic tile installations.” – TCNA Handbook
The hydration curve and chemical bonds
Grout curing is a chemical reaction called hydration where water molecules bind with cement particles to create a crystalline structure that locks pigments into a permanent solid state. To ensure color consistency, the evaporation rate must be controlled through ambient temperature and relative humidity management. If you mix your grout in the blazing sun, the water will evaporate before the chemical bond is complete. You will end up with soft, powdery grout that falls out of the joints. I always tell people to turn off the HVAC while grouting. You do not want a vent blowing dry air directly onto a fresh joint. It creates uneven drying. One side of the room will be three shades lighter than the other. This is the science of the trade. It is about controlling the environment so the chemistry can do its job. After you finish the initial wash, keep the room cool and dark. Let the grout drink the water it has. This results in a hard, vibrant joint that will last for thirty years without fading. The final step is always the sealer. Do not apply it until the grout has fully cured for at least 72 hours. If you seal it too early, you trap moisture inside and invite the ghost of efflorescence back to the party.