
I once walked into a house where a $15,000 wide-plank walnut floor was cupping so bad it looked like a potato chip because the installer didn’t check the crawlspace humidity, and the homeowner had tried to scrub paint splatters off with a steel wool pad. The result was a ruined finish that required a full sand and refinish on a floor that was only three weeks old. My hands still smell like the WD-40 I used to clean my tools this morning, and my knees remember every hour spent on that job. When you see a drop of dried latex paint on your beautiful oak or maple, your first instinct is to grab a scraper and go to war. Stop. You are dealing with a structural surface that depends on a delicate chemical bond between the wood fibers and the polyurethane topcoat. If you compromise that bond, you are opening the door for moisture to penetrate the wood, leading to the kind of structural failure that makes me lose sleep. Removing paint is not about force, it is about chemistry and patience.
The chemical bond between acrylic paint and polyurethane
To remove dried acrylic paint from polyurethane hardwood, you must break the intermolecular bond without penetrating the protective wear layer of the wood finish. Most modern house paints are water-based acrylics that cure by evaporation and cross-linking. Once the water leaves the paint, the resins form a hard plastic film that clings to the microscopic texture of your floor finish. If your floor was finished with an oil-based poly, the paint has a harder time sticking than it does to a water-based poly. This is because oil-based finishes have a higher surface energy and a smoother molecular profile. When you look at your floor under a magnifying glass, you see ridges and valleys. The paint is sitting in those valleys. To get it out, you have to soften the paint resins without softening the floor resins. This is a narrow window of chemical opportunity. If you use a solvent that is too aggressive, you will liquefy the finish along with the paint, leaving a permanent dull spot that no amount of wax can hide.
“A floor is only as good as the subfloor beneath it; deflection is the enemy of every joint.” – Master Flooring Axiom
The mechanical advantage of a plastic edge
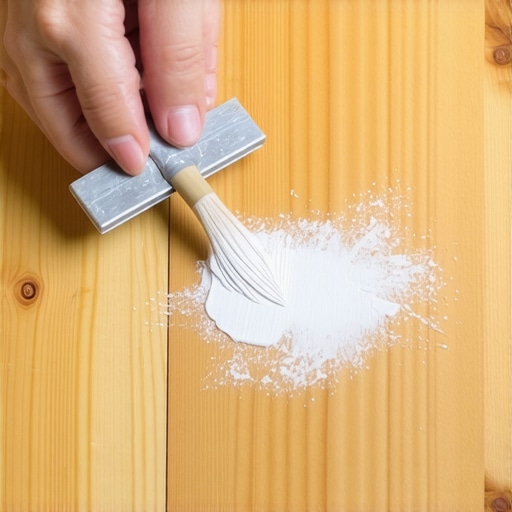
Using a plastic putty knife or a credit card is the safest way to apply mechanical pressure to dried paint splatters on hardwood surfaces without scratching the polyurethane finish. Metal scrapers are the enemy of hardwood. A metal blade has a hardness rating that far exceeds the Janka rating of even the hardest domestic woods like hickory or white oak. When you use metal, you risk creating a microscopic gouge. These gouges are where dirt and moisture collect over time, leading to localized rot or discoloration. I always carry a stiff plastic scraper in my back pocket. The trick is to approach the paint glob at a low angle, roughly 15 degrees. You want to focus the pressure on the base of the paint droplet where it meets the wood. If the paint is old and brittle, it might just pop off. If it was a high-quality paint with a lot of resin content, it will be rubbery. That is when you need to bring in a little heat or a mild solvent to help the plastic edge do its job. I have seen guys try to use a razor blade, but unless you have the steady hand of a surgeon, you are going to nick the grain. One nick is all it takes for moisture to start its work.
Why water is the enemy of wood removal
While water based cleaners are often used for latex paint removal, excessive moisture can cause wood fibers to swell and cup, especially if the finish is compromised. I have spent years telling people that their floors are not waterproof. Even the best-engineered hardwood can only handle so much topical moisture. If you soak a paint spot with a wet rag for an hour, the water will find its way through the expansion gaps at the perimeter or between the tongues and grooves. Once water gets under the finish, it saturates the wood cells. The wood expands, but the finish does not. This is how you get checking and peeling. If you are dealing with a floor in a high-moisture area, like near showers or in a kitchen, you have to be even more careful. The ambient humidity in those rooms is already pushing the wood to its limits. Adding a puddle of water to remove a paint spot is like pouring gasoline on a fire. Always use a damp cloth, never a dripping one. If the paint does not move after five minutes of localized moisture, it is time to move on to a chemical solution that does not rely on H2O.
Solvent chemistry and the search for the right pH
Using isopropyl alcohol or denatured alcohol provides a controlled solvent action that dissolves latex paint resins while remaining relatively neutral toward cured hardwood finishes. Alcohol is a miracle for painters. It breaks the polymers in the paint without being a strong enough solvent to eat through a fully cured polyurethane. However, you have to know what you are standing on. If your floor is an old-school wax finish or a shellac, alcohol will melt it instantly. Most floors installed in the last thirty years use a conversion varnish or a poly. To test your finish, find a hidden spot inside a closet. Dab a tiny bit of alcohol on it. If the finish gets sticky, stop. If it stays hard, you are good to go. I prefer a 70 percent isopropyl solution. It stays wet long enough to work but evaporates fast enough that it won’t soak into the wood grain. I have seen homeowners try to use nail polish remover. That is pure acetone. Acetone will strip a floor to the bare wood in seconds. It is a heartbreak waiting to happen. Stick to the mild stuff and let the chemistry do the heavy lifting.
| Solvent Type | Target Paint | Risk Level for Finish | Recommended Use |
|---|---|---|---|
| Isopropyl Alcohol | Latex/Acrylic | Low | Splatters and drips |
| Mineral Spirits | Oil-Based | Medium | Stubborn residue |
| Commercial Stripper | Multiple Layers | Extreme | Full restoration only |
| Citrus Cleaners | Fresh Latex | Very Low | General cleanup |
The 1/8 inch that ruins everything
When you are scraping paint, a depth of 1/8 inch represents the danger zone where mechanical force can penetrate the finish and damage the natural wood grain. This is about precision. I tell my apprentices that they should be able to feel the difference between the paint and the wood through the scraper. If the paint is thick, you might need to use a heat gun on its lowest setting. I mean low. If you can’t hold your hand in front of the heat, it is too hot for the floor. You want to get the paint to about 120 degrees Fahrenheit. This softens the acrylic polymers. As soon as the paint looks slightly dull or soft, you hit it with the plastic scraper. Do not push down, push across. You are trying to shear the paint off the surface. If you see the wood finish starting to look cloudy, you are applying too much heat or too much pressure. This is where the physics of the floor come into play. A harder wood like Brazilian Cherry can take a bit more abuse than a soft wood like Pine. Know your Janka rating. A floor with a low rating will dent if you even look at it wrong, let alone if you start digging at it with a tool.
Dealing with oil based splatters and grout issues
To remove oil based paint from hardwood floors, you must use mineral spirits which act as a thinning agent for the alkyd resins without dissolving the polyurethane topcoat. Oil paint is a different animal. It doesn’t just sit on top, it tries to become one with the finish. Mineral spirits are the key here. Unlike paint thinner, which is a bit of a gamble, high-quality mineral spirits are refined and predictable. You apply it with a cotton swab specifically to the paint. Don’t let it sit on the wood for more than a minute or two. If you have paint that has dripped onto a transition piece near laminate or grout, you have to be careful. Solvents that are safe for wood can sometimes melt the wear layer on laminate or discolor the grout lines. If you get paint in grout, you are usually looking at a mechanical removal with a stiff brush because the porous nature of grout sucks the paint deep into the cementitious matrix. On hardwood, the finish is your shield. As long as that shield is intact, you can win the fight against any paint drip.
“A floor finish is a sacrificial layer; its job is to be destroyed so the wood doesn’t have to be.” – Master Flooring Axiom
The 10 step paint removal checklist
- Identify the paint type by testing a small area with warm water.
- Clear the area of dust and debris to avoid scratching the finish while working.
- Gently scrape the top of the paint drip with a plastic putty knife.
- Apply a damp, warm cloth to the spot for exactly three minutes.
- Attempt to peel the softened paint with your fingernail or the plastic edge.
- If paint remains, apply 70 percent isopropyl alcohol to a cotton swab.
- Rub the paint spot in a circular motion, staying within the bounds of the drip.
- Wipe away the dissolved paint residue with a clean, dry microfiber cloth.
- Clean the area with a pH-neutral hardwood floor cleaner to remove solvent traces.
- Buff the area with a dry cloth to restore the original luster of the poly finish.
Refining the surface and final inspection
Once the paint is gone, you might notice a ghosting effect where the paint was sitting. This is usually just a change in surface tension or a tiny bit of residue. Do not reach for the sandpaper. Instead, use a high-quality hardwood floor buffing solution. I like to use a clean white rag and a bit of elbow grease. If the finish looks a bit dull, it is because the solvent stripped away some of the surface oils. A good maintenance coat of a specialist floor refresher can bring that shine back. Never use wax on a polyurethane floor. It creates a buildup that makes it impossible to ever recoat the floor in the future without a full sanding. I see this mistake all the time. People think they are helping the wood, but they are actually sealing its fate. A floor needs to breathe, and it needs to be able to accept a new topcoat every ten years or so. Treat your hardwood like the structural engineering marvel it is. It supports your furniture, your family, and your life. A little paint splatter is just a temporary blemish, not a reason to panic and destroy the very thing you are trying to save.