
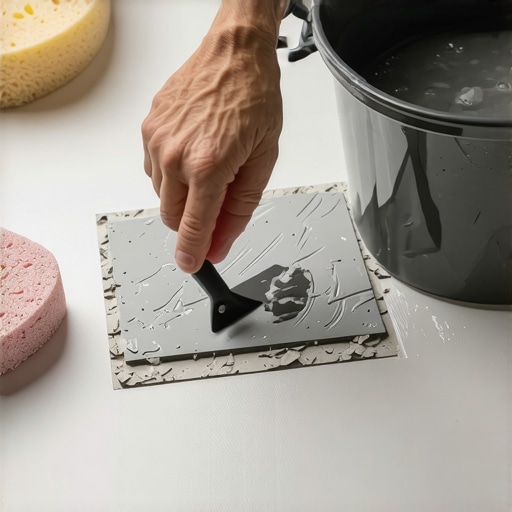
How to Remove Dried Thinset From Tile Without Scratching
I spent three days grinding concrete on a job last month just so the floor wouldn’t click like a castanet. The previous crew had left the subfloor in a state of total neglect, but the bigger crime was the dried thinset they left scattered across a custom porcelain installation. Most guys skip the leveling compound and then get sloppy with their mortar application. They think the underlayment will hide the dip or that the thinset will just pop off later. It won’t. When thinset cures, it forms a mechanical and chemical bond that is designed to last a century. Removing it without ruining the finish of the tile requires an understanding of the physics of adhesion and the hardness scale of your tools. I had to treat those tiles like surgery, carefully breaking the bond of the portland cement without inducing a single hairline scratch on the glaze. If you find yourself staring at gray clumps of mortar on your new floor, you need to put down the metal screwdriver and listen to a pro who has lived this nightmare.
The stubborn nature of portland cement
Removing dried thinset from tile requires breaking the chemical bond of the portland cement without exceeding the Mohs hardness of the tile glaze. Softening the mortar with a mild acid like white vinegar or a professional sulfamic acid solution is the first step. Use plastic or wooden scrapers. Thinset is not just some fancy glue. It is a hydraulic cement mixture that undergoes a chemical reaction called hydration. When water hits that powder, it begins growing calcium silicate hydrate crystals. These crystals interlock with the microscopic pores on the back and face of your tile. By the time it is dried, you are dealing with a rock-like substance. If you try to chip it off while it is dry and brittle, you risk taking a chunk of the tile glaze with it. This is especially true with ceramic tiles which have a softer body than porcelain. You have to rehydrate the surface to weaken the crystalline structure before you even think about applying mechanical force. It is about patience, not power. Most homeowners see a bump and want to hammer it. That is how you end up buying a whole new box of tile and a lot of extra labor.
“A floor is only as good as the subfloor beneath it; deflection is the enemy of every joint.” – Master Flooring Axiom
Why the wrong tool creates permanent scars
Choosing the correct tool for thinset removal depends entirely on the hardness of the tile surface compared to the tool material. A metal putty knife or flathead screwdriver is often harder than the glaze on ceramic tile, leading to permanent scratches and gouges. Use hardwood blocks or plastic scrapers. I have seen guys go at a floor with a cold chisel and a hammer. It makes me sick. On the Mohs scale, many ceramic glazes sit around a five or six. High carbon steel tools are often in the same range or higher. If you drag steel across that glaze, the steel wins every time. You leave behind grey marks or deep scratches that no amount of floor wax will ever hide. I prefer using a piece of oak or maple scrap. Wood is hard enough to put pressure on the thinset but soft enough that it will crush before it scratches the tile. If the thinset is really stubborn, I might use a specialized plastic scraper. You have to understand the molecular reality of the materials you are handling. The goal is to create a shear force that breaks the bond at the interface of the mortar and the glaze without penetrating the glaze itself. It is a game of leverage and angles.
The chemistry of softening hardened mortar
Softening hardened mortar involves using acidic solutions to break down the alkaline calcium carbonate found in portland cement thinset. Warm water mixed with white vinegar creates a mild acetic acid solution that dissolves the surface tension of the dried clumps. Professional sulfamic acid is used for heavy deposits. Many people do not realize that thinset is highly alkaline. When you introduce a mild acid, it starts a localized chemical reaction that begins to dissolve the binder holding the sand and cement together. I tell people to soak a rag in a fifty-fifty mix of warm water and white vinegar and lay it directly over the dried thinset. Let it sit for at least twenty minutes. You want that moisture to penetrate deep into the clump. While most people want the thickest underlayment to fix floor issues, too much cushion actually causes the locking mechanisms on LVP to snap under pressure, and similarly, too much moisture for too long on certain tiles can lead to staining. But for porcelain and ceramic, a good soak is your best friend. Once the thinset starts to look darker and feels slightly mushy on the edges, you have a window of opportunity to strike. Do not let the vinegar dry on the tile, as it can leave a film. Keep it damp and keep it moving. If vinegar doesn’t work, you might need a sulfamic acid crystals mixed with water, but you better wear gloves and keep the room ventilated because that stuff does not play around.
| Tool Material | Mohs Hardness | Safe for Ceramic | Safe for Porcelain |
|---|---|---|---|
| Plastic Scraper | 2.0 | Yes | Yes |
| Hardwood Block | 3.0 | Yes | Yes |
| Copper Penny | 3.5 | Yes | Yes |
| Steel Putty Knife | 5.5 | No | Yes (Caution) |
| Tungsten Carbide | 9.0 | No | No |
Precision scraping techniques for porcelain
Precision scraping techniques for porcelain involve applying consistent pressure at a low angle to shear the mortar from the vitrified surface. Porcelain is denser and harder than ceramic, making it more resistant to scratching, but high impact can still cause chipping. Work from the edges inward. Porcelain is a beast. It is fired at higher temperatures than ceramic, making it nearly waterproof and very hard. This means the thinset does not penetrate as deeply into the surface, but it also means the bond is very tight. I use a technique I call the “nudge and lift.” Once the thinset is softened, I place my wooden block or plastic scraper against the edge of the clump at a thirty degree angle. I give it a sharp, controlled tap with the palm of my hand. You are looking for that satisfying snap when the bond fails. If it does not move, do not force it. Apply more acidic solution and wait another ten minutes. I have spent hours on my knees doing this on high end showers because if you slip with a metal tool, you are looking at a three hundred dollar mistake. The key is to never use the corner of your tool. Always use the flat edge to distribute the pressure. If you use the corner, you create a point of high pressure that can pierce the surface tension of the tile glaze and leave a mark that looks like a pencil line but won’t rub off.
“Proper bond coverage requires the collapse of mortar ridges to ensure no air pockets remain under the tile surface.” – TCNA Handbook Standards
The danger of high speed grinders
High speed grinders pose a significant risk to tile surfaces because of the heat generated and the lack of control over the abrasive depth. Mechanical grinding should only be used on the subfloor or the back of a tile, never on the finished decorative face. Friction burns are permanent. I see these DIY videos where people are using Dremel tools with diamond bits to sand off thinset. That is a recipe for disaster. A diamond bit has a Mohs hardness of ten. It will eat through porcelain like it is butter. Even if you don’t dig into the tile, the heat generated by a tool spinning at twenty thousand RPM can cause the glaze to discolor or crack due to thermal shock. When I am prepping a subfloor, I use a grinder with a dust shroud and a vacuum, but that is for the raw concrete. On the tile itself, you keep the power tools in the truck. The only exception is a specialized oscillating tool with a non-abrasive plastic blade, and even then, I rarely trust it. You lose the tactile feedback that your hands provide. When you are scraping by hand, you can feel the moment the thinset gives way. You can feel the texture of the tile beneath the tool. A machine hides all of those signals until it is too late and you have ground a permanent divot into your floor. Stick to the basics. Use your hands and your head.
- Vacuum the entire area to ensure no loose grit is under your knees or your tools.
- Identify if the tile is ceramic or porcelain to understand its hardness.
- Soak the dried mortar with a warm vinegar solution for twenty minutes.
- Use a hardwood block or plastic scraper at a low angle.
- Gently tap the tool to shear the bond rather than prying upward.
- Clean the residue with a non-abrasive nylon scrub pad.
- Rinse the tile thoroughly with clean water to remove any acidic traces.
Protecting the integrity of your grout lines
Protecting the integrity of your grout lines during thinset removal is essential to prevent moisture infiltration and maintain the structural stability of the floor. Excessive scraping or the use of harsh chemicals can erode the grout joints surrounding the tile. Work away from the joints. If you are removing thinset near an existing grout line, you have to be twice as careful. Grout is porous and much softer than the tile. If you are sloppy with your scraper, you will gouge the grout, creating a low spot that collects dirt and water. I always scrape away from the grout joint, never toward it. If thinset has dried inside the grout joint where it doesn’t belong, you have a different problem. You need to use a manual grout saw very carefully to rake out the excess mortar before it fully cures. If it is already rock hard, you are in for a long day. Most people focus so much on the tile that they forget the grout is the weakest link in the system. If you compromise the grout, you are inviting moisture to get under the tile and rot the subfloor. This is why I preach about cleanliness during the install. A damp sponge used every ten minutes saves you ten hours of scraping later. If you have to use a chemical cleaner, make sure it is pH neutral if it is going to touch the grout for any extended period. Acids will eat cementitious grout just as fast as they eat thinset.
The physics of mechanical bond failure
The physics of mechanical bond failure relies on the difference in elasticity between the rigid thinset and the slightly more flexible tile surface. Applying a localized shock to the thinset clump causes it to separate from the non-porous glaze. Understanding this allows for clean removal without surface damage. Everything has a bit of flex, even if it feels like stone. When you hit a clump of thinset with a wood block, you are sending a vibration through the mortar. Because the thinset is a different density and has a different modulus of elasticity than the tile, the two materials react differently to that shock. This creates a shear stress at the interface. If the surface of the tile is smooth and glazed, there aren’t many mechanical anchors for the thinset to hold onto. This is why it is much easier to clean glazed ceramic than it is to clean unglazed natural stone. If you are dealing with a textured or “wood-look” tile, the thinset will be trapped in the valleys of the texture. In that case, you need a stiff nylon brush and a lot of vinegar. You have to scrub in circular motions to break those tiny mechanical fingers loose. It is tedious work. It is the kind of work that makes you realize why pros charge what they do. We aren’t just slapping mud on the floor. We are managing a complex chemical and physical assembly that has to withstand thousands of pounds of pressure and decades of foot traffic.