How to Spot High-Quality AC4 Laminate Floors and Avoid Cheap Imitations
I spent three days grinding concrete on a job last month just so the floor would not click like a castanet. Most guys skip the leveling compound. They think the underlayment will hide the dip. It will not. I have seen homeowners spend five dollars a square foot on material only to have it sound like a hollow drum because the slab was a messy sea of waves. You can buy the most expensive AC4 boards in the world, but if your subfloor is not flat to within 3/16 of an inch over a 10-foot radius, you are burning money. I have been on my knees with a moisture meter for twenty-five years, and I can tell you that the difference between a high-quality laminate and a big-box discount special is not always visible from the top. It is in the chemistry of the core and the physics of the locking joint. People walk into a showroom and touch the texture, thinking that tells them something about durability. It does not. Texture is just a press plate. The real guts of the floor live in the density of the fiberboard and the aluminum oxide content in the wear layer.
The truth about AC4 wear layer ratings
AC4 laminate flooring is specifically engineered to withstand light commercial traffic and high-traffic residential areas like hallways or kitchens. To earn this rating, the wear layer must survive at least 4,000 cycles of the Taber Abrasion Test using S-42 sandpaper. When you look at a board, you are looking for a high concentration of aluminum oxide (Al2O3) particles suspended in a melamine resin. Cheap knockoffs use a thin spray-on coating that wears through in eighteen months. You want a floor where the aluminum oxide is integrated throughout the resin bath. This creates a microscopic shield that is nearly as hard as a diamond. If you try to scratch a genuine AC4 board with a car key, it should leave a white mark that wipes off with your thumb. If the scratch stays, that is not an AC4 floor. It is a paper-thin lie disguised as a durable surface. High-quality boards also feature a balanced backing layer that provides dimensional stability to prevent the board from bowing when the humidity changes. This is a common failure point in budget materials where the manufacturer saves money by using a lower-grade resin on the underside. When that backing fails, the floor starts to cup, and no amount of weight will flatten it back out. You are stuck with a floor that feels like walking on a bag of potato chips.
“A floor is only as good as the subfloor beneath it; deflection is the enemy of every joint.” – Master Flooring Axiom
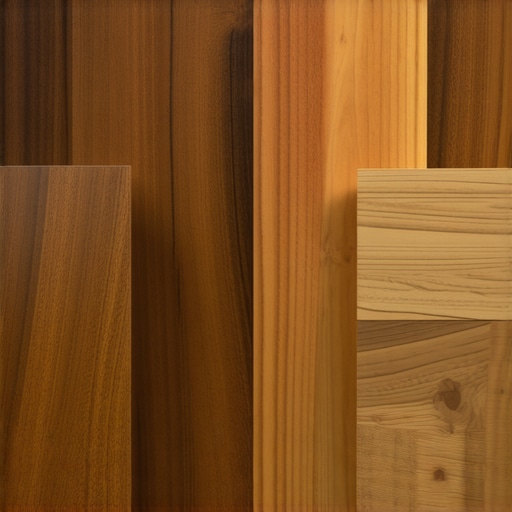
The density of the high-density fiberboard core
High-density fiberboard or HDF core material is the structural heart of any quality laminate floor and must maintain a density rating of at least 850 kilograms per cubic meter. Most people do not realize that the core is not just wood dust. It is a complex matrix of refined wood fibers and phenolic resins compressed under extreme heat and pressure. A cheap core is porous. It absorbs moisture from the air like a sponge. If you live in a place with high humidity, a low-density core will swell at the edges, causing the decorative paper to peel. I always check the weight of a sample. A heavy board usually indicates a denser core with less air and more resin. This density is vital because the locking mechanism is milled directly into this material. If the core is soft, the tongue and groove will snap under the pressure of a heavy sofa or even just the weight of a person walking across a slightly uneven spot. Unlike hardwood floors which can be sanded, laminate is a one-shot deal. Once that joint snaps, there is no fixing it. You are ripping up the whole room. In my experience, the premium brands use a hydrophobic wax injection on the edges of the HDF. This wax seals the pores and prevents the capillary action that pulls water into the joint. If you see a raw, dry-looking tongue, that floor is going to fail the first time someone spills a glass of water.
The 1/8 inch that ruins everything
Subfloor flatness and moisture vapor transmission rates are the two technical hurdles that most DIY installers fail to clear before laying laminate planks. You might think a small dip in the plywood is fine, but that 1/8 inch gap allows the board to flex every time it is stepped on. This vertical deflection puts immense stress on the click-lock system. Over a few months, the friction generates heat and micro-abrasions, eventually shearing off the locking lip. This leads to gapping where the boards separate. People ask me if they can put laminate in showers or wet rooms. The answer is a hard no. While the surface is waterproof, the grout lines of a tile floor are replaced by mechanical joints in laminate. Those joints are not vapor-proof. If you want a floor that can handle a flood, you buy tile. If you want the look of wood, you accept that laminate needs a dry environment. I always test the calcium chloride levels of a slab before I even think about opening a box of flooring. If the slab is pumping out more than three pounds of moisture per thousand square feet, you need a 6-mil poly film barrier at the very least. Without it, that expensive AC4 floor will be ruined by osmotic pressure within a year. It is a slow death that starts at the bottom and works its way up to the surface. [IMAGE_PLACEHOLDER]
Why your subfloor is lying to you
Self-leveling underlayment and patching compounds are necessary tools for correcting concrete slab irregularities before the flooring installation begins. I have walked onto jobs where the previous guy told the homeowner that a thick underlayment would fill the holes. That is a lie told by people who want to go home early. A thick, squishy underlayment is actually the worst thing you can put under an AC4 laminate. It creates too much cushion. When you walk, the floor sinks into the foam, and the locking joints are forced to bend. Most manufacturers specify a maximum underlayment thickness of 3mm. Anything more than that and you are voiding your warranty. High-quality laminate often comes with a pre-attached pad made of cross-linked polyethylene. This is a superior option because it is factory-applied and ensures the correct density for sound dampening and compression resistance. If you are buying a separate underlayment, look for something with a high Sound Transmission Class (STC) rating, but keep the thickness minimal. You want the floor to feel solid underfoot, not like a trampoline. The goal is a surface that mimics the rigidity of site-finished oak without the maintenance. I have seen cheap foam underlayments disintegrate into dust after five years, leaving the floor feeling hollow and loud. Use a high-density rubber or felt if you want it to last twenty years.
| Feature | Low-Quality Knockoff | High-Quality AC4 Laminate |
|---|---|---|
| Core Density | < 750 kg/m3 | > 850 kg/m3 |
| Edge Treatment | Unprotected HDF | Paraffin Wax or Hydrophobic Coating |
| Wear Layer | Melamine Spray | Aluminum Oxide Infusion |
| Locking Style | Simple Angle-Angle | Drop-Lock with Tensioned Tongue |
| VOC Emissions | Often High (Formaldehyde) | CARB Phase 2 or FloorScore Certified |
The ghost in the expansion gap
Perimeter expansion gaps must be maintained at a minimum of 3/8 of an inch around all vertical obstructions to allow for natural movement. Laminate is a floating floor. It is not attached to the subfloor. It is a giant wood-based raft that grows and shrinks as the seasons change. If you push the boards tight against the baseboards, the floor has nowhere to go when the humidity rises. It will buckle in the middle of the room, creating a hump that looks like a mole is tunneling under your house. I see this mistake on almost every DIY job. People think it looks better to have a tight fit. It is a fatal error. You have to leave that gap and hide it with quarter round or shoe molding. This is why acclimation is so vital. You cannot bring the boards from a freezing warehouse into a warm house and start clicking them together. They need at least 48 hours to reach equilibrium moisture content. If you skip this, the floor will expand after it is installed, and you will be calling me to come out and trim the edges of the boards while they are already on the floor. That is a tedious, expensive job that could have been avoided with a little patience. I tell my clients that a floor is alive. It breathes. If you choke it at the walls, it will fight back.
“Wood based flooring expands and contracts with changes in relative humidity, making perimeter gaps a non-negotiable structural requirement.” – NWFA Field Manual
The chemistry of edge swelling
Surface tension and capillary action are the primary forces that lead to edge peaking in laminate installations. When a manufacturer uses a cheap, porous core, any moisture that sits on the joint is pulled deep into the fiberboard. This causes the wood fibers to expand vertically. Once they expand, they do not always shrink back to their original size. This creates a raised edge at every seam. You can feel it when you walk barefoot. It feels sharp. A high-quality AC4 floor uses vacuum-sealed edges and high-pressure lamination to ensure the decorative layer is fused so tightly to the core that moisture cannot find a way in. Some of the best boards on the market now feature a beveled edge that is painted with a water-resistant lacquer. This not only looks more like a hardwood floor but also provides an extra layer of protection. When you are shopping, look for boards where the pattern wraps over the edge of the bevel. This is a sign of a Direct Pressure Laminate (DPL) process that is superior to the old glued-on edges. It is much harder to manufacture, which is why the cheap stuff always has square edges or poorly painted v-grooves. If you see a square edge, be careful. Any minor swelling will be immediately visible and will eventually lead to the wear layer chipping off at the corners.
Checklist for a professional installation
- Verify the subfloor is flat to 3/16 inch over 10 feet.
- Check concrete moisture levels using an RH probe or calcium chloride test.
- Ensure a 6-mil polyethylene vapor barrier is used over all concrete slabs.
- Acclimate the flooring in the room of installation for at least 48 hours.
- Maintain a 3/8 inch expansion gap around the entire perimeter.
- Use a tapping block and pull bar to avoid damaging the locking mechanisms.
- Inspect every plank for damage or manufacturing defects before clicking it in.
- Clean the subfloor thoroughly; a single pebble will be felt through the floor.
The locking mechanisms that actually stay locked
Uniclic and Valinge are the two gold standards for laminate locking technology, and any floor using these systems has paid a licensing fee for the engineering precision. These systems use a pretensioned joint that actually pulls the boards together. In a cheap knockoff, the tongue just sits in the groove. There is no tension. Over time, the regular movement of people walking across the floor causes the joints to vibrate and slowly pull apart. This is how you get those annoying gaps in the middle of the room. A high-quality joint requires a specific amount of force to engage. When I am installing a premium AC4 floor, I can feel the mechanical lock snap into place. It is a solid, reassuring click. The physics of these joints are fascinating. They are designed so that the more downward pressure you apply, the tighter the horizontal grip becomes. This is why you should never use glue on a floating floor unless the manufacturer specifically calls for it in a wet area. The floor needs to be able to shift as a single unit. If you glue one part of it, you create a fixed point, and the rest of the floor will tear itself apart as it tries to move around that point. It is a structural engineering challenge that most people treat like a puzzle. Respect the engineering, buy a quality board with a licensed locking system, and your floor will look the same in ten years as it does the day I finish the transition strips.