
The ghost in the expansion gap
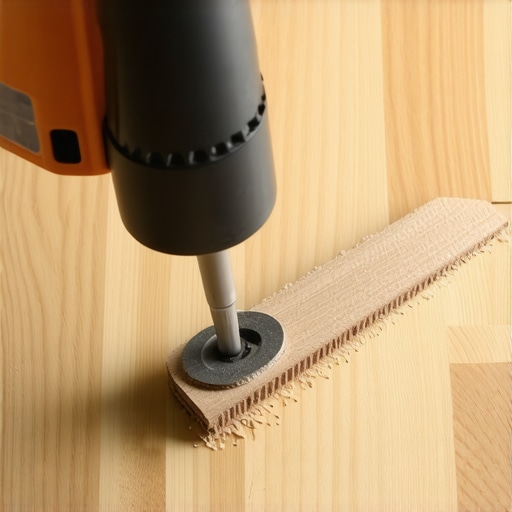
Hardwood floor repair requires a deep understanding of wood hygroscopy and structural integrity to prevent future buckling or gaps. When a tongue or groove fails, the mechanical lock of the floor is compromised. This failure often stems from improper acclimation or subfloor deflection that puts undue stress on the narrow wood fibers. I once walked into a house where a $15,000 wide-plank walnut floor was cupping so bad it looked like a potato chip because the installer didn’t check the crawlspace humidity. The homeowner thought they could just sand it flat, but the issue was the subfloor moisture pushing through the boards. The tongues were literally snapping under the pressure of the expansion. Fixing this requires a surgical approach with a router, not a hammer and a prayer. We are looking at the molecular level of the wood, where the cellulose and lignin respond to the relative humidity of the room. If you do not respect the physics of the wood grain, your repair will fail within a single seasonal cycle. You smell the toasted oak and the metallic tang of a carbide bit when you do this right. It is a precise operation that demands a steady hand and a sharp eye for the 1/8 inch margin of error.
“A floor is only as good as the subfloor beneath it; deflection is the enemy of every joint.” – Master Flooring Axiom
Why your subfloor is lying to you
Subfloor flatness is the most critical variable when using a router to fix damaged hardwood or laminate planks. If the plywood or OSB has even a 3/16 inch dip over ten feet, the router base will tilt, and your new groove will be crooked. Most guys skip the leveling compound. They think the underlayment will hide the dip. It won’t. I spent three days grinding concrete on a job last month just so the floor wouldn’t click like a castanet. When you are routing a new groove into a fixed board, the tool must stay perfectly perpendicular to the floor face. Any deviation means the replacement board will sit proud or sunken, creating a trip hazard and an eyesore. This is why we use a moisture meter before we even pull the router out of the van. If the subfloor has a moisture content higher than 12 percent, or if the delta between the subfloor and the hardwood is more than 4 percent, you are wasting your time. The wood is a living material. It breathes. It moves. If the subfloor is wet, the wood will swell and blow out the very groove you just spent an hour precision-cutting.
The 1/8 inch that ruins everything
Router bit depth and fence alignment are the two primary factors that determine whether a hardwood tongue and groove repair succeeds or fails. You must use a slot-cutting bit with a ball-bearing guide to ensure the depth is consistent across the entire length of the board. A standard 3/4 inch solid oak board typically has a tongue that is 1/4 inch thick, centered in the middle of the board. However, older mills used different standards, and sometimes you will find off-center tongues that require custom bit heights. If your groove is even 1/32 of an inch too high, the replacement plank will catch every sock that walks over it. If it is too low, the structural bond is weakened and the board will eventually crack under the weight of a heavy furniture leg. This is not like working with grout in showers where you can smear some paste to hide a mistake. Wood is unforgiving. You get one shot to cut that groove. Use a scrap piece of the same flooring to test your depth. If the test piece doesn’t slide in like a glove, adjust the router. It should feel firm but not tight. A tight fit prevents the wood from expanding when the humidity hits 70 percent in August.
Physics of the carbide edge
Rotational speed and feed rate of the router bit must be calibrated to the Janka hardness of the wood species being repaired. A dense wood like Brazilian Cherry or Hickory requires a slower feed rate to prevent burning the wood fibers. Burning creates a carbonized layer that prevents wood glue or construction adhesive from penetrating the pores, which results in a weak bond. For softer woods like Pine or even some White Oak, a higher RPM is necessary to prevent the wood from splintering or tearing. When the carbide edge hits the wood, it is performing a series of micro-impacts. If the bit is dull, it will crush the cells instead of slicing them. This creates a fuzzy groove that will make the replacement board sit unevenly. I always use a fresh bit for repair work. The cost of a $30 bit is nothing compared to the cost of pulling up three rows of hardwood because a groove was botched. You have to listen to the motor. If it bogs down, you are pushing too hard. If it screams, your bit is likely dull or your speed is too high for the density of the material.
| Tool Type | Precision Level | Dust Production | Material Compatibility |
|---|---|---|---|
| Fixed Base Router | High | Moderate | Solid Hardwood, Engineered Wood |
| Plunge Router | Very High | Moderate | Deep Pocket Routing, Inlays |
| Oscillating Multi-tool | Low | Low | Rough Cuts, Corner Clearing |
| Chisel and Mallet | Manual | Minimal | Fine Detail, Corner Cleanup |
Chemistry of the structural bond
Adhesive selection for a hardwood floor repair depends on the moisture barrier and the subfloor type. While the router creates the mechanical space for the new joint, the chemical bond is what keeps the floor from squeaking. For a tongue and groove repair, a high-quality PVA (polyvinyl acetate) glue is standard for the joints, but if you are glueing a board directly to a concrete slab, you need a moisture-cured urethane. These urethanes are designed to stay flexible. Wood moves. If you use a rigid adhesive, the bond will snap when the floor expands. The chemistry of these adhesives is complex. They react with the moisture in the air to cure. In a dry climate like Phoenix, you might actually need to lightly mist the subfloor to get the glue to kick. In a swampy place like Houston, the glue might set faster than you can work. While most people want the thickest underlayment, too much cushion actually causes the locking mechanisms on LVP or the tongues on hardwood to snap under pressure. You want a firm, high-density pad that limits the vertical movement of the joint while still providing a thermal break.
Moisture levels and cellular expansion
Environmental controls are the most overlooked aspect of hardwood flooring maintenance and repair. Wood is a hygroscopic material, meaning it absorbs and releases water to reach equilibrium with its surroundings. If you route a new groove in a board that is at 10 percent moisture and then the room drops to 5 percent moisture in the winter, that groove will shrink. This can cause the replacement board to lose its grip and start to rattle. You need to verify the equilibrium moisture content (EMC) before you start. The NWFA provides charts that correlate temperature and humidity to the ideal moisture level of the wood. If your home is 70 degrees Fahrenheit and 35 percent humidity, your wood should be at 6.9 percent. If it is significantly higher, you need to run a dehumidifier for a week before you touch your router. This is especially true near showers or kitchens where localized humidity spikes can occur. I have seen entire floors fail because a small leak in a bathroom caused the adjacent hardwood to swell, snapping the tongues off three rows of planks. The repair isn’t just about the wood; it is about the air around it.
“Wood moves in three directions, but it is the width that will break your heart if you don’t leave a gap.” – The Floor Layer’s Handbook
The checklist for surgical flooring repair
- Verify moisture content of both the existing floor and the replacement planks using a pin-type meter.
- Set the router bit depth using a digital caliper to match the existing tongue height exactly.
- Clean the subfloor of all old adhesive, staples, and debris to ensure a flat working surface.
- Dry-fit the replacement board to check for flushness and gap tolerances before applying glue.
- Apply a bead of wood glue to the bottom of the groove, avoiding the top edge to prevent squeeze-out.
- Weight the board down for at least four hours using sandbags or heavy toolboxes to ensure a tight bond.
Regional humidity and the wood movement factor
Climate adaptation is a requirement for any floor installer who wants their work to last. In the Pacific Northwest, we deal with constant dampness. You have to leave larger expansion gaps at the perimeter because that wood is going to grow. If you don’t, the floor will lift off the subfloor. In the Southwest, the challenge is the opposite. The air is so dry the wood will shrink until the tongues pull out of the grooves. When you are using a router for a repair in a dry climate, you might actually cut your groove slightly deeper to account for the plank narrowing over time. This prevents the joint from opening up and showing the subfloor beneath. Every region has its quirks. In the Midwest, you get both extremes. You install it in the humid summer and by winter the homeowner is calling because they can see the tongues. You have to explain to them that wood is a natural product. It is not plastic. Even a laminate floor, which has a high-density fiberboard core, will expand and contract with the seasons. The router is the tool that allows us to interface with these natural forces, but the brain is what tells the router where to cut. We are not just fixing a floor. We are managing a structural system that is constantly in motion. If you respect the wood, the wood will respect you. If you try to force it, the wood will always win in the end. It will buckle. It will crack. It will remind you that you are not the master, only the technician. Take your time. Measure three times. Cut once. And always keep your bits sharp.