
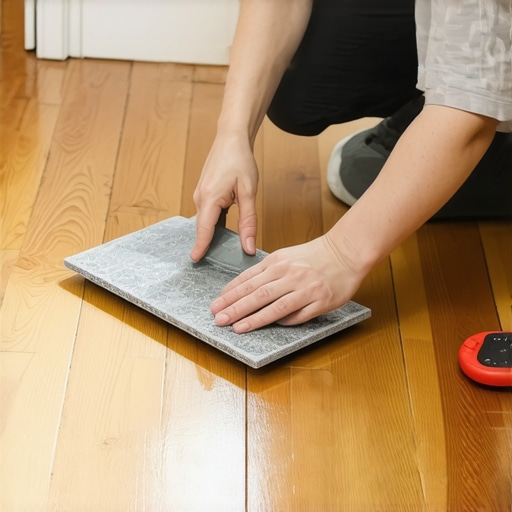
How we Rescued a Water-Stained Hardwood Floor with Fine Steel Wool and Wax
I once walked into a house where a $15,000 wide-plank walnut floor was cupping so bad it looked like a potato chip because the installer didn’t check the crawlspace humidity. The homeowner was in tears, thinking the entire investment was a total loss. That job taught me that moisture is a patient killer, but it is also a predictable one. My hands have been stained with more wood dyes and floor waxes than I can count, and my knees carry the permanent ache of a thousand installations. When you spend twenty-five years on your knees with a moisture meter, you stop seeing a floor as a design choice. You see it as a structural engineering challenge involving cellular respiration and atmospheric pressure. This specific rescue involves a white ring on a beautiful oak surface, the kind of mark that sends homeowners into a panic. They think they need a full sand and finish, but often, they just need to understand the chemistry of their topcoat. My shop smells like a mix of WD-40, mineral spirits, and oak dust, and that is the smell of a problem being solved. We do not do aesthetics here without addressing the physics of the subfloor first.
The chemistry of a white ring
White rings on hardwood floors signify moisture trapped within the wax or polyurethane finish layer. This phenomenon occurs when water sits long enough to penetrate the surface but not the wood grain itself. Heat or chemical intervention is required to release the vapor and restore the original clarity of the protective coating. When a cold glass sits on a table, the condensation migrates into the microscopic pores of the finish. It creates a pocket of vapor that reflects light differently than the surrounding solid material. This is what you see as white. It is not a stain in the wood, it is an optical disruption in the film. If the stain were black, we would be talking about a far more serious issue involving the tannins in the wood reacting with liquid water. Black stains mean the moisture has reached the cellular level of the oak. White stains are a surface level battle. To fix this, we have to open the finish just enough to let the moisture escape without stripping the floor down to the bare timber. This requires a precise understanding of the abrasive hierarchy. Most people reach for a rag and some spray, but that does not do anything for the water trapped under the surface. You have to mechanically agitate the finish to create an escape route for the vapor.
“A floor is only as good as the subfloor beneath it; deflection is the enemy of every joint.” – Master Flooring Axiom
The abrasive truth about steel wool
Steel wool grade 0000 is a specialized abrasive consisting of extremely fine metallic filaments. In flooring restoration, it is used to mechanically remove surface oxidation and trapped moisture from a finish. Its delicate nature ensures that only the top layer of the finish is disturbed, leaving the wood grain intact. You cannot just use any steel wool you find in the kitchen. Grade 0000 is the only option here. It is made by drawing low-carbon steel wire through a series of increasingly smaller toothed dies. The filaments are about 25 microns thick. When you rub this over a white ring, you are essentially performing microscopic surgery. You are shaving off the very top layer of the finish that has become clouded by water. You have to work in the direction of the grain. If you go across the grain, you create tiny scratches that will catch the light and look like a hazy mess. I have seen guys try to use sandpaper for this, and they always regret it. Sandpaper is too aggressive. It cuts through the finish and hits the wood, creating a spot that will never take a stain the same way as the rest of the floor. Steel wool is different because it is flexible. It follows the natural contours of the wood fibers rather than flattening them. This is essential when working with hardwood floors that have any kind of natural texture or character. You are looking for the moment the white haze starts to dissipate, which tells you the moisture has been released.
Why your subfloor is lying to you
Subfloors often hide moisture issues that manifest as surface stains or finish failures. A concrete slab may look dry on the surface while holding a high relative humidity that pushes vapor upward through the floorboards. Proper testing with a calcium chloride kit or an in-situ probe is the only way to verify subfloor health. Most guys skip the leveling compound. They think the underlayment will hide the dip. It won’t. I spent three days grinding concrete on a job last month just so the floor wouldn’t click like a castanet. If your subfloor has a high moisture vapor transmission rate, no amount of steel wool will save your finish. The water will just keep coming up from the bottom. This is why I always carry a pinless moisture meter. It uses electromagnetic signals to check the moisture content deep within the wood without poking holes in it. If the wood is at 12 percent and the subfloor is at 20 percent, you have a recipe for a disaster. This is why we see so many failures in basement installations where people try to put solid hardwood over concrete. In those environments, you are better off with an engineered core or even a high-end laminate, though laminate has its own set of problems. Laminate cannot be repaired with steel wool. If you scratch the wear layer of a laminate plank, it is dead. You cannot buff out a mark on a photograph of wood that is protected by a melamine resin. Hardwood is a living thing, and that is why we can heal it.
A chemical dance with carnauba wax
Carnauba wax is a natural polymer derived from the leaves of the Copernicia prunifera palm and is used to provide a hard, heat-resistant seal on wood. When applied after a steel wool treatment, it fills the microscopic voids and restores the refractive index of the floor finish. After the steel wool has done its job, the area will look a bit dull. This is because you have increased the surface area of the finish, causing light to scatter. To fix this, we use a high-quality paste wax. I prefer carnauba because it has a higher melting point than beeswax and creates a much tougher film. You apply it thin. Real thin. If you put it on thick, it stays soft and attracts every bit of dust in the house. You want to work it into the grain and then buff it out until it is hard. This creates a barrier that is actually more water-resistant than the original polyurethane in many cases. It is the same logic we use when dealing with grout in showers, though the materials are different. In a shower, you use a silicone-based sealer to fill the pores of the grout. On a floor, you use wax to fill the pores of the wood finish. It is all about surface tension. If the surface tension is high, water will bead up and sit on top rather than soaking in. This is the goal of every floor installer.
| Steel Wool Grade | Fiber Thickness | Primary Use in Flooring |
|---|---|---|
| 0000 (Super Fine) | 0.025 mm | Buffing out water marks and polishing wax |
| 00 (Fine) | 0.040 mm | Removing heavy grime from old finishes |
| 1 (Medium) | 0.060 mm | Scuffing between coats of oil-based poly |
| 3 (Coarse) | 0.100 mm | Stripping paint and heavy varnish |
The 1/8 inch that ruins everything
Expansion gaps are the spaces left at the perimeter of hardwood floors to accommodate natural movement. These gaps allow for the hygroscopic expansion of wood fibers as they absorb humidity from the air. Without these gaps, the internal pressure will cause the floor to buckle. People always complain about the gap under the baseboard. They want it tight. But wood is hygroscopic. It is going to grow in the summer and shrink in the winter. If you don’t give it that 1/8 inch or 1/4 inch of breathing room, the boards will find somewhere else to go. Usually, that means up. I have seen floors lift two inches off the subfloor because they were pinned against a stone fireplace. When you are doing a repair with steel wool and wax, you also need to check the perimeter. If the floor is tight against the walls, the moisture that caused the white ring might also be causing the boards to swell and bind. This creates stress in the wood cells. Under a microscope, you can see the cell walls of the oak literally crushing each other. This is why we stick to NWFA standards. We are not just making it look pretty, we are managing the movement of a biological material.
“Wood is a hygroscopic material, meaning it constantly gains or loses moisture to reach equilibrium with the surrounding atmosphere.” – NWFA Technical Manual
The ghost in the expansion gap
Humidity is the primary driver of wood floor failure, manifesting as seasonal gaps or structural cupping. Maintaining a consistent indoor relative humidity between 30 and 50 percent is the only way to ensure the long-term stability of a hardwood installation. In places with swampy humidity like Houston, solid wood is a death wish unless you have a high-end HVAC system running year round. In the dry heat of Phoenix, your wood will shrink until the tongues show in the joints. This is the ghost that haunts every floor. When we rescued that water-stained floor, we had to check the local climate conditions. If the house is too humid, the wax will never cure properly. It will stay tacky. You have to understand how the air in the room interacts with the chemicals in the wax. The solvents in the paste wax need to evaporate to leave behind the hard solids. If the air is already saturated with water vapor, those solvents have nowhere to go. You end up with a sticky mess that ruins the look of the hardwood floors. This is why I always tell homeowners to keep their thermostat steady. Frequent swings in temperature and humidity are what cause the finish to crack and allow water to get in and create those white rings in the first place.
A checklist for the cautious homeowner
- Verify the type of finish before starting any abrasive repair.
- Always test a small, inconspicuous area behind a door or under a rug.
- Clean the surface with a pH-neutral wood cleaner to remove oils and dirt.
- Rub the 0000 steel wool only in the direction of the wood grain.
- Apply paste wax in thin layers to avoid a soft, gummy buildup.
- Buff the wax with a clean cotton cloth until the surface feels hard and slick.
- Check the room humidity to ensure proper drying and curing times.
The abrasive reality of site finished oak
Site-finished hardwood floors offer a level of customization and repairability that pre-finished products cannot match. Because the finish is applied in a continuous film across the entire floor, it can be buffed and blended with greater ease during spot repairs. Pre-finished floors have a micro-bevel on every edge. If you try to use steel wool on those, you will often catch the edge of the bevel and wear through the finish. With a site-finished floor, you have a flat plane. This makes the steel wool and wax method much more effective. You can blend the repair into the surrounding area without seeing a distinct line. This is the difference between a floor that looks like furniture and a floor that looks like a plastic kit. While most people want the thickest underlayment, too much cushion actually causes the locking mechanisms on LVP or laminate to snap under pressure. With solid hardwood, we don’t use soft underlayment. We want a firm connection to the subfloor. This stability is what allows the finish to stay intact over decades. When water hits that finish, it stays on top longer, giving you time to clean it up before it becomes a permanent stain. My job is to make sure that the connection remains solid, from the joists to the wax on top.