
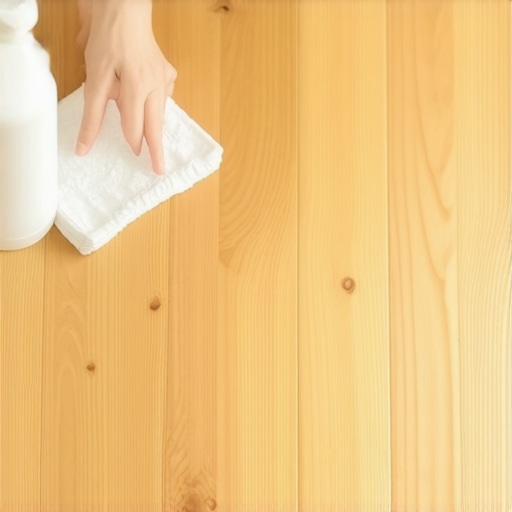
The sticky trap that ruins your finish
Removing sticky residue from tape on hardwood floors requires a calculated chemical and mechanical approach to prevent stripping the polyurethane or penetrating the wood grain. You must first identify the type of adhesive, whether it is a rubber-based pressure-sensitive adhesive or an acrylic-based bond, to select the correct solvent that will liquefy the residue without emulsifying the floor finish itself. I once walked into a house where a $15,000 wide-plank walnut floor was cupping so bad it looked like a potato chip because the installer didn’t check the crawlspace humidity, but even worse was the blue tape they used to ‘protect’ it. That tape sat for three weeks in the sun. When they pulled it up, it took the top layer of the finish with it. People think blue tape is safe forever. It is not. It has a shelf life of fourteen days before the polymers begin to cross-link with your floor finish. This is why I carry a moisture meter and a bottle of mineral spirits in my truck at all times. A floor is more than a walk surface. It is a structural engineering feat of moisture management and chemical stability. If you treat it like a kitchen counter, you will kill it. Hardwood floors require a level of respect that most modern builders simply do not understand. They throw down laminate or install showers with bad grout and think they are craftsmen. A real floor is an investment in wood cells and finish chemistry.
The chemistry of pressure sensitive adhesives
Pressure sensitive adhesives found on duct tape and masking tape are comprised of long-chain polymers that create a van der Waals bond with the surface of your hardwood floors. When these adhesives sit, they undergo a process called ‘wet-out’ where the liquid-like properties of the glue seep into the microscopic pores of the wood finish. If your floor is site-finished with a water-based polyurethane, those pores are more receptive to the adhesive than a factory-finished aluminum oxide coating. The bond becomes stronger over time. This is why you cannot just rip the tape off. You are fighting a molecular attraction. You need to introduce a solvent that has a lower surface tension than the adhesive but a higher evaporation rate than the finish. This is the delicate balance of the master installer. I have seen guys use acetone on a pre-finished floor and melt the wear layer right off. It turned the floor into a sticky, grey mess that looked like wet grout. You have to understand the Janka hardness of the wood too. A soft pine floor will dent if you use a metal putty knife to scrape the residue, whereas a solid oak floor might handle a bit more pressure. But I always tell my apprentices to leave the metal in the toolbox. Use plastic or use your thumb. The heat from your hand is often the best tool you have for softening old tape glue.
“A floor is only as good as the subfloor beneath it; deflection is the enemy of every joint.” – Master Flooring Axiom
Why your finish dictates the solvent choice
The choice between mineral spirits, naphtha, or citrus-based cleaners depends entirely on whether your hardwood is sealed with oil-modified urethane, water-borne acrylic, or a traditional wax finish. If you have an old-school wax finish, almost any solvent will strip it. If you have a modern water-based finish, you have to be careful with high-VOC solvents that can cloud the film. This is where the physics of the floor comes into play. Most people confuse laminate with hardwood. Laminate is a picture of wood glued to a fiberboard core, and it can handle harsher chemicals because the top layer is basically plastic. But real hardwood is a living, breathing organ. It expands and contracts with the humidity of the room. If you pour a solvent on a gap between planks, that liquid will travel down the side of the board and soak into the tongue and groove. This can cause the wood to swell or, worse, cause a chemical reaction with the subfloor adhesive. I have seen tape residue removal turn into a full-on refinishing job because the homeowner used too much ‘Goof Off’ and it seeped into the grain. You want to dampen a microfiber cloth, not soak the floor. Work in small circles. You are trying to lift the adhesive, not drown it.
| Adhesive Type | Hardwood Safety | Laminate Safety | Recommended Solvent |
|---|---|---|---|
| Masking Tape | High | High | Mineral Spirits |
| Duct Tape | Moderate | High | Naphtha |
| Packing Tape | Low | Moderate | Citrus Oil |
| Blue Painter Tape | High | High | Warm Water/Soap |
Tools that respect the Janka hardness
Using the right tools for adhesive removal prevents mechanical damage like scratching or gouging that occurs when homeowners use metal scrapers or abrasive pads on delicate wood fibers. I always start with a plastic putty knife or even an old credit card. The goal is to apply just enough shear force to break the bond without piercing the protective finish layer. If the residue is stubborn, I might use a heat gun on its lowest setting, but you have to be careful. Too much heat will blister the polyurethane faster than you can say ‘refinish.’ It is a game of patience. You are a surgeon, not a demolition crew. I think back to a job near some custom showers where the humidity was constantly at 60 percent. The tape residue on the hardwood just outside the bathroom was like cured epoxy because the moisture had helped the adhesive penetrate deeper into the wood. I had to use a specialized citrus-based gel that sat on the surface for ten minutes to break the bond. It is about the dwell time. Most people are in too much of a hurry. They want it gone in ten seconds. But a good floor takes years to grow and hours to ruin. Take your time. Smell the wood. If you start smelling something chemical and acrid, you are likely melting your finish. Stop immediately.
“Wood is hygroscopic; it will always seek an equilibrium with the moisture in the air, regardless of the finish applied.” – NWFA Technical Guidelines
The surgical removal process
A professional extraction of tape residue follows a four-step protocol: lubrication, dwell time, mechanical lifting, and pH-neutral cleaning to ensure no chemical footprints remain on the hardwood. First, apply your chosen solvent to a clean white rag. Never use a colored rag as the dyes can bleed into the wood grain if the finish is thin. Rub the area gently to saturate the adhesive. Let it sit for two to three minutes. This is the dwell time where the solvent breaks down the polymer chains. Next, use your plastic scraper to peel the residue back. Do not push down. Push across. Once the bulk is gone, take a fresh cloth with a tiny bit of solvent to wipe away the remaining film. Finally, you must neutralize the area. Many solvents leave an oily film that will attract dirt and eventually turn black. Use a dedicated hardwood floor cleaner that is pH-neutral to wipe the area dry. If you are working near transitions to laminate or tile grout, be sure to keep the liquids from pooling in the expansion gaps. Those gaps are there for a reason. If you fill them with gunk or cleaner, you are asking for squeaks later on. A floor needs to move. If you lock it down with residue or improper cleaning, you are fighting the physics of the material. It will buckle. It will groan. It will fail.
- Identify the finish type by testing a small hidden area with a drop of water.
- Use plastic scrapers only to avoid scratching the wear layer.
- Always rub with the direction of the wood grain to hide any micro-abrasions.
- Ventilate the room to avoid inhaling concentrated solvent fumes.
- Avoid using vinegar or steam mops which can permanently damage wood cells.
Avoiding the residue disaster next time
To prevent future adhesive issues, only use tapes specifically rated for hardwood floors and never leave them in place for more than the manufacturer-recommended duration. Better yet, do not tape anything to your floor. If you need to protect it during a remodel, lay down Ram Board or heavy rosin paper and tape the paper to itself, not the wood. This creates a floating protective shell. I see guys all the time taping plastic sheets directly to the floor. It is a recipe for disaster. If the house gets hot, that plastic creates a greenhouse effect, pulling moisture out of the wood and driving the tape adhesive into the finish. It is basic thermodynamics. You are better off spending the extra money on proper floor protection than spending three days on your knees with a bottle of mineral spirits. And if you do get a bit of residue, don’t panic. Don’t reach for the steel wool. Don’t reach for the wire brush. Reach for your knowledge of chemistry and the patience of a master installer. Your floors will thank you by lasting another fifty years. If you treat them right, they are the soul of the home. If you treat them like a subfloor, they will act like one. Keep your grout tight, your laminate dry, and your hardwood free of the sticky traps that ruin a great finish. Flooring is a science. Treat it like one.