
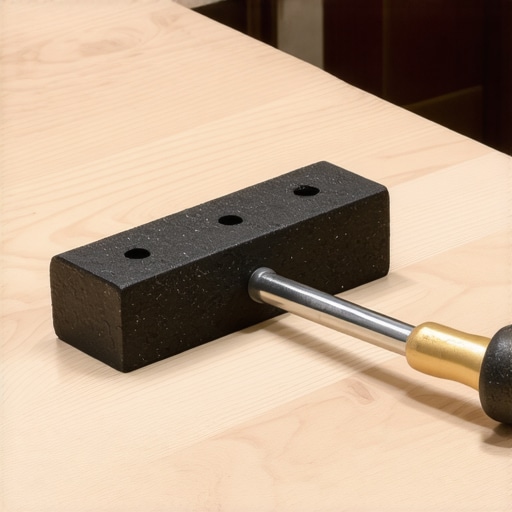
Look at your hands. If they are clean, you haven’t started the job yet. I spent three days grinding concrete on a job last month just so the floor wouldn’t click like a castanet. Most guys skip the leveling compound. They think the underlayment will hide the dip. It won’t. I have spent 25 years on my knees with a moisture meter and a level. I have seen every DIY disaster from unacclimated hardwood to laminate installed over wet subfloors. A floor is a performance surface. It is a structural engineering challenge. If you treat it like a weekend craft project, your joints will fail. I smell like WD-40 and oak dust most days because I respect the physics of the planks. You need to understand the difference between a tapping block and a pull bar before you even think about opening a box of material. These are not interchangeable accessories. They are the primary instruments of force distribution in a floating or glue-down installation. If you use them wrong, you will crush the tongue or snap the groove of your expensive planks.
Tools that define the finish
A tapping block and a pull bar are the two essential mechanical interfaces used to engage the locking mechanisms of laminate or hardwood floors without damaging the edges. The tapping block handles open-field installation while the pull bar manages perimeter closures where space for a hammer swing is restricted by the wall. You cannot complete a professional grade installation without both pieces of equipment. When you are standing in the middle of a room, the tapping block is your best friend. It is usually a solid chunk of high density polyethylene or nylon. It is designed to sit against the tongue of a plank. When you strike the block with a dead blow hammer, the force is distributed across a wider surface area. This prevents the hammer from localized impact which would otherwise shatter the delicate milling of the wood or composite. A pull bar is a different animal. It is a long piece of heat treated steel with a hooked end. You use it when you reach the final row or the space under a radiator. You hook one end over the edge of the plank and strike the other end to pull the joint tight. Without it, you are just staring at a gap you cannot close.
“A floor is only as good as the subfloor beneath it; deflection is the enemy of every joint.” – Master Flooring Axiom
Physics of the strike zone
The mechanics of a strike involve kinetic energy transfer through a medium to achieve friction over-ride. When you hit a tapping block, the energy travels from the hammer face into the plastic and then into the plank. The density of the block matters. Cheap blocks made of soft plastic will absorb too much energy. They will also deform. I have seen DIYers try to use a scrap piece of wood as a tapping block. Do not do this. Wood on wood impact can splinter and those splinters can get into the locking groove. Once a piece of debris is in the groove, the joint will never close properly. You will be left with a 1/32 inch gap that will collect dirt and moisture. In areas near showers, that gap becomes a highway for water to reach the subfloor. This leads to mold. It leads to structural rot. You need a block that has a recessed edge. This recess allows the block to sit over the tongue without actually touching it. The pressure is applied to the shoulder of the plank. This protects the most vulnerable part of the milling. If you crush the tongue, the next board will not click in. You will be stuck pulling up five rows of flooring just to fix one mistake. I have seen it happen a hundred times. It is a waste of time and a waste of money.
Geometry of the pull bar
The pull bar is the unsung hero of the perimeter. When you are three inches from a wall, you do not have the clearance to swing a hammer against a tapping block. The pull bar acts as an extension of your reach. It translates a downward or outward strike into a lateral pulling force. Quality pull bars are made of heavy gauge steel. If the steel is too thin, the bar will flex. Flex is the enemy of precision. If the bar bows when you hit it, the energy is wasted. You want a bar that stays rigid. This ensures that 100 percent of the hammer force is directed into moving the plank. You must also check the padding on the underside of the pull bar. A bare metal bar will scratch the surface of your laminate or hardwood floors. I always look for bars with felt or foam backing. If yours doesn’t have it, tape some scrap underlayment to it. Do not ruin a finish that took you hours to layout. The height of the hook is also a factor. If the hook is taller than the thickness of your flooring, it will hit the wall before it seats the plank. You need a low profile hook for modern thin laminate and a deeper hook for 3/4 inch solid oak. Precision is non-negotiable here. A gap at the wall might be hidden by baseboards, but a loose joint at the wall will eventually migrate to the center of the room.
| Feature | Tapping Block | Pull Bar |
|---|---|---|
| Primary Material | High-Density Nylon/PE | Heat-Treated Steel |
| Force Direction | Push/Lateral Strike | Pull/Reverse Strike |
| Application Area | Open Floor Space | Walls and Corners |
| Typical Thickness | 1 to 2 Inches | 3/16 to 1/4 Inch |
| Protection Target | Tongue and Groove Shoulder | Plank Edge and Finish |
The 1/8 inch that ruins everything
Precision in flooring is measured in fractions of an inch. Most manufacturers require a 1/4 inch to 3/8 inch expansion gap around the entire perimeter. If you use your pull bar too aggressively and shove the floor tight against the drywall, you have failed. The floor needs to breathe. Wood and laminate are hygroscopic materials. They expand and contract with changes in humidity. If there is no gap, the floor will buckle. It will rise up in the middle of the room like a mountain range. I have been called to houses where the floor was so tight it actually popped the baseboards off the wall. You need to use spacers in conjunction with your tapping block and pull bar. The tapping block helps you get the joints tight together, but the spacers keep the entire mass of the floor away from the fixed structures of the house. In rooms with high moisture like those near showers, this expansion is even more pronounced. The humidity from the steam enters the core of the boards. If the floor is locked against the wall, it has nowhere to go but up. Use your tools to create a tight field, not a tight perimeter. The ghost in the expansion gap is the air that saves your floor from self-destruction.
“Wood flooring will perform best when the environment is controlled to stay within a relative humidity range of 30 to 50 percent.” – NWFA Technical Guidelines
Critical components of the installation kit
Before you start, you need a checklist. If you are missing one of these items, stop and go to the store. Do not try to improvise. Improvisation in flooring leads to creaking and groaning underfoot. A floor should be silent. If it clicks like a castanet, you didn’t level the subfloor or you didn’t seat the joints. Here is what you need for a professional result.
- Dead blow hammer with a rubber or plastic face to prevent tool damage.
- Heavy duty tapping block with a protective shoulder recess.
- Professional grade pull bar with at least 3/16 inch steel thickness.
- Moisture meter to check the subfloor and the flooring material.
- Expansion spacers to maintain the perimeter gap.
- High quality underlayment with a high IIC rating for sound dampening.
- Fine tooth saw for clean cuts around door jambs and transitions.
Why your subfloor is lying to you
The most expensive tool in the world cannot fix a bad subfloor. If your concrete slab is wavy, your tapping block will not save you. When you hit a plank into a dip, the locking mechanism is under constant vertical stress. Eventually, the plastic or wood tongue will snap. This is why I spent those three days grinding concrete. You want the floor to be flat within 1/8 inch over a 10 foot radius. If you ignore this, the floor will feel bouncy. It will feel cheap. People think thick underlayment fixes this. It doesn’t. While most people want the thickest underlayment, too much cushion actually causes the locking mechanisms on LVP to snap under pressure. The floor needs a firm base. The tools are there to join the planks, not to force them into a shape they don’t want to be in. If you are working with hardwood floors, you also have to worry about the moisture content of the subfloor. If the subfloor is wet, the wood will cup. If the subfloor is too dry, it will pull moisture out of the planks and cause them to shrink. The interaction between the tool, the plank, and the subfloor is a three way chemical and physical dance. You are the choreographer. Do not let the subfloor lie to you. Use a straight edge and a level before you ever pick up that tapping block.
The mechanics of the joint closure
Closing a joint is not about brute force. It is about finesse. You should not be swinging like you are at a driving range. You should be using short, sharp taps. Listen to the sound. A joint that is not seated has a hollow, high pitched sound. A joint that is fully engaged has a solid, thudding sound. That change in acoustics tells you the job is done. If you keep hitting it after it is seated, you are just risking damage. This is especially true with laminate. The core is often high density fiberboard which is essentially compressed sawdust and resin. It is hard, but it is brittle. If you hit it too hard, the core will shatter internally. You might not see it on the surface, but the structural integrity is gone. When someone walks on that spot, the floor will give way. Use your tapping block to feel the vibration of the plank. The feedback through the tool tells you more than your eyes ever will. This is the difference between a mechanic and a hobbyist. The mechanic listens to the materials. The hobbyist just hits things until they move. Respect the material and the material will last for forty years. Abuse it and you will be replacing it in five.