Why Your Shower Grout is Cracking Near the Baseboard and How to Stop It
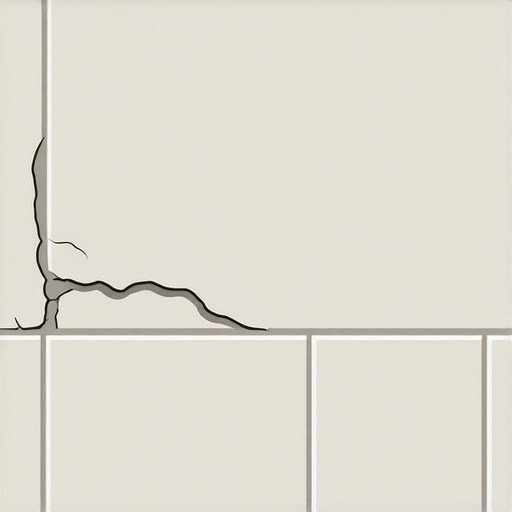
The primary reason shower grout cracks near the baseboard is the movement at the change of plane where the wall meets the floor. Rigid grout cannot handle the structural shifting between two different surfaces. To stop it, you must replace grout with a 100 percent silicone sealant. Most guys skip the leveling compound. They think the underlayment will hide the dip. It won’t. I spent three days grinding concrete on a job last month just so the floor wouldn’t click like a castanet. I have seen it time and again in bathrooms where the homeowner thinks they can just slap down some tile and call it a day. I walked into a master bath last week that smelled like damp earth. The grout lines along the perimeter were pulverized into white dust. The installer used a standard cementitious grout in a corner where two different planes of movement collided. It is a rookie mistake that leads to rot, mold, and thousands of dollars in structural damage. My knees are shot from decades of fixing these blunders, and my hands still smell like the WD-40 I used to clean my trowels this morning. If you want a floor that lasts, you have to respect the physics of the house. A house is a breathing organism that expands and contracts with every shift in humidity. When you lock two rigid planes together with a brittle material like grout, something has to give. It is always the grout that loses the fight.
The myth of the rigid joint
Grout is a compressive filler designed to sit between tiles on a flat plane, not a structural adhesive meant to bridge moving parts. When you see cracks appearing where your shower floor meets the wall or the baseboard, you are witnessing the house moving in two different directions at once. The floor joists are deflecting under weight while the wall studs are twisting as they lose or gain moisture. This is why the TCNA standards are so specific about change of plane joints. You cannot expect a mixture of Portland cement and sand to behave like a rubber band. It will buckle. It will crack. It will fail. I have spent twenty five years watching people try to caulk over grout or, even worse, try to smear more grout into a crack. It never works. You are just putting a band-aid on a broken leg. The reality is that your shower is a wet environment where water will find every microscopic opening. Once that grout cracks, capillary action sucks moisture behind the tile where it sits against the framing. That is how you end up with a subfloor that looks like soggy cardboard. Whether you are dealing with hardwood floors or a tile shower, the principles of expansion and contraction remain the same. You have to give the materials room to breathe or they will destroy themselves.
“A floor is only as good as the subfloor beneath it; deflection is the enemy of every joint.” – Master Flooring Axiom
Why your subfloor is lying to you
Your subfloor may look flat and stable, but under the weight of a person and the vibration of the house, it is constantly in motion. Standard building codes for floor deflection are often L over 360, which means the floor can bend up to one 360th of its span. For ceramic tile, that is the bare minimum. For natural stone, you need L over 720. If your installer did not check the joist spacing or the thickness of the plywood underlayment, your grout is doomed from day one. I remember a job in a high rise where the architect wanted heavy marble but the subfloor was thin laminate grade plywood. The grout was cracking before we even finished the baseboards. We had to tear it all out and sister the joists. People hate hearing that. They want the pretty finish, not the ugly structural work. But the structural work is what keeps the water out of your crawlspace. When you see that crack near the baseboard, it is a signal that your subfloor is moving more than the grout can handle. It is the canary in the coal mine for your bathroom. If you ignore it, you are asking for a full gut renovation in five years. You need to understand that even the best grout has zero tensile strength. It can handle being stepped on, but it cannot handle being pulled apart.
| Material Type | Flexibility Rating | Moisture Resistance | Primary Use Case |
|---|---|---|---|
| Sanded Grout | Very Low | Moderate | Joints wider than 1/8 inch |
| Unsanded Grout | Very Low | Moderate | Narrow wall joints |
| Epoxy Grout | Moderate | High | High traffic commercial |
| 100% Silicone | Maximum | Absolute | Change of plane joints |
The chemistry of the bond failure
Traditional grout fails because it is a porous, cement-based product that lacks the polymers necessary to bridge structural gaps. At a molecular level, cementitious grout forms a crystalline structure as it cures. These crystals are incredibly hard but also incredibly brittle. When the baseboard moves even a fraction of a millimeter due to seasonal humidity, it snaps those crystals. This is why you see that fine white powder. It is the literal corpse of your grout. Modern high performance grouts have some latex additives that provide a tiny bit of give, but they still cannot compete with the movement at a wall-to-floor transition. You also have to consider the bond breaker. If the grout is stuck to the edge of the tile and the subfloor and the wall plate, it is being pulled in three directions. This is called three point bonding, and it is a recipe for disaster in any sealant application. You want a material that only bonds to the two sides of the gap so it can stretch like a bridge. Silicone is the only material that can do this effectively in a shower environment. It stays flexible for decades, and it does not care if your house settles another inch. I have seen guys try to use cheap acrylic caulk from the discount bin, but that stuff shrinks and turns yellow faster than a cheap laminate floor in the sun. You need the professional grade stuff if you want to stop the cracking for good.
The 1/8 inch that ruins everything
A tiny gap of one eighth of an inch is usually all it takes to allow for the natural expansion and contraction of your home. If your tile was installed tight against the baseboard or the wall with no gap, the grout has nowhere to go but up or out. This is the same reason we leave expansion gaps around the perimeter of hardwood floors and laminate. If you butt hardwood tight against a wall, the floor will bubble in the middle of the room. In a shower, that pressure manifests as cracked grout and popped tiles. You need to ensure there is a clean, empty channel between the floor tile and the wall tile. This channel should be filled with a color matched 100 percent silicone sealant, not grout. This is the secret that separates the masters from the hackers. I have spent countless hours with a grout saw, carefully raking out the mistakes of the guy who came before me. It is tedious work that makes your forearms burn, but it is the only way to do it right. You have to get every last bit of old grout out of that joint or the silicone will not bond properly. If you just smear silicone over the top, the moisture trapped in the old grout will cause the new sealant to peel off within weeks. Cleanliness is everything in this game.
“Expansion joints are not suggestions; they are the pressure valves of a structural installation.” – Master Flooring Axiom
How to fix the crack the right way
Fixing a cracked joint requires a surgical approach to removing the old material and preparing the surface for a flexible sealant. Do not just reach for the caulk gun and start squeezing. You need to follow a strict protocol to ensure the new joint holds. First, you must remove the failed grout. I prefer a manual grout rake because it gives me better control than a power tool that might chip the tile. You need to get down to the substrate. Once the joint is empty, use a vacuum to pull out every grain of dust. Then, wipe the area down with denatured alcohol. This removes any soap scum or body oils that will prevent the silicone from sticking. If the gap is deeper than a quarter inch, you might even need to tuck some foam backer rod in there. This prevents the three point bonding I mentioned earlier. Then, and only then, you apply a bead of high quality silicone. Tool it with a gloved finger and a bit of soapy water to get that clean, concave look. It is not about making it look pretty, though that is a nice bonus. It is about creating a waterproof, flexible gasket that moves with your house. If you do this, you will never have to worry about that crack again.
- Rake out all old, cracked grout using a manual grout saw or carbide tipped tool.
- Vacuum the joint thoroughly to remove all debris and fine dust particles.
- Clean the edges of the tile with denatured alcohol to ensure a sterile bonding surface.
- Select a 100 percent silicone sealant that matches the color of your existing grout.
- Apply a consistent bead of silicone into the expansion gap at the change of plane.
- Tool the joint immediately using a finger dipped in a mixture of water and dish soap.
- Allow the silicone to cure for at least 24 hours before exposing the shower to water.
The problem with builder grade solutions
Many new homes are built with speed in mind rather than longevity, leading to the use of inferior materials in high stress areas. Builders love grout because it is fast and cheap. They can have a subcontractor grout an entire bathroom in an hour. Silicone takes time to tool and requires a higher level of skill to apply cleanly. But what is fast for the builder is a headache for you. I have seen brand new homes where the grout is cracking before the homeowners even move in. It is a sign of a house that is still settling and an installer who was looking at the clock instead of the quality. This is especially true with modern large format tiles. The larger the tile, the less grout you have to take up the stress of movement. This puts even more pressure on the joints at the edges. If you have those big 12 by 24 inch tiles, you absolutely must have flexible joints at every corner. I tell people all the time that flooring is not just about what you see on the surface. It is about the layers underneath. It is about the thin-set chemistry and the subfloor stiffness. If you ignore the fundamentals, the prettiest tile in the world will not save you. You have to build it like it is going to be there for a century, even if you only plan to stay for five years. That is the mark of a pro. I do not care about the latest trends or the fancy colors. I care about whether that shower is going to leak on my watch. And if you use grout in a change of plane, it is going to leak. It is just a matter of time.