
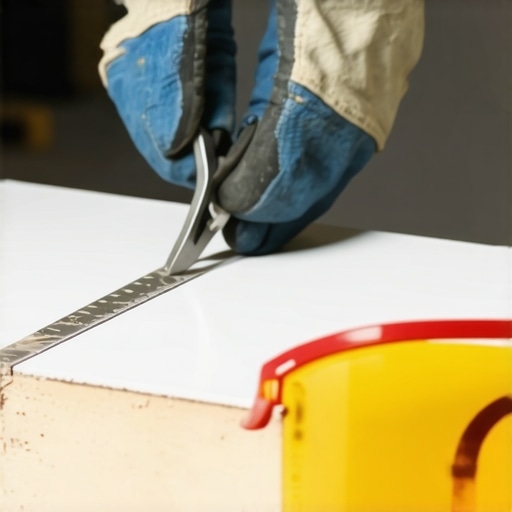
The gritty reality of a sharp tile edge
Most homeowners and green installers think the danger of tile work ends once the wet saw stops spinning. It does not. I spent three days grinding concrete on a job last month just so the floor would not click like a castanet, but even with a level floor, the project nearly failed because of the edges. When you cut a piece of porcelain or ceramic for a shower, that edge becomes a microscopic razor. I have seen guys end up in the emergency room because they caught a finger on a raw cut while trying to press the tile into a bed of thin-set. Experience taught me that the difference between a hack job and a professional installation is a simple ten dollar carborundum stone. A carborundum rub stone is the primary tool for smoothing raw tile edges, preventing skin lacerations during the grouting process and ensuring that grout bonds properly to a clean beveled surface. This small investment eliminates the jagged burrs left by even the most expensive diamond blades. Professionals use this tool to create a slight round-over on the cut edge, which allows the grout to wrap over the shoulder of the tile. This creates a much more durable joint that resists cracking and moisture penetration over time. Without this step, the grout thin-sets against a sharp point, creating a failure point where water can eventually seep into the substrate. You can buy the fanciest laser-guided saw on the market, but if you do not spend five seconds with a rub stone, your edges will look like a serrated knife.
Why your subfloor is lying to you
The structural integrity of any flooring surface begins long before the first plank or tile is laid. A subfloor that looks flat to the naked eye is often a topographical map of disappointment. Subfloor preparation requires checking for deflection and floor flatness to within one eighth of an inch over a ten foot radius as mandated by industry standards. Failing to address these dips leads to broken locking mechanisms in laminate and cracked grout lines in tile installations. Most guys skip the leveling compound. They think the underlayment will hide the dip. It won’t. I have ripped up thousands of dollars of hardwood floors because the installer ignored a half inch sag in the center of the room. When wood or laminate spans a void, every footstep acts like a hammer blow to the tongue and groove joint. Eventually, the wood fibers fatigue and the joint snaps. In a shower, a dip in the subfloor means water will pool under the tile, regardless of how much grout you jam into the cracks. You have to treat the subfloor as a structural engineering challenge. This means checking the joist spacing and ensuring the plywood thickness meets the L/360 deflection standard for ceramic tile or the more stringent L/720 for natural stone.
“A floor is only as good as the subfloor beneath it; deflection is the enemy of every joint.” – Master Flooring Axiom
The chemistry of the thin-set bond
Tile does not just sit on a floor. It is chemically bonded through a process of hydration and mechanical interlocking. Modified thin-set mortars use liquid latex or powdered polymers to increase bond strength and flexibility, which is mandatory for large format tiles and environments with high thermal expansion. Selecting the wrong mortar for your specific tile type and substrate will lead to delamination and hollow sounding floors. When you mix a bag of thin-set, you are starting a chemical reaction. If you add too much water, you weaken the polymer chains. If you do not let it slake for ten minutes, the chemicals do not fully activate. I see people using premixed mastic in showers all the time. That is a recipe for disaster. Mastic is organic and it will rot when exposed to constant moisture. For a shower, you need a high-quality, polymer-modified thin-set that can handle the weight of the tile without sagging. The rub stone comes back into play here because a smoothed edge allows the thin-set to squeeze out evenly when you beat the tile in with a rubber mallet. It prevents the sharp edge from catching on the trowel ridges, which ensures one hundred percent coverage. If you have air pockets behind your tile, it will eventually crack. It is physics, pure and simple.
| Material Type | Janka Hardness | Acclimation Time | Moisture Tolerance |
|---|---|---|---|
| Solid White Oak | 1360 lbf | 7 to 14 Days | Low |
| Engineered Maple | 1450 lbf | 3 to 5 Days | Medium |
| Laminate Core | N/A | 48 Hours | Moderate |
| Porcelain Tile | N/A | None | High |
The ghost in the expansion gap
Wood is a living material that breathes. It expands when the humidity rises and shrinks when the air dries out. Expansion gaps at the perimeter of a room are the most ignored requirement in flooring installation, yet they are the most common cause of floor buckling and cupping. A minimum of one half inch gap must be maintained around all vertical obstructions to allow for natural movement. I once walked into a house where a $15,000 wide-plank walnut floor was cupping so bad it looked like a potato chip because the installer didn’t check the crawlspace humidity and shoved the boards tight against the baseboards. There was nowhere for the wood to go but up. Even laminate floors, which people think are plastic, have a wood fiber core that reacts to the environment. If you lock a laminate floor under a heavy kitchen island or skip the expansion gaps, the floor will bubble at the seams. It is not a product defect. It is an installation failure. Professionals use spacers to ensure that gap is uniform. We then cover it with baseboard and shoe molding. The floor must be allowed to float or move as a single unit. If you pin it down at one point, you are asking for a callback.
The one eighth inch that ruins everything
In the world of professional flooring, we live and die by tiny measurements. The industry standard for floor flatness is a deviation of no more than three sixteenths of an inch over ten feet for most hard surfaces. If your subfloor exceeds this limit, the locking systems on modern floors will eventually fail under the weight of foot traffic. You cannot fix a bad subfloor with thick underlayment. While most people want the thickest underlayment, too much cushion actually causes the locking mechanisms on LVP to snap under pressure. It creates a trampoline effect. You want a high-density underlayment that provides support, not just softness. This is especially true in showers where the slope to the drain must be precise. A quarter inch per foot is the standard. If you are off by even an eighth, you get standing water. Standing water leads to mold. Mold leads to a teardown. I use a ten foot straight edge on every single job. If I see light under that bar, I am not laying a single piece of material until the floor is leveled with a high-flow cementitious underlayment.
- Always check the moisture content of the subfloor with a pin-type meter before installation.
- Use a carborundum rub stone on every cut edge of shower tile to prevent cuts and improve grout adhesion.
- Ensure a minimum of ninety five percent thin-set coverage in wet areas like showers.
- Verify that the subfloor meets the L/360 deflection rating to prevent grout cracking.
- Acclimate hardwood flooring in the room where it will be installed for at least seven days.
The thermal expansion of grout and stone
Grout is not just a filler. It is a structural component of the tile assembly. Cementitious grout is porous and requires sealing to prevent staining and water absorption, whereas epoxy grouts are waterproof and chemical resistant but much harder to install. Choosing the right grout depends on the joint width and the environment of the room. In a shower, I almost always push for high-performance grouts. Standard sanded grout is like a sponge. It will soak up water and hold it against the waterproofing membrane. If that membrane has even a pinhole leak, your subfloor is toast. The rub stone helps here because it creates a consistent beveled edge on every cut. This means the grout joint is uniform in depth and width across the entire wall. If you have jagged edges, the grout will be thin in some spots and thick in others. The thick spots will cure at a different rate than the thin spots, leading to color mottling and cracking. It is the small details that make a floor last fifty years instead of five. I do not care if you like the color of the tile. If you do not follow the chemistry and the physics, your floor is junk.
“Cementitious grout must be mixed to a peanut butter consistency; excess water destroys the pigment and the structural integrity of the bond.” – TCNA Installation Handbook