
Most guys skip the leveling compound. They think the underlayment will hide the dip. It won’t. I spent three days grinding concrete on a job last month just so the floor wouldn’t click like a castanet. That job taught me that the demolition phase is where the real craftsmanship begins. If you wreck the subfloor while pulling up old ceramic, you are already behind the eight ball before the first plank of hardwood floors or laminate even touches the site. Most contractors come in with a jackhammer and a bad attitude. They leave the plywood looking like a war zone. I found that a simple fifteen dollar wide blade trim puller is the secret to surgical tile removal. It allows you to get under the grout line and pop the bond without sending shards of porcelain flying into the drywall. I have seen guys spend thousands on power scrapers when a high carbon steel flat bar with a wide footprint does the job cleaner. It is about the physics of leverage and the distribution of force across the joist. When you use a narrow crowbar, all that pressure is concentrated on one square inch of your subfloor. That is how you punch holes in the plywood. A wide blade spreads that load. It turns a destructive process into a controlled disassembly. You want that tile to come up in one piece so you are not vacuuming dust out of your lungs for the next three weeks.
The physics of the bond in modern thinset
The bond between a tile and the substrate is a mechanical and chemical lock achieved through Portland cement crystals and polymer additives. To break this bond without shattering the tile, you must interrupt the crystalline structure at the weakest point which is the interface between the mortar and the tile. This requires a tool that can wedge into the microscopic gaps without vibrating the ceramic to its breaking point. Most people think thinset is just glue. It is not glue. It is a cementitious matrix that grows into the pores of the tile and the wood. When you try to pry it up with a hammer, you are fighting chemistry. The fifteen dollar tool I am talking about is a spring steel trim puller. It has a larger surface area than a standard pry bar. This means when you hit it with a mallet, the force moves horizontally. It shears the bond rather than lifting it. This is the difference between a clean pop and a thousand sharp pieces of trash. If you are prepping for hardwood floors later, you need that subfloor to stay flat. Any gouge you make now is a dip you have to fill later with expensive self leveler. I have seen guys ruin a perfectly good shower floor by being too aggressive with a demo bar. They puncture the liner and then they wonder why the ceiling below is leaking a month later. Precision matters more than power in this trade.
“A floor is only as good as the subfloor beneath it; deflection is the enemy of every joint.” – Master Flooring Axiom
Why your subfloor is lying to you
Subfloors often appear flat to the naked eye but hide significant deviations that can cause laminate and hardwood floors to fail prematurely. A subfloor that has been abused during demolition will have micro-fractures and dips that compromise the integrity of the next installation layer. You have to look at the subfloor as a structural engineering component. If you are dealing with a 3/4 inch plywood deck, it has a specific deflection rating. When you use heavy demolition tools, you can weaken the glue bonds between the plywood plies. This leads to squeaks that no amount of screws can fix. The secret is to keep the tool flat. The fifteen dollar trim puller has an integrated wedge that does the work for you. You don’t have to angle it up. You just drive it in. This keeps the pressure parallel to the floor. It protects the wood fibers. I have walked onto too many jobs where the previous guy used a spade bit on a demo hammer. The floor looked like Swiss cheese. You cannot lay high quality laminate over that. It will bounce. The locking mechanisms will snap within six months. I tell my apprentices that the demo is the foundation. If you don’t respect the subfloor, the subfloor won’t respect your finished product. You have to be a surgeon with a pry bar.
| Tool Type | Subfloor Impact | Tile Breakage Rate | Average Cost |
|---|---|---|---|
| Standard Crowbar | High Gouging | 90 percent | $12.00 |
| Demo Hammer | Structural Risk | 100 percent | $150.00 |
| Wide Trim Puller | Minimal | 20 percent | $15.00 |
| Floor Scraper | Moderate Scratches | 60 percent | $45.00 |
The 1/8 inch that ruins everything
A deviation of just one eighth of an inch over a ten foot span is enough to void the warranty on most hardwood floors and laminate products. This tiny gap allows the planks to flex which eventually breaks the tongue and groove joints and creates audible clicking sounds. You might think a small hole in the plywood doesn’t matter. It matters. That hole becomes a pocket of air. When you step on the floor, the plank bows into that pocket. Over time, the finish on the wood will crack. The grout in your showers will crumble if the wall studs are notched or damaged during tile removal. It is all connected. I use a laser level on every single demo job. I want to see exactly where the high spots are. If I see a hump, I don’t just sand it. I find out why it is there. Often it is a joist that was crowned too high. Or it is a build up of old adhesive that someone was too lazy to scrape. The fifteen dollar tool is great for this because it has a sharp edge that acts like a plane. You can shave off old thinset without digging into the timber. It is about finesse. You want the surface to be as smooth as a billiard table before you even think about opening a box of flooring. This is why professional installers charge so much for prep. We know that the prep is the only part that actually lasts.
Managing the mess in showers and wet zones
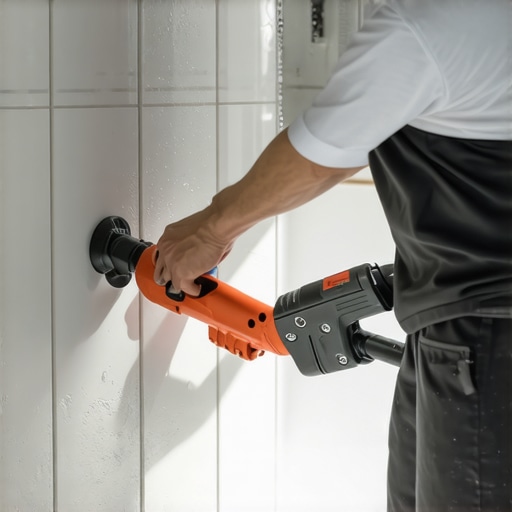
Removing tile in showers requires an understanding of moisture barriers and the underlying cement board to prevent water damage to the home framing. In bathrooms, the grout acts as a secondary defense but the real work is done by the waterproof membrane located behind the tile. If you go in there with a heavy hand, you will tear that membrane. Then you are looking at a full stud-out renovation instead of a simple tile swap. The wide blade puller is thin enough to slide behind the tile without punching through the backer board. You can pop the tiles off like scales on a fish. This is vital if you are trying to save the original waterproofing. I have seen people try to use a screwdriver and a hammer. They end up with a hole in the pipe or a cracked shower pan. You have to understand the chemistry of the grout too. Modern epoxy grouts are incredibly tough. They are essentially plastic. If you try to pry against epoxy grout, the tile will always shatter before the grout gives. You have to cut the grout lines first. A diamond blade on a multi-tool is the best way to do this. Once the grout is gone, the tile has no lateral support. That is when the fifteen dollar tool shines. It slides in, you give it a tap, and the tile pops off. It is a clean, satisfying sound. It means you did it right.
- Inspect the subfloor for any signs of water rot or mold before starting demo.
- Cut all grout lines with a manual or oscillating saw to isolate each tile.
- Place the wide blade puller at the edge of the tile and tap gently with a rubber mallet.
- Use a vacuum with a HEPA filter to catch silica dust as you work.
- Check the level of the substrate every five square feet to track progress.
Moisture barriers and the invisible enemy
Moisture vapor transmission from a concrete slab can reach levels of twelve pounds per thousand square feet which is enough to delaminate almost any adhesive or warp solid hardwood floors. Controlling this vapor is the most overlooked aspect of flooring architecture in residential construction. When you pull up old tile, you often find white powder underneath. That is efflorescence. It is a sign that moisture is moving through the slab. If you ignore it and slap down some laminate, you are going to have a mold factory under your feet in two years. The fifteen dollar tool helps here too because it allows you to see the state of the old thinset. If the thinset is soft or chalky, you have a moisture problem. You need to address that with a liquid applied vapor barrier. I prefer the epoxy based ones that soak into the concrete pores. They create a permanent seal. Most homeowners want to skip this step because the bucket costs two hundred bucks. I tell them they can pay me now to do it right or pay me triple in three years to do it again. There is no middle ground with water. It always wins. You have to respect the capillary action of the concrete. You have to understand how the dew point inside the house interacts with the temperature of the ground. This is the difference between a floor and a performance surface. One is just something you walk on. The other is a piece of engineering that protects the home.
“Installation failures are rarely the fault of the material; they are the result of a subfloor that was never prepared to receive it.” – Master Flooring Axiom
The regional climate expert perspective
In the swampy humidity of the Gulf Coast, solid wood is a death wish for a ground floor. You need engineered cores. The moisture levels in the air will cause a solid oak plank to expand so much it will literally pop the baseboards off the walls. I have seen floors buckle two feet into the air because the installer didn’t leave an expansion gap. They pushed the wood tight against the drywall. That is amateur hour. You need a minimum of a half inch gap around the entire perimeter. The fifteen dollar tool is actually great for cleaning out those expansion gaps when they get filled with debris. If you are in a dry climate like Vegas, you have the opposite problem. The wood will shrink. You will get gaps between the planks that you can fit a nickel into. You have to acclimate the wood to the house for at least two weeks. Don’t just leave it in the garage. Put it in the room where it is going to be installed. Open the boxes. Let the wood breathe. It needs to reach an equilibrium moisture content. If you rush it, you are asking for trouble. A floor is a living thing. It moves and breathes with the seasons. Your job as an architect of that floor is to give it the room it needs to exist without destroying itself. That starts with a clean demo and a perfect subfloor. Use the right tool, take your time, and don’t take shortcuts with the prep work.