
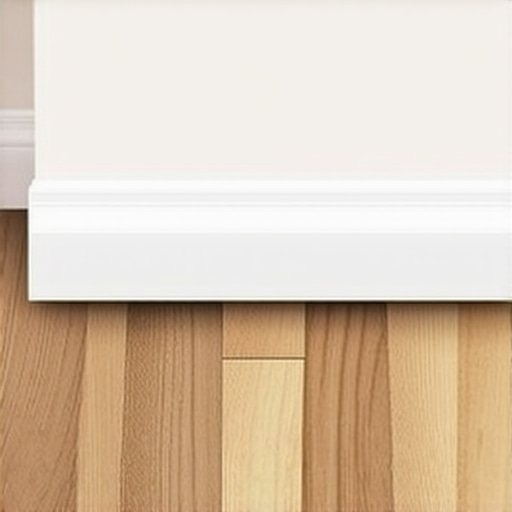
Most guys skip the leveling compound. They think the underlayment will hide the dip. It won’t. I spent three days grinding concrete on a job last month just so the floor wouldn’t click like a castanet. When you see a floor that bounces or separates at the seams, it is rarely the fault of the material itself. It is the result of an installer who ignored the physics of the subfloor. My truck smells like WD-40 and oak dust for a reason. I do not just lay boards. I engineer a walking surface that will outlast the mortgage. If you want a floor that stays put, you start with the shims and the level, not the color of the wood.
The hidden physics of the floating floor
Laminate flooring moves because it is a floating system that reacts to changes in humidity and temperature by expanding and contracting. To stop shifting, you must maintain a consistent expansion gap around the entire perimeter using plastic shims. These shims prevent the floor from walking or locking against walls. This movement is not a suggestion. It is a biological certainty for any material with a wood-fiber core. When the humidity in the room spikes, those fibers absorb moisture and swell. If the floor is pinned against a door frame or a baseboard because you did not use shims during the install, the pressure has nowhere to go. The floor will buckle in the center. Conversely, in the winter when the air is dry, the floor shrinks. Without a uniform gap established by shims, the floor can slide toward one side of the room, leaving a massive gap on the other. I have seen entire rooms where the laminate moved two inches and disappeared under the baseboard on one side. All of that because someone did not spend $2 on a pack of plastic spacers.
Why your subfloor is lying to you
Subfloor flatness is the single most essential variable in preventing laminate floor failure and ensuring the locking mechanisms do not snap. A subfloor must be flat within 3/16 of an inch over a 10 foot radius. If the subfloor has dips or peaks, the floor will flex. Every time you step on a low spot, the tongue and groove joint is stressed. Over thousands of footfalls, that plastic or fiberboard lock will eventually shear off. Once the lock is gone, the planks will begin to drift apart. This is why grinding concrete or sanding down plywood high spots is not optional. I use a 10 foot straight edge on every job. If I see light under that rail, I am not pulling a single plank out of the box yet. You have to understand the chemistry of the leveling compound too. You cannot just slap it down. You need a primer that creates a mechanical bond between the old concrete and the new leveler. Without that bond, the leveler will crack, and you will hear a crunching sound under your floor for the next twenty years.
“A floor is only as good as the subfloor beneath it; deflection is the enemy of every joint.” – Master Flooring Axiom
The ghost in the expansion gap
An expansion gap is a mandatory 1/4 inch to 1/2 inch space left between the flooring and any vertical surface like walls or cabinets. Plastic shims are the only way to ensure this gap remains uniform while you are hammering planks together. Without them, the floor shifts during installation. When you are at the far end of the room using a pull bar to lock the final row, you are applying hundreds of pounds of force. If you do not have shims at the starting wall, the entire floor will slide backward. You think you have a 3/8 inch gap, but by the time you are halfway through the room, that gap is gone. The floor is now tight against the drywall. This is a ticking time bomb. The moment the seasons change, that floor is going to tent. I always tell homeowners that the baseboard and the quarter round are there to hide a gap that must exist. If the gap is not there, the floor is not healthy.
| Flooring Type | Expansion Requirement | Janka Hardness (Average) | Acclimation Time |
|---|---|---|---|
| Laminate (HDF Core) | 1/4 – 1/2 inch | N/A (AC Rating used) | 48 Hours |
| Solid White Oak | 3/4 inch | 1,360 lbf | 7-14 Days |
| Engineered Wood | 1/2 inch | 1,200 – 1,800 lbf | 72 Hours |
| Stone Polymer LVP | 1/4 inch | N/A (Rigid Core) | 24 Hours |
The chemistry of structural stability
The core of a laminate plank is made of High-Density Fiberboard which is essentially compressed wood fibers held together by resins and wax. This material is highly sensitive to the vapor transmission rate of the concrete slab beneath it. You must use a vapor barrier. If you are installing over concrete, you are essentially laying wood on a giant sponge. Concrete is porous. It wicks moisture from the earth. If you do not lay a 6 mil poly film down first, that moisture will migrate into the underside of your laminate. The shims help manage the physical space, but the vapor barrier manages the molecular space. When moisture enters the HDF core, the resins begin to break down. The board loses its structural integrity. This is why people think laminate is cheap. It is not cheap. It is just frequently installed by people who do not respect the relationship between moisture and wood fiber.
Why solid hardwood fails in humidity
Solid hardwood floors require a much higher level of climate control than laminate or tile and are prone to cupping in humid environments like Houston. Solid wood is a living material that never stops moving throughout its entire lifespan. In a city with high humidity, the bottom of a floorboard often absorbs more moisture than the top, especially if the crawlspace is not encapsulated. This causes the edges of the board to rise higher than the center, a condition known as cupping. In the dry heat of Phoenix, you see the opposite. The wood dries out and shrinks, leading to large gaps between every board. While I love the look of a site-finished oak floor, it is a high-maintenance choice. If you are not willing to run a humidifier or a dehumidifier to keep your home at a steady 35 to 55 percent humidity, you are better off with a stable engineered product or a high-quality laminate that uses shims to manage its more predictable movement.
“Moisture is the single most common cause of flooring failure, regardless of the material chosen.” – NWFA Technical Manual
The checklist for a perfect install
- Check subfloor for levelness using a 10 foot straight edge.
- Grind down concrete humps or fill dips with self-leveling underlayment.
- Test moisture levels in the subfloor using a pin or pinless meter.
- Acclimate the flooring in the room where it will be installed for at least 48 hours.
- Install a 6 mil vapor barrier over all concrete subfloors.
- Use plastic shims every 12 inches along the perimeter to maintain expansion gaps.
- Undercut door jambs so the floor can slide beneath them freely.
- Avoid installing kitchen islands or heavy cabinetry on top of a floating floor.
- Verify that the T-molding is used in any doorway or room wider than 30 feet.
- Remove shims only after the entire floor is installed and before baseboards are attached.
The problem with heavy kitchen islands
Heavy objects like kitchen islands or grand pianos can pin a floating floor to the subfloor, effectively killing its ability to expand and contract. This creates a focal point of stress that often leads to seam separation. I see this all the time. A homeowner buys a beautiful laminate floor and then decides to build a 500 pound island right in the middle of it. Now the floor is anchored in that spot. When the rest of the floor tries to move, it pulls against that anchor. The locking mechanisms around the island will eventually fail. The correct way to do this is to install the island first, then float the floor around it, using shims to maintain the gap between the floor and the island legs. You then cover that gap with a decorative molding. This allows the floor to breathe as a single unit without being trapped by the weight of the furniture.
The grout and shower connection
In wet areas like showers, the rules change from expansion gaps to absolute waterproofing and grout integrity. While laminate is great for bedrooms, showers require the TCNA standards for mortar and membrane systems. You cannot put laminate in a shower, obviously. But the principle of subfloor prep remains the same. If the subfloor under a shower pan deflects even a fraction of an inch, the grout will crack. Once the grout cracks, water gets behind the tile. This leads to rot and mold. In my 25 years, I have seen more failed showers due to floor flex than due to bad plumbing. People focus on the tile, but the real work is in the framing and the mud bed. You need a rock-solid foundation. If the floor moves, the grout fails. If the grout fails, the house suffers.