The 5-Minute Wax Fix for Deep Scratches in Your Hardwood
I once walked into a house where a $15,000 wide-plank walnut floor was cupping so bad it looked like a potato chip because the installer didn’t check the crawlspace humidity. That is the kind of failure that keeps me awake at night. You spend a fortune on a high-grade site-finished floor and then you watch it warp because someone forgot a moisture barrier. People obsess over the aesthetic finish of their home. They worry about a tiny scratch from a dog. They ignore the structural integrity of the wood itself. A scratch is a mechanical failure of the protective polyurethane or the wood fibers. Fixing it with wax is not just about hiding a mark. It is about matching the refractive index of the surrounding finish to trick the eye. I have spent twenty-five years on my knees with a moisture meter and a level. I know that a floor is more than just something you walk on. It is a performance surface. It requires maintenance that respects its chemistry.
The 15000 dollar potato chip lesson
Hardwood floor moisture content must stay between 6 and 9 percent in most temperate climates to prevent structural deformation. When you see a scratch, you are seeing a localized rupture in the surface tension of the finish. It is not just a cosmetic issue. It is an opening where moisture can infiltrate the cellular structure of the timber. I remember that walnut job. The homeowners were worried about a chair leg scratch. They should have been worried about the water vapor rising through the subfloor like a slow-moving ghost. Hardwood floors are hygroscopic. They absorb water from the air. If the subfloor is wet, the bottom of the plank expands while the top stays dry. That is how you get cupping. Before you reach for a wax kit, check the stability of the room. A moving floor will just spit out any filler you put into it. Repairing a deep gouge requires a stable substrate. If your floor boards are clicking or shifting, no amount of wax will save you. You have a subfloor problem, not a scratch problem.
“A floor is only as good as the subfloor beneath it; deflection is the enemy of every joint.” – Master Flooring Axiom
Why your subfloor is lying to you
Subfloor levelness requirements dictate that a surface must be flat within 3/16 of an inch over a 10-foot radius to ensure long-term stability. Most guys skip the leveling compound. They think the underlayment will hide the dip. It won’t. I spent three days grinding concrete on a job last month just so the floor wouldn’t click like a castanet. If your subfloor is uneven, the wood planks will flex every time you step on them. This movement creates friction. Friction leads to finish failure. When you apply a wax fix to a moving floor, the mechanical stress will crack the wax bond within weeks. You need to understand the physics of the stack. The concrete or plywood base, the moisture barrier, the adhesive or nail pattern, and finally the wood itself. Every layer must be perfect. If the base is junk, the top will look like junk eventually. Most homeowners think waterproof LVP is the answer to everything. It is not. Even laminate requires a flat base. If you put laminate over a humped subfloor, the locking mechanisms will snap under pressure. I have seen it happen a thousand times. Wood is better but it is also more demanding.
Physics of a deep wood gouge
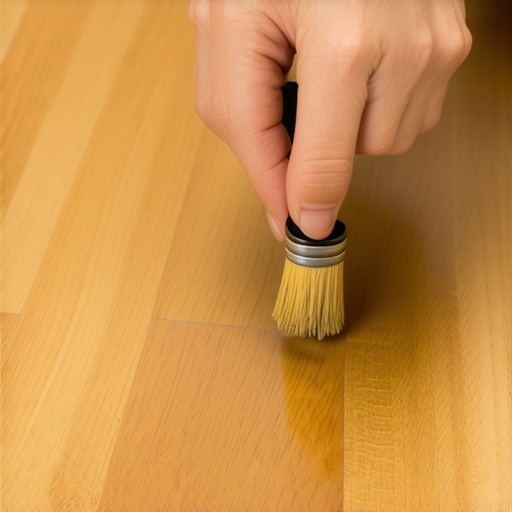
Wood fiber compression occurs when an object harder than the Janka rating of the species impacts the surface. A scratch is a removal of material. A gouge is a displacement of material. When a heavy piece of furniture is dragged across oak, the lignin in the wood cells is crushed. You cannot just sand this out without removing a significant portion of the wear layer. Wax fillers work by occupying the void left by the displaced fibers. The chemistry of the wax is vital. You want a blend of carnauba and paraffin. Carnauba provides the hardness. Paraffin provides the flow. You are essentially performing a low-temperature melt-in repair. The wax must be hard enough to resist foot traffic but flexible enough to move with the natural expansion and contraction of the wood. If you use a wax that is too soft, it will attract dirt. The dirt will act like sandpaper. It will grind away the surrounding finish. This is why cheap wax sticks from the grocery store are a waste of time. You need professional grade burn-in sticks.
| Material Type | Janka Hardness Rating | Typical Repair Method | Acclimation Time |
|---|---|---|---|
| Red Oak | 1290 | Hard Wax or Putty | 7 to 14 Days |
| White Oak | 1360 | Burn-in Stick | 7 to 14 Days |
| Brazilian Cherry | 2350 | Epoxy Resin | 14 to 21 Days |
| Laminate | N/A | Acrylic Filler | 48 Hours |
| Engineered Wood | Varies | Soft Wax | 5 to 7 Days |
Chemical bond of carnauba and paraffin
Hard wax stick composition involves a precise ratio of natural resins and synthetic polymers designed to mimic the density of hardwood. When you heat a wax stick, you are lowering its viscosity to allow it to penetrate the torn wood fibers. This creates a mechanical lock. As the wax cools, it shrinks slightly. You have to overfill the hole. I use a plastic scraper to level the excess. Never use a metal putty knife on a finished floor. You will create more scratches than you fix. The goal is a flush surface. Once the wax is level, you need to buff it. Buffing creates heat. Heat fuses the edges of the wax to the polyurethane finish. This is where the magic happens. If you do it right, the repair becomes invisible. If you do it wrong, you have a dull spot that catches the light. Professional installers often use a touch-up marker to draw the grain back in. You have to look at the wood like an artist looks at a canvas. It has depth. It has color variation. A single color of wax will never look right. You must layer the colors.
Differences between laminate and solid wood repairs
Laminate floor repair kits differ from hardwood kits because laminate is essentially a photograph glued to a fiberboard core. You cannot sand laminate. You cannot melt wax into it the same way because the heat might delaminate the decorative layer. For laminate, you use acrylic-based fillers that air-dry. These fillers do not have the same structural integrity as hard wax. Hardwood floors are different. They are solid. They can take the heat of a burn-in tool. This is why I always tell people to buy real wood if they can afford it. You can repair it forever. Laminate is a disposable product. Once the wear layer is gone, the floor is dead. I have seen people try to use grout to fix laminate. That is a disaster. Grout is for tile showers and backsplashes. It is rigid. It will crack and fall out of a wood floor in days. Use the right tool for the job. Do not be the guy who thinks a tube of caulk is a universal repair kit.
- Assess the depth of the scratch to determine if wax is sufficient.
- Clean the area with mineral spirits to remove old floor wax and oils.
- Select at least three shades of wax sticks to match the grain variance.
- Heat the wax stick or rub it vigorously into the gouge.
- Level the repair with a plastic straight edge.
- Buff the area with a lint-free cloth to match the sheen of the finish.
- Apply a clear coat pen if the area is high-traffic.
The 1/8 inch that ruins everything
Expansion gap requirements are the most ignored rule in flooring installation. Every floor needs room to breathe. If you pin the floor against the walls, it has nowhere to go when the humidity rises. It will buckle. I have seen entire living rooms lift off the subfloor because the installer didn’t leave a 1/2 inch gap at the perimeter. This pressure can cause the wood to splinter. Those splinters look like deep scratches. But they are actually structural fractures. You can put all the wax you want into those cracks, but they will keep coming back. The floor is under stress. It is a ticking time bomb. Before you worry about the five-minute wax fix, look at your baseboards. Do you see a gap? Is the wood tight against the drywall? If it is, you have bigger problems than a scratch. You need to pull those baseboards and cut back the wood. Only then will your repairs hold. A floor is a living thing. Treat it with respect or it will make your life miserable.
“Modern finishes provide the armor, but the wood provides the soul; protect both with equal fervor.” – Master Flooring Axiom
The ghost in the expansion gap
Wood flooring acclimation is the process of letting the material reach equilibrium with its environment. If you skip this, your floor will shrink or grow after it is installed. This movement is what causes those hairline cracks between boards. People call me all the time wanting to fill those gaps with wood putty. I tell them no. Putty is rigid. Wood is dynamic. If you fill a gap in the winter, the wood will expand in the summer and squeeze the putty out like toothpaste. It looks terrible. For those gaps, you need a flexible filament or you just have to live with it. A house is not a static object. It shifts. It settles. The floor is the biggest moving part in your home. If you want a floor that never moves, go buy tile and use epoxy grout in your showers and hallways. But if you want the warmth of oak, you have to accept the movement. The wax fix is for the surface. The soul of the floor is in the subfloor and the environment. Keep your humidity stable and your floor will stay beautiful for a hundred years.