
I once walked into a house where a $15,000 wide-plank walnut floor was cupping so bad it looked like a potato chip because the installer didn’t check the crawlspace humidity levels before he slapped down a site-finish. The homeowner was crying, the contractor was ghosting her, and the wood was literally screaming as the fibers tore against the fasteners. It was a structural failure born of arrogance. Most guys think they can just look at a floor and know what is on it. They are wrong. My hands smell like WD-40 and fresh oak dust because I spent my morning grinding down a 1920s chestnut floor that someone tried to coat with water-based poly over an old wax finish. It was a peeling mess. If you do not know the chemistry of the surface, you are not a floorer, you are a gambler.
The ghost in the expansion gap
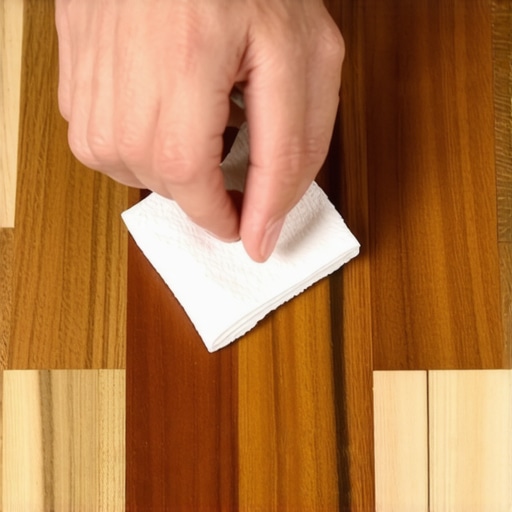
To identify mystery hardwood finishes accurately, you must apply a small amount of 70 percent isopropyl alcohol to an inconspicuous area. If the finish softens or dissolves, it is likely shellac or a lacquer. If it remains unaffected, you are likely dealing with a modern polyurethane or a moisture-cured oil. This simple chemical test prevents the catastrophic failure of new coatings failing to bond to old, incompatible resins. When we talk about expansion gaps, we are talking about the lungs of the house. Wood is hygroscopic. It breathes. It moves. If you seal a floor with the wrong chemical before understanding its history, you are essentially suffocating the material. I have seen entire rooms of white oak buckle because the installer ignored the perimeter gap and used a finish that acted as a glue-bond between planks. This creates a monolithic slab of wood that has nowhere to go when the summer humidity hits. It will buckle. It will fail. There is no middle ground in structural flooring physics.
Why your finish is lying to you
The visual appearance of a hardwood floor finish can be incredibly deceptive because aging oils and ambering resins often mimic the look of modern synthetic topcoats. Identifying the finish requires a chemical probe because the refractive index of old varnish changes over decades of UV exposure. You cannot trust your eyes when thousands of dollars are on the line. I have been on my knees with a moisture meter and a magnifying glass for twenty five years. I have seen 1950s lacquer that looked like high-gloss poly. If you put poly over lacquer without a complete strip, the whole thing will flake off in six months. It is about the molecular bond. New finish needs a mechanical or chemical key to stick. Without it, you are just painting on glass. This is especially true when transitioning from hardwood to areas with tile and grout. People love to run wood right up to a shower curb, but if that finish is not a high-solids moisture-cured urethane, that wood will be black with rot before the year is out.
The 1/8 inch that ruins everything
A floor is only as good as the subfloor beneath it; deflection is the enemy of every joint. – Master Flooring Axiom
Deflection refers to the vertical movement of a floor system under load, and even a 1/8 inch dip can cause the locking mechanisms of laminate or the tongue and groove of hardwood to snap. Subfloor preparation requires grinding high spots and filling low spots with a high-compression cementitious compound. I spent three days grinding concrete on a job last month just so the floor wouldn’t click like a castanet. People think underlayment is a magic carpet that hides sins. It is not. Too much cushion is actually worse. If you put a thick, squishy pad under a click-lock floor, every step you take puts leverage on the plastic joints. Eventually, they fatigue and break. Then you have a floating floor that actually floats away from the baseboards. You need a flat substrate. Not level, flat. There is a massive difference between the two that most weekend warriors do not understand.
The solvent test that saves thousands
Performing a solvent test involves using three distinct chemicals which are rubbing alcohol, lacquer thinner, and mineral spirits to observe the reaction of the floor coating. This hierarchical testing method isolates the chemical family of the finish to ensure that any new maintenance coats will adhere properly. If you take a cotton swab with rubbing alcohol and the finish turns into a goo, you have shellac. If the alcohol does nothing but lacquer thinner melts it, you have a nitrocellulose lacquer. If neither works, but mineral spirits softens it, you are looking at a paste wax. If none of those three solvents do anything, you have a cross-linked polyurethane. This is the gold standard of identification. I see guys skip this and just start sanding. Then their sandpaper gums up in five seconds because the heat of the drum sander melted the wax that they didn’t know was there. Now they have ruined a hundred dollars in ceramic paper and they are cursing the floor when they should be cursing their own laziness.
| Finish Type | Solvent Reaction | Physical Characteristic | Common Era |
|---|---|---|---|
| Paste Wax | Softens with Mineral Spirits | Low sheen, dulls easily | Pre-1940s |
| Shellac | Dissolves in Rubbing Alcohol | Amber tint, brittle | 1920s – 1950s |
| Lacquer | Dissolves in Lacquer Thinner | Very thin, high clarity | 1930s – 1970s |
| Polyurethane | No Reaction to Solvents | Plastic feel, very durable | 1970s – Present |
A chemical war on your subfloor
The interaction between moisture and the chemical finish on your floor determines the lifespan of the wood fibers and the stability of the cellular structure. When moisture vapor rises through a concrete slab, it exerts hydrostatic pressure against the underside of the finish. If that finish is a non-breathable film, the pressure will eventually cause the finish to delaminate or the wood to cup. This is why we use moisture barriers. I have seen guys install beautiful laminate over a slab with no 6-mil poly film. Within two years, the edges of the laminate are peaked because the MDF core sucked up the moisture like a sponge. It is a disaster. You have to think like an engineer. You are managing moisture, friction, and gravity. The finish is just the armor on top of the machine. If the machine is rusted, the armor does not matter.
“Standard subfloor testing for moisture must show a reading within 2 to 4 percent of the hardwood flooring itself before installation can begin.” – National Wood Flooring Association
The friction between laminate and real wood
Laminate flooring is a multi-layer synthetic product fused together with a lamination process that simulates wood, whereas hardwood is a solid or engineered organic material. The primary difference in identification is the repetitive pattern and the sound profile of the surface under impact. If you are unsure if a floor is real wood or a high-end laminate, look for the repeat. Every laminate has a pattern that repeats every few planks. Real wood is like a fingerprint. No two boards are the same. Also, the rubbing alcohol test will not affect the wear layer of a laminate because it is made of aluminum oxide. It is basically a sheet of transparent armor. This makes laminate great for high traffic, but it means you can never refinish it. Once that wear layer is gone, the floor is trash. You cannot sand a photograph. You cannot save a paper core once it gets wet from a leaky shower or a grout failure in the adjacent bathroom.
Floor Finish Identification Checklist
- Vacuum a small corner of the room to remove all abrasive grit.
- Apply a drop of 70 percent isopropyl alcohol to the wood grain.
- Wait exactly 60 seconds for the solvent to penetrate the resin.
- Wipe with a clean white microfiber cloth to check for pigment transfer.
- Test a second spot with mineral spirits to rule out floor wax contamination.
- Check the gloss level under a high-intensity LED flashlight.
Grout lines and hardwood transitions
Transitions between hardwood and tiled areas like showers require a waterproof silicone sealant rather than standard grout to allow for the differential expansion of the two materials. Hardwood expands at a significantly higher rate than ceramic tile and grout. If you butt wood directly against a tile floor and fill the gap with grout, the grout will crack within weeks. The wood will push against the tile and either the grout will crumble or the wood will start to pinch. I always leave a 1/4 inch gap and fill it with a color-matched 100 percent silicone caulk. It stays flexible. It handles the movement. It prevents water from the shower from seeping under the hardwood and ruining the subfloor. It is the small details that separate a master from a hack. The 1/8 inch that you think doesn’t matter is the 1/8 inch that causes the floor to fail.