
I spent twenty five years on my knees with a moisture meter and a level. My hands smell like WD-40 and oak dust even after three scrubs in the sink. I once walked into a house where a $15,000 wide-plank walnut floor was cupping so bad it looked like a potato chip because the installer didn’t check the crawlspace humidity. The homeowner was devastated. They thought the direction of the boards was just about the look. It is not. Hardwood flooring is a structural engineering challenge that happens to look pretty if you do it right. People think they can just pick a direction and start nailing. They are wrong. You have to respect the physics of the house. You have to understand how light bounces off the cellular structure of the wood. Most of all, you have to realize that the subfloor is usually lying to you.
The logic of the longest wall
Hardwood floors should generally run parallel to the longest wall in a room to create the illusion of expansive space. This installation direction minimizes the number of breaks in the visual field and draws the eye forward, which effectively elongates the interior dimensions of any living area. When you align plank flooring with the longest span, you reduce the visual clutter created by the joints between the boards. It creates a sense of flow that short, choppy runs simply cannot match. If you run the boards perpendicular to the long wall, you create a ladder effect. This makes the room feel like a series of hurdles. It shrinks the perceived square footage. I have seen tiny hallways transformed into grand corridors just by flipping the boards ninety degrees. It is about reducing the number of vertical lines that the eye has to process. The brain interprets longer lines as a sign of a larger environment. This is the first rule of floor architecture.
Why light changes the game
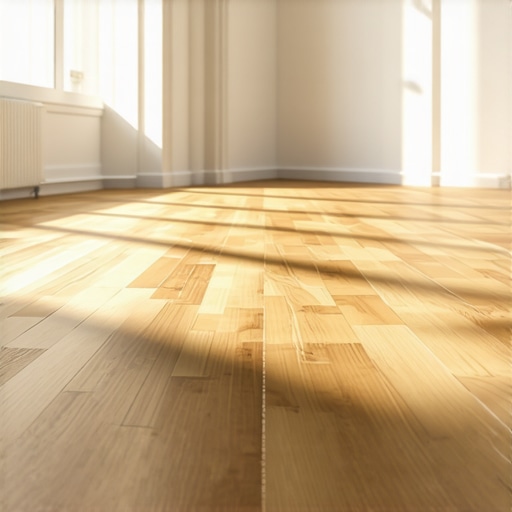
Natural light dictates how the surface texture and wood grain appear to the human eye. Placing hardwood planks parallel to the primary light source, such as a large window or sliding door, helps to hide small imperfections and subfloor peaks. When light hits a floor at a right angle to the boards, it highlights every tiny gap and height variation between planks. It creates shadows. Shadows are the enemy of a clean aesthetic. If the light runs along the length of the board, it smooths out the surface. The light travels down the grain and the joints disappear into the background. This is especially true for site-finished floors where the sanding must be perfect. If you have a room with multiple windows, you have to choose the dominant light source. Usually, that is the one that stays active the longest during the day. Do not ignore the sun. It will expose a bad install faster than any inspector.
“A floor is only as good as the subfloor beneath it; deflection is the enemy of every joint.” – Master Flooring Axiom
The diagonal deviation
Diagonal installation involves laying boards at a 45-degree angle to the walls, which effectively pushes the boundaries of the room outward. This flooring technique breaks the boxy feel of rectangular rooms and provides a unique aesthetic that hides walls that are not perfectly square. It is a trick I use when the framing is a disaster. If the room is out of square by two inches, a straight lay will show a wedge-shaped board at the finish. That looks like amateur hour. A diagonal lay hides that error. It also makes the floor the focal point. It is more expensive because you have more waste. You are looking at fifteen percent waste instead of the usual five to seven. But the result is a room that feels twice as wide. It creates a diamond effect that leads the eye to the corners. Pushing the eye toward the corners is the fastest way to trick the brain into thinking the space is massive. It works every time.
Subfloor physics and joist alignment
Floor joists represent the structural skeleton of your home and dictate the safety of your hardwood installation. To ensure structural integrity, traditional solid hardwood must be installed perpendicular to the joists to prevent the floor from sagging or bouncing over time. If you want to run the boards parallel to the joists for aesthetic reasons, you must reinforce the subfloor. You cannot just nail into three-quarter inch plywood and hope for the best. You need to add another layer of underlayment or block the joists from below. Deflection is the silent killer of floors. It causes the nails to rub against the wood. That is where squeaks come from. It can also cause the finish to crack at the seams. While most people want the thickest underlayment, too much cushion actually causes the locking mechanisms on LVP or laminate to snap under pressure. You want a firm base. You want it flat to within one-eighth of an inch over a ten-foot radius. If it is not flat, grind it down or fill it in.
| Wood Species | Janka Hardness Rating | Stability Coefficient | Recommended Direction |
|---|---|---|---|
| White Oak | 1360 | .00365 | Parallel to long wall |
| Brazilian Cherry | 2350 | .00300 | Parallel to light |
| Black Walnut | 1010 | .00190 | Diagonal |
| Maple | 1450 | .00462 | Perpendicular to joists |
Transitions and the grout line problem
Transition strips are necessary when moving between hardwood floors and wet areas like showers or tiled kitchens. The alignment of your grout lines in the bathroom should ideally complement the direction of the wood planks to avoid a chaotic visual clash at the doorway. When wood meets tile, the eye looks for a reason. If the wood is running north-south and the tile grout is running east-west, it creates a hard stop. It feels like a barrier. If you can align the wood so it flows into the tile, the transition feels intentional. It feels like one large space. Use a low-profile reducer or a T-molding that matches the wood species. Avoid those bulky transition pieces from the big-box stores. They look cheap. They are trip hazards. A real pro will undercut the stone or tile and slide the wood underneath for a flush look. That is how you win the game of lines. It requires a steady hand and a high-quality oscillating saw.
The expansion gap reality
Expansion gaps are the mandatory spaces left around the perimeter of a room to allow for the natural movement of wood during seasonal humidity changes. Without these perimeter gaps, the wood will have nowhere to go when it expands in the summer, leading to buckling or crowning. Wood is hygroscopic. It is a sponge. It takes in moisture and it gets bigger across the grain. It does not get much longer, but it gets wider. This is the chemistry of the cell wall. If you pin the floor against the drywall, it will move the wall or it will lift off the subfloor. I leave a half-inch gap everywhere. I cover it with baseboard and shoe molding. Do not ever caulk that gap. Do not fill it with grout. It needs to breathe. If the floor cannot breathe, it will die. This is why acclimation is the most important step. You have to let the wood sit in the house for at least a week. I do not care what the box says. Buy a moisture meter. Test the wood. Test the subfloor. They should be within two percent of each other before you hit the first nail.
- Check the moisture content of the subfloor and the hardwood planks.
- Ensure the subfloor is flat within 1/8 inch over 10 feet.
- Identify the longest wall and the primary light source.
- Verify the direction of the floor joists in the crawlspace or basement.
- Clean all debris and dust to ensure a proper bond for adhesives.
- Undercut door casings to allow for expansion and a clean look.
“Wood flooring is a living product; it responds to the environment just like the tree it came from.” – NWFA Technical Manual
The 1/8 inch that ruins everything
Leveling compounds are the only way to fix a concrete slab that is out of spec before laying engineered hardwood. If you ignore a subfloor dip of just one-eighth of an inch, the floor will feel hollow when you walk on it. It will click. It will pop. It will eventually fail. I have spent three days grinding concrete on a job last month just so the floor wouldn’t click like a castanet. Most guys skip the leveling compound. They think the underlayment will hide the dip. It won’t. The adhesive needs a flat surface to grab onto. If there is a void, the board will flex. That flex breaks the glue bond. Then you have a loose board. Fixing a loose board in the middle of a room is a nightmare. You have to cut it out with a circular saw and hope you don’t hit a nail. Do the prep work. Spend the money on self-leveler. It is cheaper than a callback. A flat floor is a quiet floor. A quiet floor is a high-end floor.
The ghost in the expansion gap
Baseboard installation must be done carefully to ensure that you do not nail through the hardwood floor and lock it in place. This mechanical fastening error prevents the wood from sliding underneath the trim, which effectively kills the expansion gap you worked so hard to create. If you nail the baseboard into the floor, the wood will pull the trim off the wall when it shrinks in the winter. Or it will buckle in the summer. Always nail the baseboard into the wall studs. Leave the floor free to move. This is the ghost in the gap. It is a hidden force that can ruin a perfect install. I use a spacer during the install to keep the gap consistent. When I pull the spacers, I feel like the floor is finally alive. It is a system. Every part of the system has to work. From the chemical bond of the modified thin-set in the adjacent bathroom to the mil-thickness of the wear layer on your planks. It all matters. Don’t be the guy who thinks direction is just about the view. It is about the life of the home.