
The subfloor secret that kills most renovations
The best tile pattern for a small walk-in shower is a straight grid of two-inch mosaics or a diagonal herringbone layout using four-by-twelve subway tiles. These configurations maximize slip resistance, accommodate the necessary slope for drainage, and create a visual illusion of expanded square footage in cramped environments. I spent three days grinding concrete on a job last month just so the floor wouldn’t click like a castanet. Most guys skip the leveling compound. They think the underlayment will hide the dip. It won’t. If you don’t get the substrate within an eighth of an inch over ten feet, your tile pattern is irrelevant because the lippage will trip you every morning. In a small shower, every fraction of a degree in the slope matters. If you are dealing with a center drain, you are fighting the laws of physics. You need a tile that can follow the contour of a four-way pitch without requiring ugly diagonal cuts that break the visual flow. This is why the industry relies on small format mosaics. They are the only material that behaves like a fabric over the topography of a shower pan. If you try to force a large twelve by twenty-four inch porcelain tile into a small shower with a center drain, you are going to end up with an envelope cut. That means four jagged lines running from the corners to the drain. It looks like a cracked windshield.
The ghost in the expansion gap
Expansion gaps are the silent protectors of your tile installation because they allow for the natural movement of the structure without cracking the grout or the tile. In small showers, the perimeter gap must be filled with a high-quality hundred percent silicone sealant rather than hard grout to maintain water integrity. Most homeowners think grout is waterproof. It is not. Grout is a filter. Water goes through it and hits your membrane. If you do not have a proper slope or a high-quality thin-set, that water sits and rots your studs. We see this often when people try to install laminate or hardwood floors right up to the edge of a wet room. Those materials have no business near a shower. Wood is a sponge. Laminate is basically compressed cardboard with a picture of wood on top. If you want a wood look in your shower, you go with porcelain planks and you lay them in a third-offset pattern. Do not do a fifty percent offset because tiles are often slightly bowed from the kiln. If you hit the high point of one tile against the low point of another, you get a toe-stubbing lip that ruins the entire aesthetic.
“A floor is only as good as the subfloor beneath it; deflection is the enemy of every joint.” – Master Flooring Axiom
Why your subfloor is lying to you
Your subfloor may appear flat but usually contains structural deflection that can cause grout joints to fail and tiles to pop under the stress of daily use. For a small walk-in shower, the joist spacing and subfloor thickness must meet the L over three-sixty standard for ceramic and L over seven-twenty for natural stone. I have seen guys try to lay heavy marble in a tiny bathroom with sixteen inch on-center joists and no extra bracing. Within six months, the grout is powder. If you are doing a small shower, you are better off with a stack-bond pattern or a vertical subway tile. This draws the eye upward and makes the ceiling feel higher. It is a simple trick of the trade. But you have to be careful with the adhesive. You cannot just use any bag of mud you find at the big box store. You need a polymer-modified thin-set that can handle the thermal expansion of hot water hitting cold tile. The chemistry of the bond is what determines if that tile stays on the wall for twenty years or falls off in five.
The failure of the traditional offset
Traditional fifty percent offset patterns often highlight the inherent bowing in modern large-format tiles, leading to significant lippage issues in small shower spaces. Using a thirty-three percent offset or a straight stack-bond configuration is the superior engineering choice to ensure a flat and durable walking surface. I remember a job where the client insisted on a classic brick pattern with oversized tiles. The shadow lines were so bad it looked like a staircase. We had to tear it out and start over. In a small shower, you do not have the distance to hide mistakes. Every cut is right there in your face. If you want to use a herringbone pattern, you have to accept that you will have thirty percent waste. You are cutting every single tile at the perimeter. It is a math nightmare, but the structural benefit is that it locks the floor together in a way that resists movement better than a standard grid.
The chemistry of the grout joint
Grout is the structural buffer between tiles that absorbs stress and prevents the edges from chipping while also providing the primary friction point for foot traffic in a wet environment. Choosing a high-performance epoxy or a single-component grout is mandatory for small showers to prevent staining and water penetration into the mortar bed. The old-school cement grout is a headache. It is porous and it grows mold if you even look at it wrong. In a small shower, the concentration of soap scum and body oils is higher per square inch. You need a grout that is non-porous. Epoxy is the gold standard, though it is a pain to work with because it gets sticky and you only have a short window to clean it off. If you miss that window, you are essentially trying to scrub plastic off your tile with a sponge. It is a nightmare.
Technical comparison of shower flooring materials
| Material Type | Janka Hardness | Moisture Absorption | Optimal Pattern |
|---|---|---|---|
| Porcelain Tile | 7.0+ (MOHS) | Less than 0.5% | Stack Bond |
| Ceramic Tile | 5.0-6.0 (MOHS) | 3.0% to 7.0% | Offset Grid |
| Natural Marble | 3.0-4.0 (MOHS) | 0.5% to 2.0% | Herringbone |
| Slate Stone | 5.5+ (MOHS) | 1.0% to 3.0% | Modular |
The 1/8 inch that ruins everything
Maintaining a consistent one-eighth inch grout joint is the technical requirement for a stable shower floor that provides enough grip for safety without becoming a maintenance burden for the homeowner. Precision spacers and leveling systems are the only way to achieve this level of accuracy in a small, sloped environment. People ask me why their shower looks messy. It is usually because they used different sized spacers or they tried to eye it. You cannot eye a shower floor. Gravity is unforgiving. If your lines are not straight, the water will pool in the low spots and you will have a permanent puddle. This is especially true with vertical patterns. If you are off by a hair at the bottom, you will be off by an inch by the time you reach the ceiling.
“Movement joints are not an option; they are a structural necessity in every wet environment to accommodate thermal expansion.” – TCNA Handbook Standards
Checklist for a high-performance shower installation
- Verify subfloor deflection meets L/360 requirements
- Check concrete slab moisture levels with a calcium chloride test
- Install a waterproof membrane like Schluter-Kerdi or Wedi
- Select a tile with a Dynamic Coefficient of Friction (DCOF) above 0.42
- Use polymer-modified thin-set meeting ANSI A118.15 standards
- Maintain a consistent slope of 1/4 inch per foot toward the drain
- Apply color-matched silicone to all change-of-plane joints
The danger of large format porcelain
Large format tiles in a small shower create a hazardous environment because they lack the necessary grout density to provide adequate slip resistance on a wet surface. The physical structure of a small shower requires frequent grout lines to act as a mechanical grip for the foot, making mosaics the safest choice. I see people putting these huge slabs in their showers because they want that seamless look. It is a death trap. Without those grout lines, your foot has nothing to grab onto when the soap hits the floor. It is like ice skating. Beyond the safety aspect, you have the issue of the drain. Unless you are using a linear drain at the back of the shower, a large tile simply cannot wrap around a standard center drain. You will end up with a mess of cuts that ruin the integrity of the waterproofing.
Water management beneath the surface
Effective water management in a small shower relies on a secondary drainage system that allows moisture to escape the mortar bed through weep holes in the drain assembly. If the tile pattern blocks these drainage paths or if the thin-set is applied incorrectly, the shower will develop a foul odor and structural rot over time. I have ripped out showers where the mud bed was a black, slimy mess because the guy didn’t put pebbles around the weep holes. It doesn’t matter how pretty your tile pattern is if the system underneath is failing. You need a professional who understands that the tile is just the decorative layer. The real work is in the slope, the membrane, and the chemical bond of the adhesive.
The vertical expansion trick
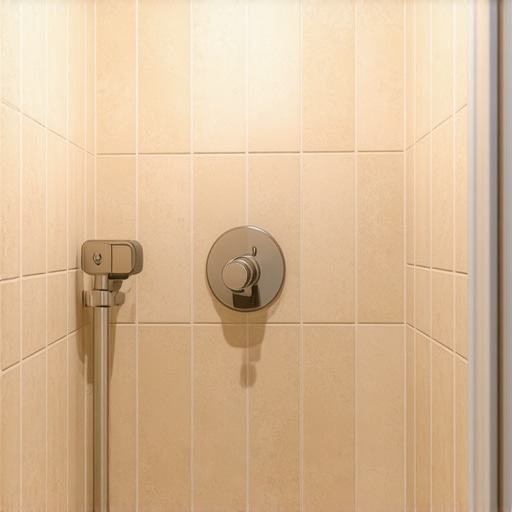
Installing subway tiles in a vertical stack-bond pattern creates a visual stretching effect that makes a small walk-in shower feel significantly more spacious and modern. This pattern also simplifies the installation process around niches and benches by reducing the number of complex cuts required at the corners. If you have a shower that is only three by three, you need to use every trick in the book. Vertical lines lead the eye up toward the light. It breaks the boxy feeling of a small stall. But you have to be precise. Vertical stacks show every mistake. If your wall isn’t plumb, that vertical line will slowly drift until it looks like the Leaning Tower of Pisa. I spend more time with a level and a laser than I do with a tile saw. That is the secret to a high-end finish. It is not the tile. It is the math.
The friction of the matter
Slip resistance in a shower is measured by the Dynamic Coefficient of Friction, and the tile pattern plays a direct role in this safety metric by increasing the frequency of grout joints. A herringbone or mosaic pattern provides significantly higher traction than a large-format straight-lay pattern due to the physical texture of the floor. When you are designing a small shower, you are working with limited real estate. You cannot afford to have a slippery floor. I always recommend a tile that has a bit of tooth to it. Something with a matte finish or a slight texture. Avoid anything high-gloss for the floor. It looks great in the showroom, but once it gets wet, it is a liability.
Final inspection of the structural system
The success of a small walk-in shower is determined by the synergy between the tile pattern, the subfloor preparation, and the chemical properties of the setting materials. A well-executed installation will last for decades, while a poorly planned one will show signs of failure within the first year of use. Do not cut corners. Do not buy the cheapest thin-set. And for the love of everything, do not let anyone put wood or laminate anywhere near your shower. Stick to porcelain, use a high-quality membrane, and pick a pattern that respects the physics of the drain. If you do those things, you will have a shower that looks good and stays dry for a long time.