
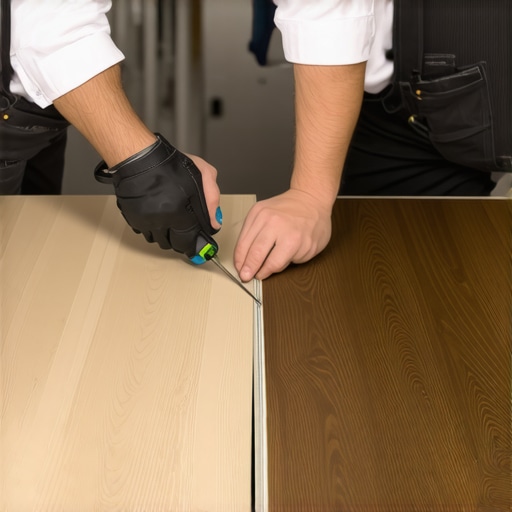
I have spent twenty-five years on my knees. My hands smell like a mixture of WD-40, oak sawdust, and the chemical tang of floor wax. When I walk onto a job site, I do not see a room. I see a structural challenge. I see a subfloor that is probably lying to me. Homeowners often believe that luxury vinyl plank or laminate is a simple weekend project. They think it is a sticker they can just slap down. They are wrong. Homeowners always ask why their ‘waterproof’ vinyl is buckling. Usually, it is because they locked it under a heavy kitchen island, killing the floor’s ability to breathe. I once walked into a house where a five thousand dollar vinyl installation was failing because the installer used a dull utility knife and jagged the edges so badly the locking mechanisms could not engage. The floor clicked like a castanet every time someone walked across the room. It was a disaster born of laziness and a lack of respect for the materials.
The physics of the score and snap
Cutting luxury vinyl plank requires an understanding of polymer density and the brittle nature of stone plastic composite cores. To achieve a clean break, you must score through the wear layer and the decorative film with a single, heavy-handed stroke. This prevents the delamination of the top layers during the snapping process. When you take your utility blade to a piece of SPC, you are fighting against a core made of calcium carbonate and stabilizers. This is not soft plastic. It is a rigid, dense material designed to withstand immense PSI. If you do not score deep enough, the core will shatter along its natural crystalline structure rather than following your line. I always tell my apprentices that the blade is just a guide for the physics of the snap. You are creating a stress fracture. If that line is not straight and deep, the fracture will wander. This is why your joints look like they were chewed by a dog. You need a fresh blade every fifty square feet. If you are still using the same edge you used to open the boxes, you have already failed the floor.
The sawdust reality of laminate cores
Laminate flooring behaves entirely differently because its heart is high-density fiberboard made of compressed wood fibers and resin. You cannot score and snap a laminate plank without destroying the structural integrity of the click-lock system. You must use a saw with a high tooth count to manage the heat and friction. The HDF core is thirsty. If you use a dull blade, you generate heat. That heat can actually scorch the melamine wear layer, leaving a dark, ugly edge that no T-molding can hide. I prefer a miter saw with a 60-tooth or 80-tooth carbide blade. The goal is to minimize the kerf while maximizing the speed of the cut. If the blade spins too slowly, it grabs the wood fibers and tears them out. If it spins too fast and the blade is dull, it melts the resin. You want that sweet spot where the sawdust is fine but not scorched. I have seen guys try to use a jigsaw for straight cuts. It is a fool’s errand. The blade deflects, the cut wanders, and suddenly your expansion gap is an inch wide in one spot and touching the drywall in another. In a humid environment, that laminate is going to swell. If it hits that drywall, the whole floor will peak like a mountain range.
“A floor is only as good as the subfloor beneath it; deflection is the enemy of every joint.” – Master Flooring Axiom
The 1/8 inch that ruins everything
Subfloor preparation is the invisible labor that determines if your cuts will actually matter once the floor is installed. If your concrete slab has a dip greater than one-eighth of an inch over a ten-foot radius, your luxury vinyl locking systems will eventually snap. The physics of weight distribution will force the joint to flex until it fails. I spent three days grinding concrete on a job last month just so the floor would not bounce. Most installers skip this. They think the underlayment will hide the dip. It will not. Underlayment is for sound dampening and moisture protection, not for structural leveling. If you put a click-lock floor over a valley, every step causes the tongue to rub against the groove. This creates friction. Friction creates heat and wear. Eventually, the tongue shears off. Now you have a floating plank that is actually floating away from its neighbor. You can have the cleanest cuts in the world, but if the subfloor is a roller coaster, your floor is trash. I always use a ten-foot straight edge. If I can slide a nickel under it, I have work to do. Either the high spots come down with a diamond cup wheel or the low spots get filled with a high-compression self-leveler.
| Feature | Luxury Vinyl (SPC/WPC) | Laminate (HDF) |
|---|---|---|
| Core Material | Limestone/PVC Composite | High-Density Fiberboard |
| Primary Tool | Utility Knife / Vinyl Cutter | Miter Saw / Table Saw |
| Dust Level | Minimal (Scrap only) | High (Fine Sawdust) |
| Edge Quality | Smooth (if scored deep) | Prone to Chipping |
| Acclimation Time | 0 to 48 Hours | 48 to 72 Hours |
The ghost in the expansion gap
Expansion gaps are not optional suggestions made by manufacturers to annoy you. They are the breathing room required for the thermodynamic expansion of the floor. Vinyl expands and contracts based on temperature while laminate reacts primarily to changes in relative humidity. In a place with high humidity, like a coastal town, your laminate floor is a living thing. It wants to grow. If you cut your planks too tight against the baseboards or the door jambs, the floor has nowhere to go but up. I have seen floors lift six inches off the subfloor because the installer did not leave a quarter-inch gap. They thought it looked better tight. It looked great for a week. Then the first rainstorm hit. The humidity spiked. The floor grew. The floor died. When cutting around door casings, you must undercut the jamb. Do not try to cut the flooring to fit around the wood. Cut the wood so the flooring can slide underneath it. This allows the floor to move freely while maintaining the aesthetic of a professional finish. It is a simple step that separates the mechanics from the hacks.
Tools of the master installer
- Tungsten carbide utility blades for all vinyl scoring
- A professional-grade vinyl guillotine for repetitive end cuts
- A miter saw with a 10-inch or 12-inch 80-tooth carbide-tipped blade
- An undercut saw for door jambs and casings
- A tapping block and pull bar that will not mar the wear layer
- A moisture meter to verify the subfloor is within NWFA specs
- A 10-foot aluminum straight edge for flatness verification
“The integrity of a floating floor is maintained by the perimeter expansion space and the flatness of the substrate.” – Master Flooring Axiom
Why your subfloor is lying to you
The moisture content of a concrete slab or a plywood subfloor is the most common point of failure for both laminate and vinyl. Even if the surface feels dry to the touch, the hydrostatic pressure within a slab can push moisture upward. This vapor can emulsify adhesives or cause the HDF core of laminate to rot. You must use a calcium chloride test or an in-situ RH probe. If you are installing over a crawlspace, you need a 6-mil poly vapor barrier. I do not care if the vinyl is ‘waterproof.’ The vinyl might survive the water, but the space between the vinyl and the subfloor will become a breeding ground for mold and mildew. That smell will never leave the house. When I cut my planks, I am also thinking about the layout to ensure I do not end up with a tiny sliver of a plank at the far wall. A sliver has no mass. It has no structural strength. If your final row is less than two inches wide, you should have ripped your first row down to balance the room. This is the difference between a floor that lasts thirty years and a floor that lasts three.
The anatomy of a clean transition
Transitions are the points where the physics of two different rooms collide. You cannot simply butt a laminate floor up against a tile shower. The expansion rates are too different. You must use a proper T-molding or a Reducer that allows each surface to move independently. I despise bulky T-moldings as much as the next guy, but they serve a vital purpose. They hide the half-inch gap that prevents your floor from buckling. When you are cutting the transition pieces, precision is everything. You are working with thin, often brittle aluminum or wrapped MDF. One wrong move with the miter saw and the piece shatters. I always back the transition with a scrap piece of wood to prevent the saw blade from vibrating the material. This ensures a crisp, factory-like edge. For showers and wet areas, I use a high-quality 100 percent silicone caulk in the expansion gap rather than a hard transition if the manufacturer allows it. This provides a flexible, waterproof seal that still permits the floor to shift as the seasons change. The goal is a floor that looks like it grew there, not one that was forced into place. This is the craft. This is the standard I live by.