The concrete grinding nightmare that taught me everything
Most guys skip the leveling compound. They think the underlayment will hide the dip. It won’t. I spent three days grinding concrete on a job last month just so the floor wouldn’t click like a castanet. The dust was everywhere. It filled my lungs and coated the walls despite the HEPA vacuum. But that slab was flat to within one sixteenth of an inch. That is the difference between a floor that lasts thirty years and one that fails in three. I have been on my knees for twenty five years. I have seen every shortcut in the book. If you think a thin sheet of foam is going to compensate for a half inch valley in your subfloor, you are dreaming. Precision is the only currency that matters in this trade. When we talk about laminate transitions, we are talking about the intersection of physics and chemistry. It is not just about a pretty piece of plastic. It is about managing the kinetic energy of a floating floor system as it expands and contracts through the seasons.
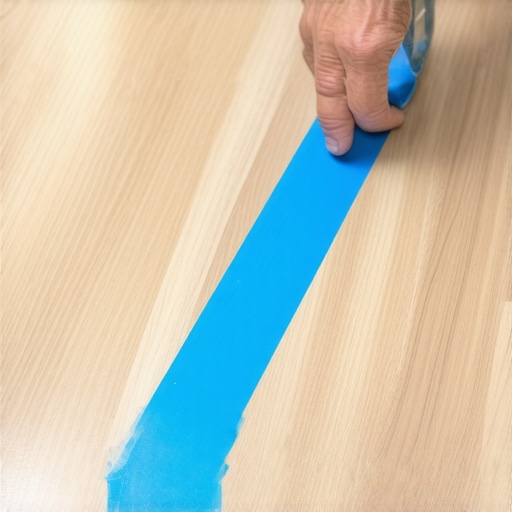
The blue tape trick that saves transition molding
Blue painter’s tape is the secret weapon for securing laminate transitions because it provides temporary structural tension without leaving adhesive residue on the AC4 wear layer. By applying three inch strips across the T-molding and onto the planks, you prevent the transition from shifting while the construction adhesive undergoes its chemical curing process. This ensures a tight fit against the subfloor and prevents the common gap that swallows dirt and moisture. You must use a high quality multi surface tape. Cheap tape will fail. It will stretch. It will leave a film that ruins the finish. I use the blue stuff to lock the first three rows of any laminate install. It stops the entire assembly from sliding as you tap the subsequent rows into place. This is the difference between a square room and a geometric disaster.
“A floor is only as good as the subfloor beneath it; deflection is the enemy of every joint.” – Master Flooring Axiom
The physics of the floating floor expansion gap
A floating floor moves as a single unit and requires a mandatory perimeter expansion gap of at least one quarter inch to prevent buckling and peaked joints. Laminate is essentially a high density fiberboard core wrapped in a photograph and dipped in resin. That core is hygroscopic. It drinks humidity. When the air gets heavy in the summer, those planks grow. If they hit a wall or a heavy kitchen island, they have nowhere to go but up. I have seen floors tent three inches off the ground because an installer forgot to leave space at the door casing. You cannot pin a floating floor down. If you put a heavy cabinet on top of it, you have effectively anchored it. That is a death sentence for the locking mechanisms. The blue tape hack helps you maintain these gaps during the critical early stages of the layout.
Why your subfloor is lying to you
Subfloor flatness is measured by a ten foot straightedge and must not exceed a deviation of three sixteenths of an inch over a ten foot radius. Do not trust your eyes. Your eyes are liars. You need a long level or a laser. If you find a hump, you grind it. If you find a dip, you fill it with a high compressive strength portland cement based leveler. I have seen guys try to use layers of roofing felt to shim up laminate. It is a hack move. It creates soft spots. Every time you walk over that spot, the tongue and groove joint flexes. Eventually, that thin piece of HDF snaps. Then you have a clicking sound that will drive you insane every time you walk to the kitchen. You want a floor that feels like a rock. That starts with the slab.
| Material Property | Laminate (AC4) | Solid White Oak | Engineered Wood |
|---|---|---|---|
| Janka Hardness | N/A (Wear Layer) | 1360 lbf | 1200 to 1400 lbf |
| Expansion Rate | Moderate | High | Low |
| Moisture Resistance | Surface Only | Low | Moderate |
| Acclimation Time | 48 Hours | 7 to 14 Days | 3 to 5 Days |
The chemistry of adhesives and moisture barriers
Moisture vapor transmission rates must be verified using a calcium chloride test or a relative humidity probe before any laminate is installed over concrete. Concrete is a sponge. Even if it looks dry, it is breathing water vapor. If you don’t use a six mil poly film vapor barrier, that moisture will hit the bottom of your laminate and swell the core. The blue tape hack is often used when gluing the T-molding track to the slab. You need a modified silane polymer adhesive. These adhesives stay flexible. They don’t get brittle. If the adhesive gets brittle, the vibrations of footsteps will eventually break the bond. You need something that can handle the micro movements of the house. I always look for a high shear strength rating. If the tube doesn’t list the PSI, I don’t buy it.
Managing the wet zone near showers and grout
Laminate floors near showers require a perimeter seal of one hundred percent silicone caulk within the expansion gap to prevent water infiltration into the HDF core. This is where most DIY jobs fail. They run the laminate right up to the tile or the tub and leave it open. Water from the shower hits the floor, travels under the baseboard, and gets sucked into the edge of the plank. Once that core swells, it never goes back down. You get what we call mushrooming. It looks terrible. I use blue tape to mask off the edge of the laminate and the edge of the tub. Then I run a bead of silicone. I tool it flat and pull the tape immediately. This creates a clean, waterproof gasket that allows the floor to move but keeps the water out. It is a professional finish that takes five minutes and saves a thousand dollars.
“Deflection in the subfloor shall not exceed L over 360 for tile installations and similar standards for rigid laminates.” – TCNA Technical Handbook
The checklist for a floor that does not move
- Check moisture levels in the subfloor with a pinless meter.
- Grind all high spots and fill low spots with self leveling underlayment.
- Acclimate the planks in the room for at least forty eight hours at living conditions.
- Install a six mil vapor barrier with overlapped and taped seams.
- Use blue painter’s tape to secure the first three rows and all transition moldings.
- Leave a minimum one quarter inch expansion gap around all vertical obstructions.
- Seal all potential wet areas with high grade silicone caulk.
The ghost in the expansion gap
Hidden structural obstacles like door jambs and radiator pipes are the most common points of failure for floating floor systems. You have to undercut your door casings. Don’t try to cut the laminate around the trim. It looks like garbage. Use an oscillating saw and a scrap piece of flooring to get the height perfect. Slide the plank under the casing. This allows the floor to move freely. If you trap the floor at the doorway, it will buckle in the center of the room. I have seen it happen a hundred times. People think the floor is haunted because it creaks at night. It is not a ghost. It is the sound of HDF planks rubbing against each other because they are under too much tension. The blue tape hack is vital here to keep those small cut pieces from shifting while the glue in the tongue and groove sets up. Precision is not optional. It is mandatory.
The truth about underlayment density
High density underlayment with a high IIC rating provides superior sound dampening and prevents the locking mechanisms from snapping under heavy loads. Many homeowners want the thickest, softest foam they can find. They think it will feel like carpet. This is a massive mistake. Too much cushion allows the floor to deflect too much. When you step on a joint, the planks sink. This puts immense stress on the plastic or HDF locking lip. Eventually, it shears off. You want a high density rubber or a cross linked polyolefin foam. These materials are thin but incredibly strong. They provide a solid base. They also have better thermal properties for those who have radiant heat systems. A floor that feels firm is a floor that was installed correctly.
Why I hate big box discount flooring
Cheap laminate often features inferior milling tolerances and a low density core that cannot withstand standard humidity fluctuations. I see these pallets at the discount warehouses for ninety nine cents a square foot. It is junk. The tongues are brittle. The photograph layer is thin. If you drop a fork, it chips. I tell my clients that if they want a floor that lasts, they need to look at the AC rating. AC4 is the sweet spot for residential. It is tough enough for dogs and kids but doesn’t feel like sandpaper. Also, look at the locking system. Uniclic or Valinge patents are the industry standard for a reason. They actually work. The knock off systems will gap within six months. You get what you pay for in this business. There are no shortcuts to quality. Using the blue tape hack on a cheap floor is like putting racing tires on a broken down truck. It doesn’t matter how well you tape it if the material itself is garbage.
{“@context”:”https://schema.org”,”@type”:”Article”,”headline”:”The Blue Tape Hack for Perfect Laminate Transitions”,”author”:{“@type”:”Person”,”name”:”Master Floor Architect”},”description”:”A deep dive into the technical aspects of laminate flooring installation, focusing on subfloor preparation, moisture management, and the blue tape transition hack.”,”articleSection”:”Flooring Engineering”}