The subfloor secret to a lasting shower installation
Most guys skip the leveling compound. They think the underlayment will hide the dip. It won’t. I spent three days grinding concrete on a job last month just so the floor wouldn’t click like a castanet. This same logic applies to your shower. If your substrate is not perfectly plumb and flat, no amount of blue tape or expensive grout will save you from a disaster. You are building a structural system, not just a pretty wall. When we talk about grout lines and shower waterproofing, we are talking about the integrity of your home. A single crack in a grout joint is a highway for moisture to reach your 2×4 studs. Once that water gets back there, it stays. It rots. It grows things you do not want in your house. Professional results come from understanding the chemistry of your materials and the physics of your tools.
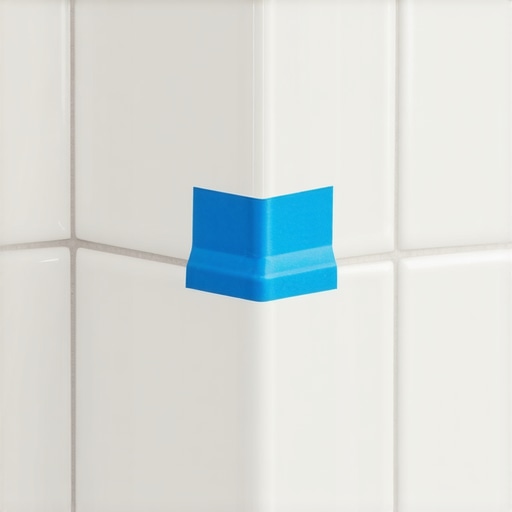
The physics of the blue tape application
The blue tape trick is a precision method used to create razor-sharp grout lines by masking the tile edges before any material is applied. This prevents the grout from staining the surface of the tile and ensures that the joint is filled to the exact depth required without messy overspread. To win the battle against grout haze, you must apply the tape exactly to the edge of the tile without overlapping into the joint space. If the tape enters the joint, you will create a void in the grout where water will eventually collect. This technique is particularly effective for hardwood floors look-alike porcelain or laminate style tiles that have deep textures where grout usually gets trapped. It requires a steady hand and a high-quality low-tack painter’s tape that will not leave adhesive residue on the ceramic or stone surface.
“A floor is only as good as the subfloor beneath it; deflection is the enemy of every joint.” – Master Flooring Axiom
Chemical differences between sanded and unsanded grout
Selecting the right grout involves analyzing the width of the joint and the chemical composition of the mixture to ensure long-term stability. Sanded grout contains fine silica sand that acts as a structural filler, preventing the grout from shrinking as it cures in joints wider than 1/8 inch. Unsanded grout is a smoother, polymer-modified cement used for narrow joints, typically 1/16 to 1/8 inch, where the sand would be too bulky to penetrate the gap. If you use the wrong one, the grout will either crack due to shrinkage or fail to bond properly to the tile edges. Modern high-performance grouts often use epoxy resins or advanced polymers that resist staining and water penetration much better than traditional cement-based products. These materials have a faster set time, meaning you have to work in smaller sections to maintain control over the finish.
| Grout Type | Ideal Joint Width | Water Resistance | Primary Benefit |
|---|---|---|---|
| Sanded Grout | 1/8 inch to 1/2 inch | Moderate | Prevents Shrinkage |
| Unsanded Grout | Less than 1/8 inch | Moderate | Smooth Finish |
| Epoxy Grout | Any width | High | Stain Proof |
| High-Performance Cement | 1/16 to 1/2 inch | High | Color Consistency |
Environmental factors in the curing phase
The curing process of grout is a chemical reaction known as hydration, where the cement particles form a crystalline structure that locks everything together. In dry climates like Phoenix, the water in the grout can evaporate too quickly, leading to a weak, powdery joint that will fail under stress. Conversely, in the humid environments of Houston or Miami, the excess moisture in the air can slow down the drying time significantly, which might lead to color shading or efflorescence. You must monitor the ambient temperature and humidity of the room before you begin the application. Professional installers often use a fine mist of water to keep the joints hydrated during the first 24 hours of curing if the air is too dry. This ensures that the chemical bond reaches its maximum tensile strength, providing a surface that can withstand the thermal expansion and contraction of the shower walls.
Why your subfloor determines your grout longevity
A floor is not a static object, it is a moving assembly that responds to weight, vibration, and moisture. Hardwood floors and laminate systems are designed to float or expand, but tile and grout are rigid. If the subfloor has too much deflection, meaning it flexes when you step on it, the grout will inevitably crack. This is why we use cement backer boards or uncoupling membranes like Schluter-Ditra. These products create a buffer between the moving subfloor and the brittle tile. If you skip this step, no amount of blue tape will keep your lines sharp. The movement will telegraph through the tile and snap the grout bonds. I always check the joist spacing and subfloor thickness before I even think about opening a bag of thin-set. If the house was built with 16-inch centers and a single layer of 5/8 inch plywood, you are asking for trouble.
- Verify the subfloor is within L/360 deflection standards.
- Clean all dust and debris from the tile joints using a vacuum.
- Apply blue tape exactly to the edge of the tile without overhang.
- Mix grout to a peanut butter consistency, avoiding excess water.
- Force grout into the joints at a 45-degree angle with a rubber float.
- Remove the tape while the grout is still slightly thumbprint hard.
The chemistry of the bond in modified thin-set
The adhesive used to stick the tile to the wall is just as important as the grout used to fill the gaps. Polymer-modified thin-set mortars contain powdered resins that increase the flexural strength and adhesion of the bond. When the water is added, these polymers re-emulsify and create a bridge between the substrate and the tile. This is vital in a shower where the constant change in temperature from hot water to cold air creates thermal shock. Without those polymers, the tile would eventually pop off the wall. I see this all the time in older homes where they used plain mastic in wet areas. Mastic is basically organic glue, and it turns back into mush when it gets wet. You must use a cement-based thin-set that meets or exceeds ANSI A118.4 standards for any shower project.
“Grout is the most vulnerable part of a tile assembly; precision in mixing and application is the only defense against moisture migration.” – TCNA Handbook Standards
Structural integrity beyond the surface
While most people want the thickest underlayment, too much cushion actually causes the locking mechanisms on LVP to snap under pressure. In a tile shower, the equivalent mistake is using too much thin-set or not enough. You need 95 percent coverage on the back of the tile in a wet area. I always back-butter every single piece of tile. This means I rub a thin layer of mortar onto the back of the tile before I set it into the combed ridges on the wall. This ensures there are no air pockets where water can collect. If water gets behind the tile, it will eventually push the grout out from the back side, a phenomenon that many homeowners mistake for a grout quality issue when it is actually an installation failure. Sharp grout lines are the result of a perfectly flat, perfectly bonded tile array. The blue tape is just the final touch on a deep engineering process.