
The Blue Tape Trick for Perfect Hardwood Layouts
I once walked into a house where a $15,000 wide-plank walnut floor was cupping so bad it looked like a potato chip because the installer didn’t check the crawlspace humidity. It was a tragedy of engineering. Most people look at a floor and see a color or a texture. I see a structural system under constant tension. I see a battle between the hygroscopic nature of wood and the ambient humidity of the room. When you have spent twenty five years on your knees with a moisture meter, you stop caring about what is trendy and start caring about what will still be flat in a decade. If you want a floor that does not squeak, gap, or buckle, you have to stop thinking like a decorator and start thinking like a structural engineer. This guide is for those who want to do it right, not those looking for a weekend shortcut. We are going to talk about the physics of the subfloor, the chemistry of the bond, and the geometry of a perfect layout.
The nightmare of the potato chip walnut floor
Experience is the best teacher in this trade, and usually, that experience is paid for in expensive failures. **A successful hardwood floor installation depends entirely on the stability of the environment and the flatness of the subfloor rather than the price of the planks.** If the moisture content of your subfloor is more than four percent different from your hardwood, the boards will move. They will cup or crown as the wood cells expand or contract. I have seen solid oak rip out its own fasteners because the expansion pressure had nowhere to go. This is why we obsess over the details that homeowners never see. The blue tape trick is a vital part of that obsession, but it is only one piece of the puzzle. We have to look at the microscopic reality of the wood itself.
The fundamental physics of subfloor flatness
Subfloor flatness is the single most important factor for a long-lasting hardwood installation because it prevents vertical movement that causes squeaks and joint failure. If your subfloor has a dip greater than 3/16 inch over 10 feet, your floor will fail eventually. The subfloor is the foundation. You cannot build a cathedral on a swamp. When a plank spans a low spot, it creates a hollow pocket. Every time someone walks over that spot, the plank flexes. This friction eventually shears the tongue and groove or pulls the nail loose. I spent three days grinding concrete on a job last month just so the floor wouldn’t click like a castanet. You need to use a straightedge and a level to map every square inch. If you find a high spot, you sand it or grind it. If you find a low spot, you fill it with a high compressive strength leveling compound. Do not think that a thick underlayment will hide these defects. It will not. In fact, too much cushion actually causes the locking mechanisms on modern floors to snap under pressure because the floor is allowed to move too much.
“A floor is only as good as the subfloor beneath it; deflection is the enemy of every joint.” – Master Flooring Axiom
Why blue tape is more than just a visual guide
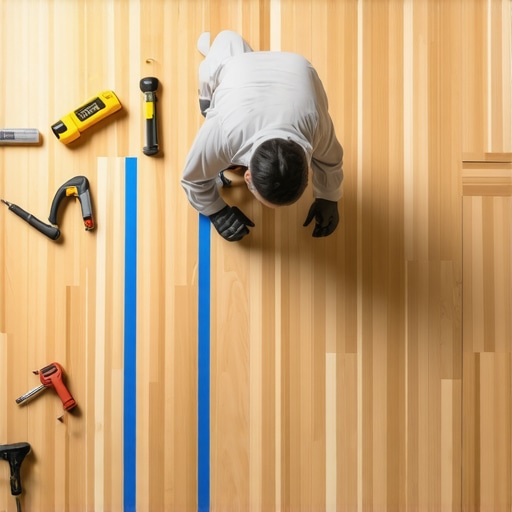
The blue tape trick involves laying out painters tape across the subfloor to visualize the final plank alignment and ensure the perimeter boards are not cut too thin. This allows an installer to adjust the starting line so the last row is a respectable width. You do not want to reach the far wall only to realize you need a half inch sliver of wood to finish the job. That sliver is a nightmare to nail and looks like amateur hour. I use the tape to mark out my center lines and my starting rows. I also use it to flag the problematic joist locations. By seeing the layout in blue tape before a single nail is driven, you can account for the weird geometry of the room. Most rooms are not square. If you follow one wall blindly, you might find yourself three inches out of square by the time you reach the other side. The blue tape allows you to split the difference and cheat the layout so the eye cannot detect the taper. It is about visual deception and geometric precision.
The chemical reality of moisture barriers
Moisture barriers are not optional when installing over concrete or crawlspaces because the vapor pressure from the ground will eventually migrate into your hardwood. Concrete is a sponge. Even if it looks dry, it is constantly breathing water vapor. If you put a piece of wood on top of that, the bottom of the wood will swell while the top remains dry. This is how you get cupping. You need a barrier with a high perm rating. We often use a six mil poly film or a liquid applied epoxy moisture mitigator. The chemistry here is about blocking the movement of water molecules. When we talk about adhesive, we are looking at the shear strength and the elongation properties. A good flooring adhesive needs to stay flexible enough to allow the wood to move slightly with the seasons without losing its grip on the subfloor. If the glue is too brittle, it will crack. If it is too soft, the floor will feel mushy. It is a delicate balance of polymer science.
Measuring the Janka scale of your investment
The Janka hardness scale is the industry standard for determining how much wear and tear a specific wood species can handle before showing dents. It measures the force required to embed a small steel ball into the wood. If you have a house full of dogs and kids, you do not want American Walnut, which is relatively soft. You want something like Hickory or White Oak. Hardness is not just about the surface, it is about the density of the wood fibers. Denser woods are harder to nail and take longer to acclimate, but they will stand up to the friction of daily life for a century. You also have to consider the wear layer on engineered products. If the wear layer is less than three millimeters, you are basically buying a disposable floor. A thick wear layer allows for future refinishing, which preserves the value of the home.
| Wood Species | Janka Rating | Stability Rating |
|---|---|---|
| Hickory | 1820 | Medium |
| Hard Maple | 1450 | Low |
| White Oak | 1360 | High |
| American Cherry | 950 | Medium |
| Black Walnut | 1010 | Medium |
The geometric math of a balanced layout
A balanced layout requires calculating the width of the room and dividing it by the width of your planks to avoid ending with a tiny piece at the wall. For example, if your room is 125 inches wide and your planks are 5 inches wide, you might think you will have 25 perfect rows. However, you have to account for the expansion gap at both walls. If you have an expansion gap of half an inch on each side, your actual laying width is 124 inches. This leaves you with 24 full rows and one four inch row. That is a perfect layout. But if your math leaves you with a one inch strip, you need to rip your first row down to three inches so your last row is also three inches. This symmetry is what separates the masters from the hacks. It creates a sense of balance that the human eye perceives as quality even if the homeowner doesn’t know why it looks good.
Expansion gaps and the perimeter ghost
The expansion gap is the empty space left around the perimeter of the room to allow the wood to expand as the humidity rises during the summer. Wood is alive. It moves. In a humid July, that floor is going to be wider than it was in a dry January. If you push the wood tight against the drywall, it has nowhere to go but up. This is how floors buckle. I have seen entire floors lift off the subfloor like a tent because the installer forgot to leave a gap. We call it the perimeter ghost because it is a space that must exist but must be hidden by baseboards or shoe molding. Do not ever fill this gap with caulk or grout. It must remain empty. A typical gap should be at least the thickness of the flooring itself. If you are installing a three quarter inch solid oak, you need a three quarter inch gap. This is non-negotiable science.
“Wood moves in the direction of the grain but expands significantly across the width of the plank.” – NWFA Technical Manual
Acclimation is not a suggestion
Acclimation is the process of letting the wood sit in the room where it will be installed until its moisture content matches the environment. You cannot just pull the wood off a cold truck and start nailing it down. The wood needs to breathe. You should cross-stack the bundles to allow air to circulate around every plank. This usually takes at least three to seven days, but you should never rely on a calendar. You should rely on a moisture meter. I don’t start a job until the wood and the subfloor are within two points of each other. If you ignore this, the wood will acclimate after it is nailed down, which leads to gaps or squeaks that you can never fix. It is the most common mistake made by DIYers and rushed contractors alike. Patience is a tool just like a saw or a hammer.
Troubleshooting the click and the pop
A floor that clicks or pops when you walk on it is usually the result of a subfloor deflection or a failure of the locking mechanism in floating floors. In laminate or luxury vinyl plank, the clicking often happens because the subfloor was not flat enough and the thin plastic tongue is rubbing against the groove. In traditional hardwood, a pop is usually a nail that was driven at the wrong angle or a joist that is loose. You can sometimes fix these by injecting an epoxy resin under the floor to fill the void, but it is a surgical procedure that is difficult to get right. It is much better to prevent the noise during the installation. Use the right fastener schedule. For solid wood, you should be nailing every six to eight inches and within two inches of every end joint. If you skimp on the staples or cleats, the floor will eventually find its voice and start complaining every time you walk on it.
- Check subfloor moisture levels in at least twenty locations per thousand square feet.
- Sand down all high spots in the plywood or grind concrete humps.
- Verify that the crawlspace has a functional vapor barrier and proper ventilation.
- Use blue tape to snap lines and verify the squareness of the starting wall.
- Allow the wood to acclimate in a climate controlled environment for a week.
- Leave a minimum half inch expansion gap at all vertical obstructions.
- Vacuum the subfloor three times before starting to ensure no debris is trapped under the planks.
The final check before the trim
Before you install your baseboards, you need to walk every square foot of the floor. Listen for the ghost in the machine. Look for any boards that might have a manufacturing defect that you missed during the install. Once the trim is down and the furniture is in, it is much harder to fix a mistake. I always tell my apprentices that the last five percent of the job is what the customer remembers. Clean the sawdust out of the expansion gaps. Make sure your transitions are flush and secure. If you use the blue tape trick correctly, your layout will be perfectly centered and your cuts will be clean. Flooring is a permanent part of the architecture. It is the only part of the house that you are in constant physical contact with. Treat it with the respect that a structural engineering project deserves and it will serve you for a lifetime. Forget the shortcuts. Trust the physics.