
I spent three days grinding concrete on a job last month just so the floor wouldn’t click like a castanet. Most guys skip the leveling compound because they think the underlayment will hide the dip. It won’t. I was in a basement in the middle of a humid summer, sweat dripping off my chin, watching the moisture meter jump like a nervous rabbit. If you do not respect the subfloor, the subfloor will humiliate you. This is the reality of professional flooring. It is not about the pretty patterns or the grout colors. It is about the physics of the slab and the chemistry of the bond. When you are cutting tile inside a finished home, you are not just a craftsman. You are an atmospheric engineer trying to prevent a silica cloud from coating every surface in a three-block radius. The cardboard box hack is the simplest, most effective way to keep your lungs and the client’s furniture clean. It is about containment and airflow control.
The physics of silica dust and your lungs
Silica dust is a microscopic crystalline structure that remains suspended in the air for hours after a single cut with a dry saw. These particles are so small they bypass the natural filters in your nose and settle deep in the lung tissue. You do not see the danger until it is too late. When you use a grinder or a wet saw in a confined space, you are creating a localized weather system of hazardous debris. The dust travels on thermal currents created by the motor of the saw. To stop it, you must interrupt the path of the particle before it gains enough velocity to escape the immediate workspace. Professional installers often use expensive HEPA vacuum systems, but for a quick fix or a small shower project, a modified cardboard box acts as a low-cost containment shroud. It works by creating a negative pressure pocket that catches the heavy grit while slowing down the finer dust long enough for it to settle onto a damp surface.
The cardboard box setup for cleaner cuts
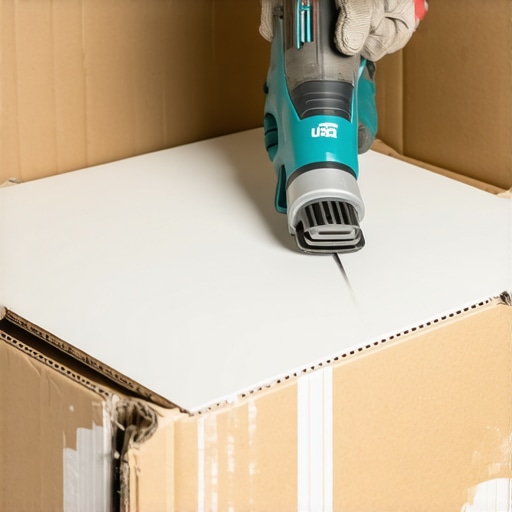
A standard moving box can be transformed into a dust-containment chamber by cutting an entry port for the saw and a viewing window. Line the interior of the box with damp rags or a shallow tray of water to catch the particles. This is a practical solution for installers who need to make one or two quick adjustments without hauling the heavy wet saw out to the driveway. You place the tile inside the box and perform your cut within the enclosure. The cardboard walls act as a physical barrier that stops the 360-degree spray of the diamond blade. I have used this method in high-end condos where carrying a muddy tile through a white-carpeted hallway was not an option. It saves time and protects your reputation. You are not just cutting tile. You are managing a hazardous byproduct with the tools you have on hand.
| Flooring Type | Wear Layer Thickness | Acclimation Time | Moisture Tolerance |
|---|---|---|---|
| Engineered Hardwood | 3mm to 6mm | 48 to 72 Hours | Medium |
| Solid White Oak | N/A (3/4 inch total) | 7 to 14 Days | Low |
| Luxury Vinyl Plank | 12mil to 28mil | 24 Hours | High |
| Laminate Flooring | AC3 to AC5 Rating | 48 Hours | Low to Medium |
Why hardwood floors fail in high humidity environments
Hardwood floors are organic materials that behave like sponges, expanding and contracting based on the ambient moisture levels in your home. If you install solid oak in a basement or a bathroom, you are asking for a structural failure. The wood cells will engorge with water vapor, leading to cupping where the edges of the planks rise higher than the center. I have seen fifteen thousand dollar walnut floors turn into potato chips because the installer did not check the crawlspace humidity. You need to use a pin-type moisture meter to verify that the subfloor is within four percent of the flooring material. If the gap is wider than that, you wait. You do not rush the process. The wood needs to breathe. It needs to reach an equilibrium with the air in the room. This is why engineered hardwood is often a better choice for modern builds. It uses a cross-grain plywood core that resists the natural urge of wood to twist and warp. It is a structural engineering solution to a biological problem.
“A floor is only as good as the subfloor beneath it; deflection is the enemy of every joint.” – Master Flooring Axiom
The chemistry of grout and showers
Grout is not a waterproof barrier but a porous cementitious product that requires proper sealing and a solid substrate. Many people think that because they have tile in their shower, the walls are safe from water. This is a lie. Water travels through grout lines via capillary action. If you did not use a waterproof membrane like Schluter-Kerdi behind that tile, the studs are rotting as we speak. The bond between the thin-set and the tile depends on the evaporation of water at a controlled rate. If the subfloor or wallboard is too thirsty, it will suck the water out of the mortar before the chemical crystals can form a bridge. This results in a weak bond. Your tiles will sound hollow when you tap them. Eventually, they will pop off the wall. I always use a modified thin-set with polymer additives. These polymers create a flexible link that can handle the slight movements of a house settling without cracking the grout. It is about the molecular interaction between the silica in the sand and the polymers in the bag.
- Check subfloor levelness with a ten-foot straight edge.
- Verify moisture content with a calibrated meter.
- Use a 1/2 inch by 1/2 inch square notch trowel for large format tile.
- Back-butter every tile to ensure ninety-five percent coverage.
- Maintain a consistent expansion gap at the perimeter of the room.
The laminate clicking sound that means failure
When you hear a clicking or crunching sound while walking on laminate flooring, it usually indicates a subfloor that was not properly leveled. Most people want the thickest underlayment they can find because they think it will make the floor feel softer. Too much cushion actually causes the locking mechanisms on laminate or LVP to snap under pressure. The joint is designed to sit flat. When the floor deflects into a dip, the tongue and groove are forced to bend. They are made of pressed wood or plastic. They are not indestructible. Over time, the friction of that movement wears down the joint until it fails completely. Then you have gaps. You have boards that slide apart. You have a floor that needs to be ripped out and replaced. I spent years fixing these mistakes. I tell every client that the prep work is seventy percent of the job. The actual laying of the planks is the easy part. You must grind down the high spots and fill the low spots with a high-quality self-leveling compound. If the floor is not flat within one-eighth of an inch over ten feet, you are not ready to install.
“Proper acclimation is not a suggestion; it is a requirement for the survival of the finish.” – National Wood Flooring Association Standard
The ghost in the expansion gap
Every floating floor needs room to move, and the expansion gap at the wall is the most critical part of the installation. Homeowners often think it looks ugly, so they try to push the flooring tight against the baseboard. This is a fatal error. When the temperature changes or the humidity rises, the floor will expand. If it has nowhere to go, it will peak in the middle of the room. The floor will literally lift off the subfloor like a bridge. I have walked into homes where the floor felt like a trampoline because the installer forgot to leave a half-inch gap. You cover that gap with shoe molding or quarter-round. You do not fill it with caulk. You do not jam the planks against the drywall. You let the floor float. It is a living, moving entity. If you restrict its movement, it will break your heart and your budget. This applies to laminate, hardwood, and even so-called waterproof vinyl. The material might be waterproof, but the physics of thermal expansion still apply to every square inch of that surface. Stick to the standards and the floor will last a lifetime.