
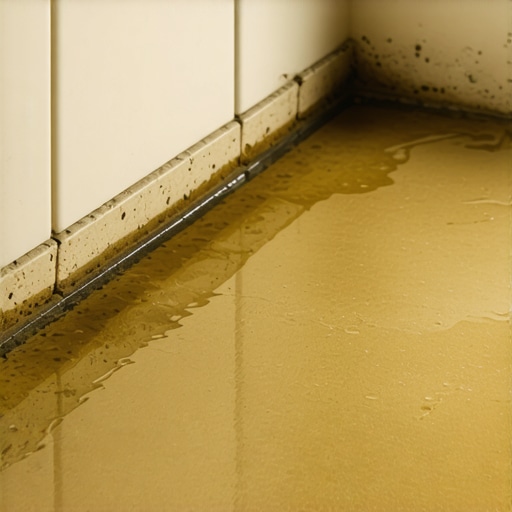
Why Your New Shower Pan is Already Leaking
Most guys skip the leveling compound. They think the underlayment will hide the dip. It won’t. I spent three days grinding concrete on a job last month just so the floor wouldn’t click like a castanet. That is the reality of the trade. If you think your shower pan is leaking because of a bad tile, you are looking at the symptoms, not the disease. You are likely dealing with a failure of the waterproofing envelope or a subfloor that is moving more than a tectonic plate. When water finds a way behind your grout, it does not just sit there. It travels. It finds the path of least resistance, often migrating into your hallway hardwood floors or swelling the edges of the laminate in the next room. This is a structural engineering failure masked as a plumbing problem.
The fundamental failure of modern grout
Grout is a porous cementitious material that naturally absorbs water through capillary action unless it is an advanced epoxy or high-performance urethane. Standard cement grout acts like a dense sponge, drawing moisture into the substrate where it can rot the subfloor or foster hidden mold colonies. This absorption is inevitable in a wet environment. If your installer relied on grout to be the primary water barrier, the project was doomed before the first bag was even opened. You need to understand the molecular structure of the mortar bed. When water penetrates the grout line, it hits the thin-set. If that thin-set is not a modified variety with high polymer content, it will eventually lose its bond due to constant saturation. This is why we see tiles popping or clicking. The water is literally dissolving the chemical handshake between the tile and the substrate.
“A floor is only as good as the subfloor beneath it; deflection is the enemy of every joint.” – Master Flooring Axiom
The ghost in the expansion gap
Expansion gaps are the lungs of a flooring system and their absence causes structural suffocation. Every material, from the ceramic in your shower to the hardwood floors in your living room, expands and contracts with changes in temperature and humidity. In a shower, the lack of a movement joint at the change of plane, where the wall meets the floor, is a death sentence. Without a flexible silicone sealant in these corners, the rigid grout will crack as the house shifts. Once that crack appears, gravity takes over. Water follows the framing members, bypassing the pan entirely. I have seen water travel fifteen feet along a floor joist before it finally drips through a kitchen ceiling. It is a slow, silent destruction that most homeowners do not notice until the drywall starts to sag.
The chemical reality of the liquid membrane
Waterproofing membranes must reach a specific mil thickness to provide a continuous barrier against hydrostatic pressure. Most installers slap on a single coat of the pink or green liquid and call it a day. That is a recipe for disaster. You need a consistent, measurable film that can bridge small cracks in the cement board. If the membrane is too thin, it becomes brittle. If it is too thick in the corners, it can fail to cure properly, creating a gummy pocket that will eventually leak. We are talking about chemistry here, not house painting. The bond strength of the membrane to the subfloor is dictated by the cleanliness of the surface. Dust is the enemy. If that plywood or concrete was not vacuumed and wiped down, the membrane is just floating there, waiting to delaminate under the weight of the water and the user. [image-placeholder]
Why your subfloor is lying to you
Subfloor deflection ruins shower pans by creating micro-movements that snap the bonds of the waterproofing system. Most builders stick to the minimum code for floor joist spacing, which is often fine for carpet but a disaster for stone or tile. If your floor bounces when you walk, your shower pan will leak. It is that simple. The TCNA has strict standards for deflection, usually L over 360 for ceramic and L over 720 for natural stone. If your subfloor is too flexible, the mortar bed will develop hairline fractures. These fractures are the highways for water. I always check the joist span and the thickness of the subflooring before I even quote a job. If it is 5/8 inch plywood, it is getting a second layer of 1/2 inch underlayment grade plywood, glued and screwed, before I even think about a mortar bed.
Comparing material resilience and moisture tolerance
Understanding the limits of your materials is the only way to ensure longevity. Hardwood floors and showers are traditionally enemies, but even within the shower itself, the choice of substrate determines the failure point. Here is a breakdown of how different materials handle the inevitable moisture exposure.
| Material Category | Moisture Tolerance | Janka Rating (if applicable) | Primary Failure Mode |
|---|---|---|---|
| Solid Hardwood Floors | Very Low | 1290 (Red Oak) | Cupping and Buckling |
| Engineered Wood | Moderate | Variable | Delamination |
| Laminate Flooring | Low to Moderate | N/A | Edge Swelling |
| Porcelain Tile | Immense | N/A | Bond Failure |
| Natural Stone | High (if sealed) | Variable | Staining/Cracking |
The 1/8 inch that ruins everything
Precision in the slope to the drain is the difference between a dry floor and a stagnant pool that breeds bacteria. A shower pan must have a minimum slope of 1/4 inch per foot toward the drain. If the installer gets lazy and ends up with a 1/8 inch slope, the water tension will keep it from moving. It sits in the pores of the grout, slowly eating away at the sealer and eventually the grout itself. This standing water creates a constant head of pressure on the waterproofing membrane. It is not just about a quick splash; it is about a permanent puddle. Here is the checklist I use for every pan installation to ensure we are not leaving anything to chance.
- Confirm subfloor stiffness meets L/360 requirements
- Check that the drain flange is set at the correct height for the tile thickness
- Pre-slope the subfloor before the liner is installed
- Ensure the liner is folded, not cut, in the corners
- Verify that weep holes in the drain assembly are clear of mortar
- Conduct a 24-hour flood test before any tile is laid
- Use 100 percent silicone for all changes of plane
Structural engineering of the shower pan
The weight of a saturated mortar bed can exceed several hundred pounds, placing immense stress on the structural framing. When you add the weight of the tile, the water, and the person standing in the shower, you are looking at a significant point load. If the floor joists are not reinforced, they will bow. This bowing pulls the shower pan away from the wall studs. This is the hidden cause of those cracks you see at the bottom of the wall tile. It is not just the house settling; it is the floor literally bending under the weight of your luxury. This is why I prefer a foam-based integrated system for modern builds. They are lighter, factory-tested for waterproof integrity, and remove the human error of mixing mortar in a bucket on a Monday morning. But even then, if that foam is not supported by a flat, level subfloor, it will compress and fail. It all comes back to the foundation. You can buy the most expensive Italian marble in the world, but if you put it on a weak floor, it will be in the dumpster in five years. You have to respect the physics of the assembly or the assembly will stop respecting your home. Moisture is a patient hunter. It waits for the smallest gap, the thinnest layer of membrane, or the slightest bounce in a joist. Once it gets in, the clock starts ticking on your hardwood floors and your structural integrity.