
Most guys skip the leveling compound. They think the underlayment will hide the dip. It won’t. I spent three days grinding concrete on a job last month just so the floor wouldn’t click like a castanet. That is the reality of professional flooring. I have spent twenty five years on my knees with a moisture meter and a level. I view a floor as a performance surface, not a decoration. If you think waterproof LVP means you can turn your living room into a swimming pool, you are mistaken. I follow the NWFA and TCNA standards to the letter because physics does not care about your weekend timeline. A floor is a structural engineering challenge that starts at the molecular level of the subfloor.
The cardboard trick for a perfect pipe fit
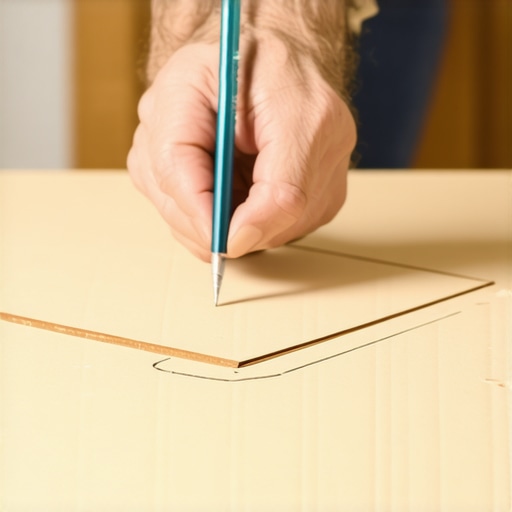
The cardboard template trick allows an installer to transfer the exact dimensions of a fixed obstacle to a plank of hardwood floors or laminate without wasting expensive material. By using scrap cardboard as a surrogate for the flooring, you can iterate the cut until it fits perfectly against the pipe or radiator leg. This method is essential for maintaining the expansion gap required by manufacturers. You start by cutting a piece of cardboard to the exact width of your flooring plank. Slide this cardboard against the pipe and mark the center point. Use a hole saw or a jigsaw to remove the material from the cardboard first. Once the cardboard fits with the required 1/4 inch of breathing room, you overlay it on your actual plank and trace. This prevents the heartbreak of a miscut piece of five dollar a square foot white oak. When you are dealing with showers or bathroom plumbing, this precision ensures the grout or sealant has a consistent channel to fill. A sloppy cut leads to a structural failure where moisture can penetrate the core of the plank. I have seen countless DIY jobs where the installer tried to eye it and ended up with a gap so wide you could see the crawlspace. That is where the rot starts.
“A floor is only as good as the subfloor beneath it; deflection is the enemy of every joint.” – Master Flooring Axiom
Why your subfloor is lying to you
Subfloor levelness is the most lied about metric in the construction industry. A subfloor might look flat to the naked eye, but a ten foot straightedge will reveal the valleys and peaks that will eventually snap your locking mechanisms. Most laminate manufacturers require the floor to be flat within 1/8 inch over a ten foot radius. If you ignore this, the floor will deflect every time someone walks on it. This constant vertical movement creates mechanical stress on the tongue and groove. Eventually, the joint fatigues and breaks. You will hear it first. It is a subtle clicking sound. Then you will see the gaps. I have spent days with a diamond cup wheel on a grinder, wearing a respirator in a cloud of dust, just to get a concrete slab into compliance. It is miserable work, but it is the only way to ensure the floor lasts thirty years. You also have to check the moisture content of the slab. I use a calcium chloride test to measure the vapor emission rate. If you trap moisture under a non porous floor, it will create a high pressure zone that forces the adhesive to emulsify or the wood to cup. Wood is a hygroscopic material. It breathes. It moves. If you do not respect the equilibrium moisture content, the floor will destroy itself.
The 1/8 inch that ruins everything
Expansion gaps are the breathing room for your floor. Every professional knows that hardwood floors and laminate expand and contract based on the relative humidity of the room. If you pin the floor against a pipe or a wall, it has nowhere to go. When the humidity rises in the summer, the planks will push against the obstruction and lift off the subfloor. This is called crowning or buckling. I once walked into a house where the floor had lifted four inches off the ground because the installer did not leave a gap around the radiator pipes. It looked like a small mountain in the middle of the dining room. You need at least 1/4 inch to 1/2 inch of space around every perimeter and every vertical obstruction. The cardboard template trick is how you get that gap consistent. You do not want a tight fit. A tight fit is a death sentence. You want a gap that you can later cover with a pipe collar or a bit of flexible silicone. For showers, the transition between the tile and the floor must be handled with a color matched 100 percent silicone sealant rather than hard grout. Grout has no flex. When the subfloor moves, the grout cracks. Silicone stays flexible and maintains the waterproof barrier.
Laminate survival near showers
Moisture protection in bathrooms is the primary reason for floor failure. Even if a product is labeled as waterproof, the laminate core is often made of high density fiberboard which is essentially compressed sawdust and glue. If water gets into the joints, the fiberboard will swell like a sponge. This is irreversible. Once the edges peak, the floor is ruined. You must use a high quality vapor barrier and seal the perimeter with a closed cell backer rod and silicone. When cutting around the toilet flange or shower pipes, the cardboard template ensures the cut is close enough to be covered by the trim but far enough to allow for movement. The chemistry of the wear layer is also important. A high AC rating means the floor can handle the abrasion of grit and sand, but it does not protect the underside from a damp slab. I always tell clients to spend the extra money on a premium underlayment. Not for the cushion, but for the vapor management. Too much cushion is actually a bad thing. If the underlayment is too thick and soft, the floor will bounce, and the locking joints will snap under the weight of the furniture.
| Material Type | Janka Hardness Rating | Required Acclimation Time | Max Moisture Content |
|---|---|---|---|
| White Oak | 1360 | 7 to 10 Days | 6 to 9 percent |
| Brazilian Cherry | 2350 | 14 Days | 6 to 8 percent |
| Engineered Maple | 1450 | 3 to 5 Days | 7 to 10 percent |
| Laminate Core | N/A | 48 Hours | Below 12 percent |
The chemistry of grout and tile transitions
Grout selection determines the longevity of a tile to wood transition. When you are moving from showers to a hardwood floors hallway, the transition point is a war zone of different expansion rates. Tile is rigid and does not move with humidity. Wood is dynamic. If you butt them together and fill the gap with sanded grout, the grout will turn to powder within six months. You need a transition strip or a chemical bond that can handle the shear force. I prefer using a Schluter strip or a similar metal profile to protect the edge of the tile. Then I leave a 1/8 inch gap between the metal and the wood, filled with a high grade polyurethane sealant. This protects the wood from any water splashing out of the shower and allows the wood to expand without cracking the tile. The molecular bond of the thin-set also matters. I only use highly modified thin-set with polymers that allow for a slight bit of movement. Rigid, old school mortar is for fireplaces, not for floors that sit on top of a wood joist system with deflection. If the subfloor has too much flex, your grout lines will fail regardless of what material you use. I always check the L/360 deflection rating before I even pull a tile out of the box.
“Moisture is the silent killer of the perfect installation; ignore the meter at your own peril.” – Master Flooring Axiom
The physical reality of wood movement
Wood cells behave like bundles of straws. They absorb moisture from the air and swell in width, though rarely in length. This is why we always lay hardwood floors perpendicular to the floor joists for strength, but we must account for the cumulative expansion across the width of the room. In a twenty foot wide room, a 1 percent change in moisture content can move the entire floor by a quarter of an inch. If you have a pipe in the middle of that run, the floor will slam into it with hundreds of pounds of force. This is why the cardboard template trick is not just about looks. It is about survival of the system. You are creating a buffer zone. I recommend using a hole saw that is at least 1/2 inch larger than the diameter of the pipe. This gives you 1/4 inch on all sides. It sounds like a lot, but by the time the humidity hits 60 percent in August, that gap will be gone. You also have to consider the species of wood. Red oak is more stable than hickory. Hickory is beautiful but it is temperamental. It will shrink and grow like a living thing. If you are installing in a high humidity environment, you better be using an engineered product with a plywood core, because solid wood will fail you.
- Acclimate the flooring in the room where it will be installed for at least 72 hours.
- Check the subfloor for flatness using a ten foot straightedge.
- Use a moisture meter to verify that the subfloor and the flooring are within 2 percent of each other.
- Create your cardboard templates for all fixed pipes and obstructions.
- Trace the template onto the plank using a sharp carpenter pencil.
- Cut the plank using a fine tooth blade to prevent splintering of the wear layer.
- Install the plank and verify the expansion gap with a spacer.
- Seal the gap in wet areas with 100 percent silicone.
[imagePlaceholder]
Chemical bonds and grout stability
Polymer additives in modern mortars have changed the way we handle transitions. In the old days, we just mixed sand and cement. Now, we have specialized adhesives that can bond to almost anything. When you are working around showers, the integration of the waterproofing membrane and the floor is essential. You cannot just run laminate up to a shower curb and hope for the best. You need a drip edge. You need to think about how water moves. Gravity always wins. If water gets under the edge of that floor, it will travel along the subfloor and rot out your joists before you even know there is a problem. I have torn out floors where the subfloor was like wet cake because someone forgot to seal around a toilet pipe. The cardboard template trick gives you the precision to apply a proper bead of sealant. If your cut is ragged and uneven, the sealant will not bond correctly. You need a clean, smooth edge. That is why I use a fresh blade for every room. A dull blade generates heat and melts the resin in the laminate, which creates a weak point. Keep your tools sharp and your measurements tighter than the manufacturer’s specs. That is the only way to get a floor that does not groan when you walk on it at night.