
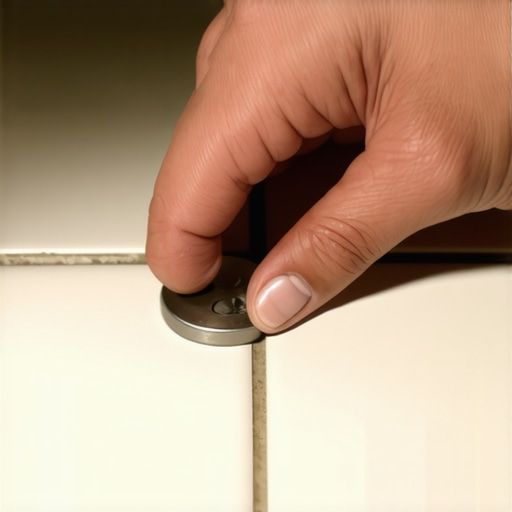
Most guys skip the leveling compound. They think the underlayment will hide the dip. It won’t. I spent three days grinding concrete on a job last month just so the floor wouldn’t click like a castanet. That job taught me that what you cannot see is exactly what will destroy your reputation. When you are standing on a finished porcelain surface that is squeaking or shifting, you are not looking at a tile problem. You are looking at a fastener failure. The magnet trick is the only way to see through the stone and find the steel holding the house together.
The subfloor secret that saves your knees
Finding subfloor screws under tile requires a high-strength neodymium magnet to detect the ferrous metal of the fastener through the ceramic or porcelain layer. This technique identifies the structural grid of the floor, allowing for targeted repairs without destroying the entire surface or guessing where the joists lie. It is a fundamental skill for any installer who values structural integrity over cosmetic speed. You move the magnet in a slow, sweeping S-pattern across the surface. When you feel that distinct tug, you have found the heart of the floor. This is not magic. It is physics. Most installers use 1 1/4 inch or 1 5/8 inch cement board screws. These screws have a specific head diameter that creates a detectable magnetic footprint even through a half inch of tile and thin-set mortar.
“A floor is only as good as the subfloor beneath it; deflection is the enemy of every joint.” – Master Flooring Axiom
The physics of magnetic pull through porcelain
Magnetic detection through tile depends on the inverse square law of magnetism, where the pull force drops significantly as the distance between the magnet and the screw increases. Using a magnet with a pull force of at least 50 pounds ensures that the magnetic field penetrates the grout, tile, and thin-set to locate the fastener head. You need to understand the density of the material you are scanning. Porcelain is denser than ceramic. It has a lower water absorption rate, usually less than 0.5 percent. This density means more mass between your magnet and the screw. If you are working with natural stone like marble or granite, the thickness might vary. A standard 3/8 inch tile plus a 1/4 inch bed of thin-set creates a 5/8 inch gap. Only a rare-earth magnet with a high N-rating can bridge that distance with enough tactile feedback to signal a hit. I prefer N52 grade magnets. They are brittle, but they have the gauss rating required to find a screw buried under a heavy mud bed.
Why your subfloor is lying to you
Subfloor instability often stems from missing fasteners or loose screws that have backed out over time, causing the clicking sound heard in laminate or the cracked grout lines in tile installations. Identifying these points with a magnet allows for localized stabilization by injecting epoxy or adding new fasteners through the grout lines. When I walk onto a job site and hear a hollow thud, I know the installer cheated. They spaced their screws every 12 inches instead of the required 6 inches on center along the edges. The magnet reveals the truth. It maps the ghost of the installation. You can see exactly where the joists run. You can see where they missed the wood entirely. This is vital when transitioning to hardwood floors in adjacent rooms. If the tile subfloor is moving, the hardwood transition will eventually snap. Wood moves. Tile is rigid. When those two worlds collide without a solid foundation, the rigid one breaks every single time.
| Fastener Type | Magnetic Signature | Common Depth | Subfloor Material |
|---|---|---|---|
| Zinc Coated Screw | Strong | 1.25 inches | Cement Board |
| Stainless Steel Screw | Weak to None | 1.5 inches | Wet Areas |
| Galvanized Nail | Moderate | 2.0 inches | Plywood |
| Ring Shank Nail | Strong | 1.75 inches | OSB |
The 1/8 inch that ruins everything
Subfloor levelness tolerances are dictated by the industry standard of 1/8 inch deviation over 10 feet for large format tiles. If your fasteners are not recessed or if the screw heads are lifting the cement board, you will never hit this tolerance. Using a magnet helps you locate these high spots. If a screw has backed out, it creates a pivot point. Imagine a see-saw. Every time you step on the tile, the board flexes over that screw head. Eventually, the bond between the thin-set and the subfloor shears off. You get a loose tile. You get a customer calling you at 7 PM on a Friday. I hate those calls. I avoid them by ensuring every screw is driven home. If I find a high screw with my magnet, I can sometimes drive it deeper through a small hole drilled in the grout line, then patch it. It is a surgical strike instead of a sledgehammer solution.
- Use an N52 Neodymium magnet for maximum penetration.
- Mark found screws with blue painter tape to map the joist layout.
- Check for fastener clusters which indicate previous repair attempts.
- Verify the screw pattern against TCNA standards for the specific substrate.
- Ensure the magnet is wrapped in a soft cloth to avoid scratching the tile glaze.
The chemistry of moisture in showers and wet rooms
Moisture management in showers is a different beast entirely because of the vapor pressure and the potential for fastener corrosion. If you are using a magnet to find screws in a shower stall, you are likely looking for the source of a leak or a failing wall board. In these environments, the screws should be high-quality galvanized or coated fasteners. If they are rusting, they expand. This expansion is called oxide jacking. It can literally push the tile off the wall. The magnet trick identifies if the installer used the wrong screws. Standard drywall screws will dissolve in the high-alkalinity environment of a shower’s cement board. When they dissolve, they leave a void. The magnet will show a weak or missing signal where a fastener should be. This is a red flag. If the fasteners are gone, the structural integrity of the waterproof membrane is compromised. You cannot fix that with a bit of caulk and a prayer. You have to rip it out.
“Fastener spacing is the heartbeat of a stable floor; skip a beat and the system fails.” – Tile Council Standards
Transitioning from tile to laminate or hardwood
Floor height transitions between tile and laminate require a perfectly stable subfloor at the junction. Laminate is a floating floor. It needs a flat surface to prevent the tongue and groove locking systems from snapping. If the tile subfloor is flexing near the transition, it will put vertical stress on the laminate. Use your magnet to ensure the subfloor fasteners are dense at the transition strip. This is the high-traffic zone. It is where the most weight is transferred. If the magnet shows a gap in the screw pattern at the doorway, you need to add fasteners before you install the T-molding. I have seen hardwood floors buckle because the installer didn’t secure the subfloor at the header. The wood expanded, pushed against the tile, and because the tile subfloor had give, the whole assembly lifted. A few well-placed screws would have saved a five thousand dollar repair bill. Don’t be the guy who thinks the transition strip hides structural sins. It doesn’t. It just delays the inevitable. Fix the subfloor. Use the magnet. Do it right the first time.