
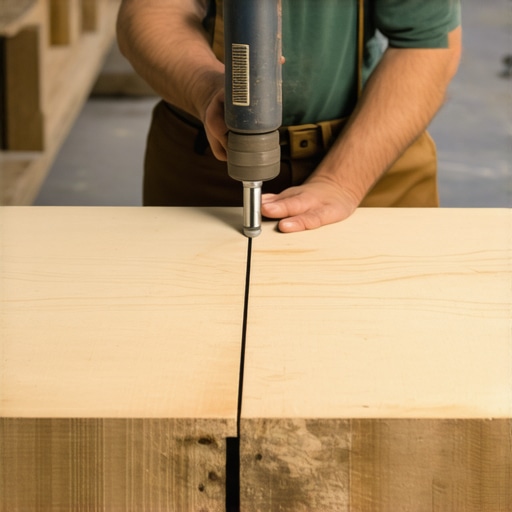
I spent three days grinding concrete on a job last month just so the floor would not click like a castanet. Most guys skip the leveling compound. They think the underlayment will hide the dip. It won’t. I remember a specific install in a high-rise where the contractor swore the slab was true. Within forty eight hours of laying the laminate, every joint began to groan because of a three sixteenths inch depression in the center of the room. We had to rip it all out. A floor is only as good as the subfloor beneath it. If your base is not flat within one eighth of an inch over a ten foot radius, your tools do not matter. You can use the most expensive tapping block in the world and it will still fail to seat the joint because the physics of the dip are working against the mechanical lock of the plank. I have spent twenty five years on my knees learning that the best tool is often the one you make yourself when the store bought plastic fails to deliver the force needed for a tight fit.
The subfloor secret that ruins every joint
A flat subfloor is the absolute foundation of a successful laminate installation because any vertical deflection under load will eventually snap the high density fiberboard locking mechanisms. You must verify the surface is free of protrusions and dips using a long straightedge. If the subfloor is concrete, moisture testing is the next step. High vapor emission rates will swell the core of the laminate, making it impossible to tighten the joints regardless of the tool used. I use a calcium chloride test or a pinless moisture meter to ensure the slab is under three pounds of pressure. If it is wet, you are wasting your time. You need a vapor barrier that is at least six mils thick. Overlapping the seams by eight inches and sealing them with moisture resistant tape is the only way to protect the integrity of the planks. When the subfloor is stable, the actual mechanics of the joint can be addressed with precision.
Why standard tapping blocks fail on modern click systems
Traditional plastic tapping blocks often lack the specific profile required to clear the delicate tongue of a modern drop lock or angle tap laminate plank. Many installers find that the block actually crushes the decorative edge before the joint is fully seated. This happens because the force is distributed across the top of the plank rather than the structural core. If you look at the cross section of a laminate board, you will see a thin layer of melamine over a core of HDF. That melamine is brittle. A heavy blow from a standard block can cause micro fractures that do not show up until the homeowner starts cleaning with a damp mop. Moisture enters those cracks and the edges swell like a sponge. This is why I often reach for a customized scrap piece of the actual flooring instead of a generic block. It ensures a perfect profile match that protects the wear layer while allowing the force to hit the core where it belongs.
“A floor is only as good as the subfloor beneath it; deflection is the enemy of every joint.” – Master Flooring Axiom
The scrap wood method for tight tolerances
Creating a custom tapping block from a scrap piece of the flooring you are installing is the most effective way to ensure a tight and damage free joint. You take a six inch offcut and remove the bottom part of the groove with a sharp utility knife or a chisel. This allows the scrap to sit flush against the tongue of the piece you are installing without interfering with the locking action. I prefer this because the scrap block has the exact same density and profile as the floor. When you hit it with a dead blow hammer, the energy transfers evenly across the entire length of the joint. You are not fighting against a mismatched plastic edge. This technique is especially useful for high end laminate that features wax coated joints designed to resist water. Those coatings add friction. A standard block might slide or bounce, but a matched scrap piece stays locked in place while you drive the plank home.
The pull bar as a surgical instrument
A heavy duty steel pull bar is the essential alternative for tightening joints at the perimeter of the room where a tapping block cannot fit. You cannot swing a hammer against the wall. The pull bar acts as a lever that transfers force from the open area of the floor to the edge of the board. I always look for a bar that has a felt backing to protect the surface of the laminate. Many cheap bars are made of thin steel that bends under pressure. You want a bar with at least a quarter inch thickness. When you are working near a doorway or a radiator, the pull bar is the only way to ensure the short end joints are fully engaged. If those joints are loose, the entire row will eventually drift. This causes gaps that collect dirt and moisture, leading to premature floor failure. I use a series of short, controlled taps rather than one massive blow. It is about finesse, not raw power.
| Tool Type | Application Scenario | Risk Level | Efficiency Rating |
|---|---|---|---|
| Custom Scrap Block | Long edge joins in open rooms | Low | High |
| Heavy Steel Pull Bar | Perimeter and doorway closing | Medium | Very High |
| Double Suction Cups | Mid floor gap repair | Low | Medium |
| Dead Blow Hammer | General installation force | Medium | High |
Suction cups and the vertical drop lock revolution
Double sided glass suction cups allow an installer to apply horizontal force to a plank from the center of its surface without touching the edges. This is the ultimate alternative for modern vertical drop lock systems where tapping the edge can actually break the plastic clip inside the joint. I use suction cups when I need to pull a plank tight in the middle of a large layout. You stick the cups to the surface, lock them down, and then use a block or your hand to provide the necessary nudge. This method is also a lifesaver for repairing gaps that open up months after the installation. You do not have to rip up the baseboards. You just suction onto the floating plank and tap it back into place. It works because laminate is a floating system. The entire floor is one big sheet. If one piece moves, you can usually persuade it back into position with enough grip and a bit of vibration.
How moisture vapor kills the joint seal
Moisture vapor rising from a subfloor causes the HDF core of laminate to expand at a different rate than the decorative surface, resulting in peaked joints. This expansion can create a gap so tight that no tapping block will ever close it. You are fighting the physical volume of the wood fibers. In high humidity regions like the Gulf Coast, I have seen floors grow by nearly half an inch across a twenty foot span. If you did not leave a sufficient expansion gap at the walls, the floor will bow. Once it bows, the joints start to pull apart. No amount of tightening will fix a floor that has run out of room to move. You must respect the expansion gap. I use spacers that are at least three eighths of an inch thick. I never trust my eyes. I always use a gauge. If the floor hits the wall, the joints will fail. It is a mathematical certainty.
“Hardwood and laminate flooring are hygroscopic materials; they will expand and contract with the relative humidity of the environment.” – NWFA Technical Guidelines
Microscopic debris and the clicking floor plague
Small grains of sand or sawdust trapped within the groove of a laminate plank will prevent the tongue from seating fully, creating a permanent gap. This is why I am obsessed with a clean workspace. I keep a vacuum running constantly. If you feel resistance when trying to tighten a joint, do not just hit it harder. Stop and inspect the groove. Often, a tiny piece of the HDF core has broken off during shipping and is lodged inside. If you force the joint closed over that debris, you will create a stress point. Eventually, that spot will click every time someone walks over it. That sound is the sound of a failing floor. I use a small stiff brush to clean every groove before I even think about bringing the tapping block or the pull bar into play. Precision starts with cleanliness.
The perimeter lie and structural expansion
Many installers believe that more force at the edges will fix a poorly laid floor, but structural integrity is actually maintained by the perimeter expansion gap. If you wedge your planks too tightly against the starting wall, you leave no room for the natural movement of the building. Homeowners often complain about gaps in the winter, but those gaps are usually the result of the floor shrinking because the air is dry. I tell them to buy a humidifier. You cannot fix seasonal movement with a tapping block. If you try to force those gaps closed when the wood is dry, the floor will buckle when the humidity returns in the summer. It is a cycle. You have to understand the chemistry of the material. Laminate is mostly wood. Wood breathes. You are building a living surface that needs room to exist within the four walls of the room.
- Check subfloor flatness with a ten foot straightedge.
- Vacuum every groove to remove manufacturing debris.
- Use a custom scrap block to protect the wear layer.
- Maintain a consistent three eighths inch expansion gap.
- Test concrete for moisture vapor emission rates.
- Use a dead blow hammer to prevent tool bounce.
- Avoid heavy furniture on floating floors to allow movement.