
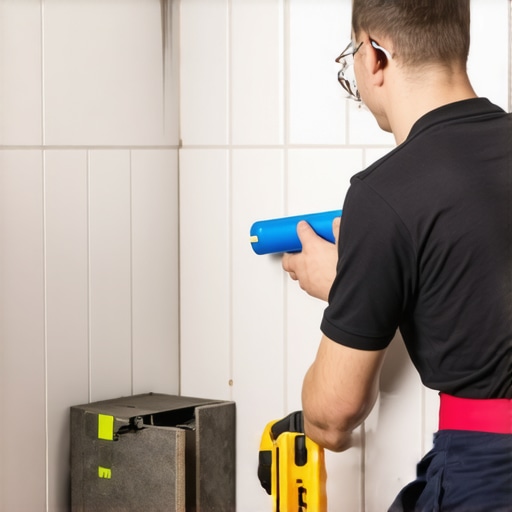
I smell like a mix of WD-40 and fine oak dust most days. My knees have the permanent calluses of a man who has spent twenty five years refusing to trust a subfloor that has not been verified by a ten foot straightedge. Most guys skip the leveling compound. They think the underlayment will hide the dip. It won’t. I spent three days grinding concrete on a job last month just so the floor wouldn’t click like a castanet. That job was supposed to be a simple laminate install, but when the homeowner wants quality, you do not bury a mistake under a foam pad. You fix the foundation. This same philosophy applies to every tile job in every crooked shower in this country. If your studs are out of plumb and your floor is out of level, your tile layout will reveal your sins by the third row. We are going to fix that using the physics of the chalk line and the discipline of geometry.
The hidden reality of crooked shower walls
A crooked shower wall is usually the result of warped 2×4 studs, house settling, or poor framing during the initial construction phase. To fix a crooked tile layout, you must establish a perfectly level horizontal baseline and a plumb vertical centerline using a chalk line and a laser level before any thin-set hits the backer board. This process ensures that your tile cuts remain symmetrical even if the corners of the walls are not square. Most builders do not care about the 1/8 inch deviation over a 10 foot span, but to a tile setter, that 1/8 inch is a mountain. When you are working with large format porcelain, even a microscopic tilt in the wall creates lippage. Lippage is the result of tiles not being on the same plane, and in a shower, it leads to water pooling and a aesthetic disaster. You have to understand that wood moves. Hardwood floors and laminate planks are designed to expand and contract. Tile is a rigid system. If the house moves and your subfloor deflects more than the L/360 industry standard, your grout will crack. We start with the chalk line because it is the only truth in a world of crooked lumber.
Why your subfloor is lying to you
Subfloors often appear flat to the naked eye but contains dips and humps that exceed the Tile Council of North America (TCNA) tolerance of 1/8 inch per 10 feet. You must use a straightedge to identify these low spots and fill them with a high compression strength self-leveling underlayment or a sand-cement mud bed. If you ignore a 1/4 inch dip in the center of the room, your tile will bridge that gap. When you step on that tile, the air pocket underneath allows the tile to flex. This mechanical stress eventually snaps the bond between the thin-set and the substrate. Think of the subfloor as the chassis of a truck. If the chassis is twisted, the body panels will never align. I have seen million dollar homes where the hardwood floors were gorgeous, but the master shower was a nightmare because the installer did not check the joist spacing. If your joists are 24 inches on center, you cannot just slap down 1/2 inch plywood and expect tile to stay put. You need the structural stiffness of a double-layered subfloor or a specialized uncoupling membrane like DITRA. This is chemistry as much as it is carpentry. The bond depends on the surface energy of the substrate and the mechanical interlocking of the thin-set crystals as they hydrate.
“A floor is only as good as the subfloor beneath it; deflection is the enemy of every joint.” – Master Flooring Axiom
The physics of the chalk line in vertical spaces
The chalk line method works by creating a visual reference grid that is independent of the actual wall corners or the ceiling height. By snapping a vertical plumb line in the center of the main wall and a horizontal level line at the second row of tile, you ensure that any taper caused by crooked walls is pushed to the corners where it is less visible. When you pull that string taut and snap it, the pigment is forced into the microscopic pores of the cement board or waterproof membrane. This line is your North Star. If the wall leans two inches to the left, you do not follow the wall. You follow the line. You will end up with a small sliver of tile at the top and a wider one at the bottom, but the field of the tile will look perfectly straight. In my shop, we do not use the cheap blue chalk for showers. It is too easy to wash away. We use the high-permanence red or fluorescent chalk that stays put even when it gets a little damp from the sponge. You must also consider the thickness of the chalk line itself. A thick, fuzzy line can be 1/16 of an inch wide. If you measure from the top of the line on one side and the bottom on the other, you have already introduced an error that will compound over twenty rows of tile.
Chemistry of the bond and thin set selection
The chemical bond between tile and substrate is achieved through the hydration of Portland cement and the addition of liquid polymers that increase shear strength and flexibility. For shower environments, you must use an ANSI A118.4 or A118.15 modified thin-set to ensure the tile does not de-bond due to thermal expansion or moisture penetration. Not all mortars are equal. Some are designed for high-porosity ceramic while others are engineered for zero-porosity porcelain. If you use a cheap, unmodified mortar on a large format porcelain tile, it will never truly grab. The water in the mortar has nowhere to go. It cannot soak into the tile and it cannot soak into the waterproof membrane. It just sits there, slowly drying, forming a weak crystalline structure. You want a mortar with a high polymer content that can bridge the different expansion coefficients of the tile and the wall studs. Remember that the shower is a dynamic environment. The temperature goes from 65 degrees to 105 degrees in minutes. This creates massive stress on the grout lines and the adhesive bed. If your thin-set is too rigid, it will shear. If it is too soft, the tile will sag.
| Material Type | Janka Hardness / Strength | Acclimation Time | Max Deflection Tolerance |
|---|---|---|---|
| Solid White Oak | 1360 lbf | 7-14 Days | L/360 |
| Porcelain Tile | High (Grade 5) | None | L/720 (Large Format) |
| Laminate Planks | Medium | 48 Hours | 1/8 inch per 10 ft |
| Engineered Wood | Variable | 3-5 Days | L/360 |
The ghost in the expansion gap
The expansion gap is a mandatory 1/4 inch space left around the perimeter of any flooring or tile installation to allow for the natural movement of the building structure. In showers, this gap is filled with 100 percent silicone sealant rather than hard grout to provide a flexible joint that prevents cracking at the change of plane. I call it the ghost because people try to pretend it is not there. They grout the corners of a shower. Do not do that. The corner where two walls meet is a change of plane. Those two walls will move independently of each other. If you put hard grout in that corner, it will crack within six months. It is an absolute certainty. Use a color-matched silicone. This allows the walls to breathe. The same logic applies to where the tile meets the hardwood floors in a transition. You need that gap. If you lock the tile against the hardwood, the hardwood will win the fight every time. It will expand with the humidity of summer and pop your tiles right off the floor. I have seen it happen in a dozen luxury builds where the installer forgot that wood is a living, moving material.
The 1/8 inch that ruins everything
A single 1/8 inch error at the base of a shower wall will result in a 2 inch discrepancy by the time the tile reaches a standard 8 foot ceiling. You must use a laser level to verify your chalk lines every three rows to ensure the grid has not shifted due to human error or tile size variations. Most people think tile is perfectly sized. It is not. Even high-end rectified tiles have a manufacturing tolerance. If you are not careful, a 1/32nd of an inch difference in tile size will add up. By the time you are ten tiles high, you are off by a quarter inch. This is why we use spacers, but we do not rely on them blindly. You have to use your eyes and your chalk lines. If you see yourself drifting off the line, you have to adjust your grout joints slightly to compensate. This is the art of the trade. It is the difference between a mechanic and a DIYer. A mechanic knows how to hide the flaws of the house.
“Consistency in the mortar bed is the secret to a floor that lasts a century; shortcuts are just paths to a tear-out.” – TCNA Handbook Wisdom
The physics of the center line
Finding the center point of the main wall is the most critical step in the layout because it determines the size of the cut tiles in the corners. You must calculate the width of the wall, divide by the width of the tile plus the grout joint, and adjust the starting point to avoid thin sliver cuts that are difficult to set and prone to breaking. If your math tells you that you will have a 1/2 inch cut in the corner, you shift your center line by half a tile. Now you have two large, balanced cuts on each side. This looks professional. It looks intentional. It also makes the tiling process much faster. Trying to cut a 1/2 inch strip of porcelain is a nightmare, especially if you are using a wet saw with a dull blade. You want cuts that are at least half the width of the tile whenever possible. This also provides better structural integrity for the corners where the most movement occurs. In the world of laminate and hardwood floors, we call this staggering the joints. In tile, we call it a balanced layout. Both are about managing the visual weight and the physical stability of the surface.
The mandatory pre-tile checklist
- Verify subfloor deflection meets L/720 for large format tile or stone.
- Check all studs for plumb using a 6 foot level and shim where necessary.
- Apply a continuous waterproof membrane and let it cure for 24 hours.
- Snap a vertical centerline on the primary focal wall using red chalk.
- Establish a horizontal level line at the height of one full tile plus a grout joint.
- Dry lay at least one row of tile to check for balance and cut sizes.
- Ensure thin-set is mixed to a peanut butter consistency with no lumps.
- Back-butter all large format tiles to ensure 95 percent coverage in wet areas.
- Use a notched trowel size appropriate for the tile dimensions.
- Keep a clean bucket of water and a sponge ready for immediate cleanup of excess mortar.
Why grout choice determines the life of the shower
The type of grout selected impacts the stain resistance and structural flexibility of the tile assembly, with epoxy grouts offering the highest level of durability and water shedding capabilities. For most residential showers, a high-performance polymer-modified cement grout is sufficient, provided the joints are at least 1/16 of an inch wide. If you try to do a butt-joint with no grout, you are asking for trouble. Grout serves a purpose. It absorbs the minor stresses of the tile shifting and it seals the edges from water. Sanded grout is used for larger joints because the sand acts as a structural filler that prevents the grout from shrinking and cracking as it cures. Unsanded grout is for delicate finishes or very thin joints. But if you want a shower that will outlast the house, you go with epoxy. It is harder to work with and it smells like a chemical plant, but it is waterproof and it never needs sealing. It bonds the tiles together into a monolithic sheet. Just make sure your chalk lines were straight, because once epoxy grout sets, that tile is not moving for the next fifty years.