
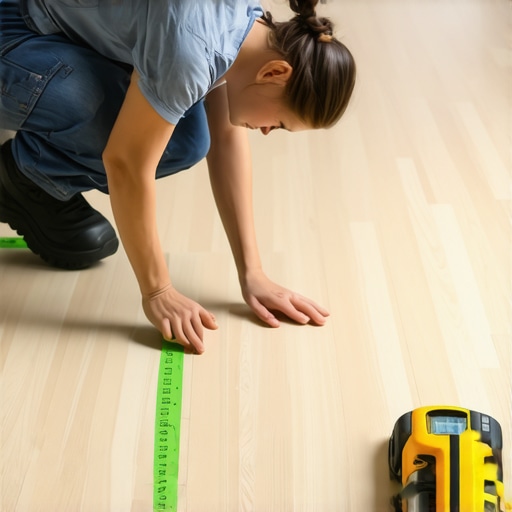
The Chalk Test for Checking if Your Subfloor is Flat
I spent three days grinding concrete on a job last month just so the floor wouldn’t click like a castanet. Most guys skip the leveling compound. They think the underlayment will hide the dip. It won’t. I walked into that job site smelling like WD-40 and oak dust, and the homeowner thought I was wasting time. Three days later, when the plank snapped into place with a solid thud instead of a hollow tap, they understood. A floor is only as good as the structural integrity of the material beneath it. If you ignore the subfloor, you are just decorating a failure.
The invisible hills that kill laminate joints
Subfloor flatness is the single most important factor for a successful laminate installation. A flat surface ensures that the tongue and groove locking mechanisms are not subjected to vertical stress. When a subfloor has a dip or a hump, the plank bridges the gap, creating a spring effect that eventually snaps the joint. Laminate is particularly vulnerable to this because its core is often made of high-density fiberboard which lacks the tensile strength to withstand constant flexing. This is why the chalk test is a standard requirement for any professional who takes their craft seriously.
“A floor is only as good as the subfloor beneath it; deflection is the enemy of every joint.” – Master Flooring Axiom
Why your subfloor is lying to you
Plywood and OSB look flat to the naked eye, but they rarely are. Environmental moisture causes these wood products to swell at the edges, creating peaked seams. In concrete slabs, the curing process often results in a slight curl at the corners or a dip in the center of the pour. Hardwood floors require a flat surface to prevent squeaks and movement. If you nail down a 3/4 inch solid oak plank over a hollow spot, that plank will move every time someone walks over it. That movement is what causes the annoying friction between the wood and the nail, leading to those midnight creaks that drive homeowners crazy. You cannot fix a structural dip with more nails. You fix it with the chalk test and a bag of high-quality leveling compound.
The physics of the chalk line method
The chalk test is a low-tech solution to a high-stakes engineering problem. To perform a chalk test you need a long straightedge and a standard chalk box. You slide the straightedge across the floor and look for light passing underneath it. When you find a gap, you snap a chalk line across the area. The chalk will only hit the high spots, leaving the low spots clean and unmarked. This creates a topographical map of your floor. It shows you exactly where the valleys are and where the peaks need to be ground down. I have seen guys try to use a laser level for this, but a laser does not show you the micro-deviations in the texture of the plywood. The chalk does not lie. It provides a physical record of the surface reality.
The 1/8 inch that ruins everything
Most manufacturers specify a tolerance of 1/8 inch over a 6-foot radius or 3/16 inch over a 10-foot radius. These tolerances exist because the physics of the locking system cannot handle more deflection. If you exceed these limits, the floor will feel bouncy. Over time, the friction from that bounce will generate heat and wear down the internal locking mechanism. Eventually, the planks will separate, leaving a gap that collects dirt and moisture. This is especially true in showers or adjacent bathrooms where humidity is high. If the subfloor under the transition to a bathroom is not flat, the grout in the doorway will crack and crumble within months. The movement of the subfloor pulls at the rigid tile assembly, and the grout is always the first thing to fail.
Subfloor Material Requirements
| Material Type | Flatness Tolerance | Recommended Preparation | Acclimation Time |
|---|---|---|---|
| Plywood / OSB | 1/8 inch over 6 feet | Sanding seams and screw checks | 72 hours |
| Concrete Slab | 3/16 inch over 10 feet | Grinding and moisture testing | 30 to 60 days |
| Self-Leveler | Zero deviation | Priming and vacuuming | 24 hours |
The chemistry of the bond
When you identify a low spot, you have to fill it with a compound that actually sticks. The chemical bond between your subfloor and the leveling agent is determined by the porosity of the substrate. Most people buy the cheapest bag of patch they can find at a big-box store. That is a mistake. Professional-grade self-leveling compounds use calcium aluminate cement rather than standard portland cement. This chemistry allows for a much higher compressive strength and faster drying times. It also shrinks less during the hydration process. If you use a cheap patch that shrinks, it will pull away from the edges of the dip, creating a new void. This is the difference between a floor that lasts forty years and one that fails in four.
Showers and the slope of disaster
In wet areas, flatness is not just about the floor staying together; it is about water management. A subfloor that is not flat under a shower pan or tiled floor leads to pooling water. This water sits against the grout lines and eventually finds its way into the substrate. Once moisture gets under a tile, it begins to rot the thin-set. This leads to loose tiles and failing waterproofing membranes. If you are installing a walk-in shower, the subfloor must be perfectly flat before you ever think about your slope. Any deviation in the subfloor will be magnified once the tile is laid, resulting in lippage that catches your toes and looks terrible under LED lighting.
“Deflection of the substrate should not exceed L/360 for ceramic tile installations or L/720 for natural stone.” – TCNA Handbook Standards
The toolkit for a perfect subfloor
Preparation is the part of the job that no one sees, but everyone feels. Before you start the chalk test, you must ensure the room is completely clear of debris. Even a small pebble or a stray staple will throw off your straightedge and give you a false reading. I keep a dedicated vacuum just for subfloor prep. I do not want any dust interfering with the chalk or the leveling compound. Here is the checklist I follow on every professional installation:
- Check for protruding nails or screws and drive them flush or remove them.
- Vacuum the entire surface twice to remove all drywall dust and sawdust.
- Identify the highest point in the room using a 10-foot straightedge.
- Perform the chalk test every two feet across the entire floor area.
- Circle the low spots with a pencil and note the depth of the dip.
- Apply a high-quality primer if using a self-leveling compound to ensure a chemical bond.
The ghost in the expansion gap
People often blame the product when a floor fails, but the product is usually fine. The failure starts at the perimeter where the floor meets the wall. If the subfloor is not flat near the walls, the expansion gap will be uneven. As the floor expands and contracts with the seasons, it will hit the baseboard or the drywall in the high spots. This causes the entire floor to buckle. You need that 1/4 inch or 3/8 inch gap to be consistent. If your subfloor is hilly, your floor cannot move as a single unit. It gets pinned down in the valleys and pushes against the peaks. This is why you see laminate floors peaking at the seams in the middle of a room. It is not a manufacturing defect. It is a subfloor defect.
Final verdict on the flatness ritual
The chalk test is a ritual of patience. It separates the professionals from the weekend warriors who just want to get the job done fast. It takes time to grind concrete. It takes time to wait for a leveler to dry. It takes time to sand down the seams of a plywood subfloor. But that time is an investment in the longevity of your home. A flat floor is a quiet floor. It is a floor that feels solid under your boots. It is a floor that respects the engineering of the planks you just paid thousands of dollars to buy. Do not skip the chalk test. Do not trust your eyes. Trust the straightedge and the chalk. Your joints will thank you ten years from now when they are still tight and silent.