
Most guys skip the leveling compound. They think the underlayment will hide the dip. It won’t. I spent three days grinding concrete on a job last month just so the floor wouldn’t click like a castanet. I saw a $30,000 installation ruined because the installer thought a 1/4 inch dip was negligible. This same lack of precision ruins your showers. People treat grout like a solid rock. It is not. It is a porous, cementitious sponge that sucks up body oils and minerals. Most homeowners spray some weak detergent on their tiles and wonder why the yellow haze remains. You have to understand the physics of the bond. I have spent 25 years looking at the failure points of flooring, and grout is the biggest offender in any bathroom. If you do not clean it with the right mechanical force, you are just moving the dirt around the pores.
Why grout holds onto filth
Grout holds onto soap scum because it is a porous material that uses capillary action to pull minerals and fats into its cementitious matrix. This creates a chemical bond between the calcium in the grout and the magnesium stearates in your soap. Removal requires mechanical agitation to break these bonds. The molecular structure of grout is basically a series of tiny tunnels. When you shower, the steam opens up these microscopic pathways. Soap residue, which is technically a salt of a fatty acid, gets trapped deep inside. If you just wipe the surface, you leave the core of the grout contaminated. This leads to permanent staining and eventual structural failure of the grout joints. I have seen grout turn to mush because the soap scum acted as a host for mold that literally ate the binder. You need a tool that can reach into those valleys. That is where the toothbrush becomes a precision instrument for the flooring professional. It is about the psi of the bristles on the specific area of the joint.
“A floor is only as good as the subfloor beneath it; deflection is the enemy of every joint.” – Master Flooring Axiom
The mechanical advantage of nylon bristles
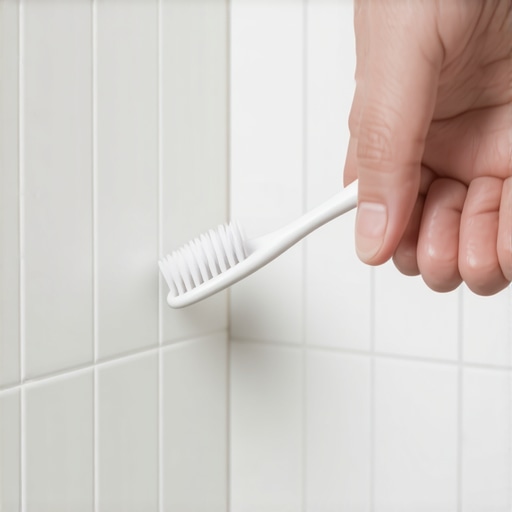
Nylon bristles provide the perfect balance of stiffness and flexibility to penetrate the uneven surface of grout joints without scratching the glaze on the surrounding tile. This mechanical action physically displaces the solidified soap scum layers through high-frequency friction. Most people use those big, clunky scrub brushes from the grocery store. They are useless. The surface area is too large, which means the pressure you apply is spread thin. A toothbrush focuses all your arm strength into a half inch square area. This increases the pounds per square inch of cleaning power. You are effectively chiseling the scum out of the grout pores. It is a slow process. It is a tedious process. But it is the only way to ensure the grout is actually clean. I have used this method on high-end marble installations where a harsh chemical would have etched the stone. The toothbrush is the surgeon’s scalpel of the cleaning world. You can feel the resistance of the scum through the handle. Once the drag stops, you know the pores are empty.
| Grout Type | Porosity Level | Scum Retention | Cleaning Difficulty |
|---|---|---|---|
| Sanded Grout | High | Maximum | Very High |
| Unsanded Grout | Medium | Moderate | High |
| Epoxy Grout | Low | Low | Low |
| High Performance | Medium-Low | Moderate | Medium |
Chemistry of the cleaning solution
The cleaning solution must act as a surfactant to lower the surface tension of the water and break the hydrophobic bond of the soap scum. A mixture of baking soda and hydrogen peroxide creates an oxygenating reaction that lifts debris from the grout. You cannot just use water. Soap scum is hydrophobic. It repels water. You need a solution that gets under the oils. When I am on a job site and need to clean up a messy grout line, I look for something that will emulsify the grease. Baking soda provides a mild abrasive that works with the toothbrush bristles. Hydrogen peroxide acts as a bleaching agent without the caustic nature of chlorine bleach. Never use acid on your grout unless you know exactly what you are doing. Acid dissolves the cement. It makes the holes in the grout even bigger. This creates more space for scum to hide. It is a vicious cycle. Stick to alkaline or neutral cleaners. This preserves the integrity of the installation for decades rather than years.
Hardwood floor risks near wet areas
Hardwood floors near showers are at extreme risk of moisture damage due to the hygroscopic nature of wood fibers which expand when exposed to high humidity. Proper grout maintenance prevents water from seeping through the walls and reaching the subfloor of adjacent rooms. I have seen beautiful white oak floors buckle because a shower leak was ignored for six months. The water travels along the plate of the wall and finds the end grain of the wood. Once that wood starts to swell, it is over. You cannot just sand it down. The cells are crushed. This is why keeping your grout sealed and clean is not just about looks. It is about the structural engineering of your entire house. A failed grout joint in a bathroom can lead to $20,000 in hardwood repairs in the hallway. Use a moisture meter. Check the baseboards. If you see a gap, you have a problem. The dry heat in places like Phoenix will shrink your baseboards until they show a gap, but the humidity in Houston will turn your subfloor into a sponge.
- Inspect grout lines every six months for hairline cracks
- Use a soft-bristled toothbrush for delicate natural stone
- Apply a high-quality penetrating sealer after every deep clean
- Rinse the area with distilled water to prevent mineral buildup
- Never use steel wool on tile surfaces
The ghost in the expansion gap
The expansion gap at the perimeter of a tile or laminate floor is the most common failure point for moisture intrusion and mold growth. This gap must be filled with a flexible 100 percent silicone caulk rather than rigid grout. Most builders are lazy. They run the grout right up to the tub or the baseboard. When the house shifts, that grout cracks. Now you have a direct highway for water to get under your laminate or hardwood. I spent a week last year ripping out a laminate floor that smelled like a swamp. The culprit was a cracked grout line at the shower transition. Water wicks under the planks. It stays there. It rots the subfloor. If you are cleaning your grout with a toothbrush, pay special attention to these transition zones. If the grout is cracked, dig it out. Replace it with a color-matched silicone. It moves with the house. It stays waterproof. It protects the investment you made in your flooring.
“A floor is only as good as the subfloor beneath it; deflection is the enemy of every joint.” – Master Flooring Axiom