
The concrete grinder and the hidden dip
Subfloor preparation requires a concrete grinder to remove high spots and a self-leveling compound to fill low points. A flat substrate is the primary requirement for marble tile installations to prevent stress fractures and hollow sounds underfoot after the thin-set mortar cures completely. Most guys skip the leveling compound. They think the underlayment will hide the dip. It won’t. I spent three days grinding concrete on a job last month just so the floor wouldn’t click like a castanet. That job was for a lady in Savannah who wanted polished marble in her foyer. She didn’t understand why I was covered in grey dust before a single tile was even pulled from the crate. I told her, you can buy the most expensive stone in the world, but if the slab is wavy, it is going to look like a cheap mess in six months. A floor is only as good as the subfloor beneath it. If you have a dip larger than 1/8 inch over a 10 foot span, your stone is at risk. Marble has no flexural strength. Unlike hardwood floors, which can bridge minor gaps, stone will simply snap under the pressure of a heel or a chair leg. I have seen fifteen thousand dollar projects ruined because the installer was too lazy to mix a bag of floor patch. You have to respect the physics of the slab. Concrete is alive. It breathes. It moves. If you do not account for the moisture vapor transmission rate in a humid climate like Georgia, you are asking for the adhesive to fail before it even hits full strength.
“A floor is only as good as the subfloor beneath it; deflection is the enemy of every joint.” – Master Flooring Axiom
The physics of a polished calcium carbonate surface
Polished marble is a metamorphic rock composed of recrystallized carbonate minerals. The surface luster is achieved through mechanical abrasion rather than chemical coatings. Because marble is acid-sensitive, common household cleaners will etch the surface, creating a dull spot that requires mechanical repolishing to fix. When we talk about marble, we are talking about a material that is relatively soft. On the Mohs scale, it sits somewhere between a 3 and a 5. Compare that to laminate or porcelain tile, and you see the vulnerability. The polish is not a layer of wax. It is the stone itself, ground down to a level of smoothness where light reflects without scattering. When you get a scratch or an etch mark from a spilled lemon or a dropped glass, you have physically altered the topography of the stone. To fix it, you must bring the surrounding area down to the same depth as the scratch. This is why most homeowners fail when they try to use a spray-on shine. You cannot fill a hole with a liquid and expect it to look like a mirror. You need friction. You need heat. You need the right medium to carry the polishing compound into the microscopic pores of the stone without creating more damage in the process.
The felt eraser for microscopic stone scratches
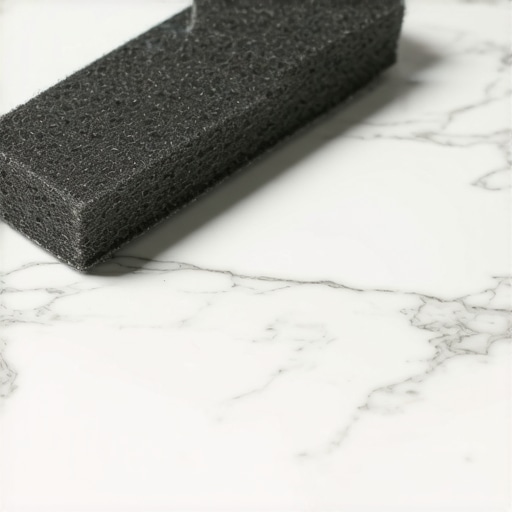
The chalkboard eraser secret involves using high-density wool felt to apply polishing powder to localized etch marks on polished marble tiles. This method provides targeted friction without the risk of swirl marks caused by large mechanical buffers or synthetic pads. I found this trick in an old workshop manual from the fifties. Most modern installers want to bring in a 7-inch variable speed polisher for every little spot. That is overkill. A dense, old-school wool felt eraser allows you to apply significant downward pressure exactly where the etch is located. You use a specialized marble polishing powder, which often contains aluminum oxide or tin oxide. You place a pinch of powder on the dry stone. You take the eraser and you work it in a tight circular motion. The friction generates just enough heat to facilitate a chemical reaction between the powder and the calcium carbonate. It is a slow process. Your arm will get tired. But the results are superior to any quick fix. The felt is soft enough that it won’t scratch the surrounding polish, yet firm enough to keep the powder in contact with the stone. This is the difference between a repair that looks like a patch and a repair that disappears into the stone. It works better than any synthetic sponge because natural wool felt has a specific density that holds the abrasive particles in place rather than letting them slide around the surface.
| Surface Type | Mohs Hardness | Porosity Level | Maintenance Needs |
|---|---|---|---|
| Marble | 3-4 | High | Annual Sealing |
| Granite | 6-7 | Low | Periodic Sealing |
| Hardwood | 2-4 (Janka) | Medium | Refinishing |
| Laminate | N/A | Low | Replacement Only |
Grout chemistry in the splash zone
Grout selection for showers and marble floors must prioritize water resistance and color stability. Using epoxy grout or high-performance cementitious grout prevents moisture infiltration that can lead to efflorescence or the darkening of the stone edges over time. When you are working in a bathroom, you are dealing with a high-moisture environment. Marble is porous. If you use a cheap, non-modified grout, water will seep through the joints and get trapped behind the stone. This causes what we call picture framing. The edges of your beautiful white Carrara start to turn grey or yellow. It is not dirt. It is iron oxidation or water saturation from the back. You have to use a grout that has a low absorption rate. I always recommend a polymer-modified grout for marble. It has the flexural strength to handle the minor movements of the house without cracking. If the grout cracks, the seal is broken. Once the seal is broken, your subfloor starts to rot. It is a chain reaction that ends with a five-figure demolition bill. Do not skimp on the grout. It is the cheapest part of the job, but it is the part that keeps the whole system waterproof. Especially in showers, you need to ensure the grout is packed tight. No voids. No pinholes. Just a solid wall of protection.
“Natural stone tile must be supported by a substrate with a deflection rating of L/720 under live loads.” – TCNA Handbook Standards
- Inspect the subfloor for any deviation exceeding 1/8 inch.
- Ensure the concrete slab moisture level is below 4 percent.
- Apply a high-quality penetrating sealer before grouting.
- Use an old-school wool felt eraser for buffing out etch marks.
- Avoid acidic cleaners that contain lemon or vinegar.
Structural limits of laminate versus stone
Laminate flooring offers high scratch resistance through a melamine wear layer but lacks the structural longevity of natural stone or hardwood floors. While laminate is easier to install, it cannot be buffed or refinished once the surface is compromised. People come into my shop and they want the look of marble but the price of a discount rug. I tell them about laminate. It is a photographic image on a fiberboard core. It is tough. You can drop a hammer on it and it might not dent. But if you scratch it, you are done. There is no chalkboard eraser trick for laminate. There is no sanding it down. Once the wear layer is gone, the floor is trash. Marble is different. Marble is a lifetime product. Yes, it is finicky. Yes, it etches if you look at it wrong. But you can always bring it back to life. You can grind it, polish it, and buff it for a hundred years. It is an investment in the structure of the home. When you install marble, you are adding mass. You are adding thermal inertia. It stays cool in the summer. It feels like a real building. Laminate feels like plastic. It sounds hollow. If you want a floor that lasts through your grandkids, you buy the stone and you learn how to take care of it properly. You don’t buy the stuff that snaps together like a toy.
Hardwood expansion and the vapor pressure problem
Hardwood floors require a moisture barrier to prevent cupping and crowning caused by vapor pressure from the crawlspace or slab. Unlike marble, which is dimensionally stable but brittle, wood flooring expands and contracts with changes in relative humidity. I once walked into a house where a walnut floor looked like a mountain range. The installer forgot the vapor barrier. The wood was sucking up moisture from the concrete and expanding. Because there was no room to move at the walls, the boards had nowhere to go but up. Marble doesn’t do that. Marble stays the same size. But if the wood beneath the marble moves, the marble cracks. This is why transitions are so vital. You cannot just butt hardwood up against stone and hope for the best. You need an expansion gap. You need a T-molding or a marble threshold that allows the wood to breathe. If you lock the wood in place, it will exert enough force to snap a stone tile right in half. I have seen it happen. It is pure physics. Wood is a bundle of straws. When those straws get wet, they get wider. You have to respect the power of water. Whether it is in a shower or under a living room floor, moisture is the enemy of every installation.
The 1/8 inch that ruins everything
The installation tolerance for large format marble is strictly limited to 1/8 inch over 10 feet to ensure a lippage-free surface. Using a tile leveling system during the thin-set application is mandatory to keep the edges flush and prevent tripping hazards. Lippage is what happens when one tile sits higher than the neighbor. In a polished floor, it looks terrible. It catches the light and creates shadows. It also catches the mop. If you are buffing a floor with an eraser and you hit a high edge, you won’t get an even shine. You have to get the floor flat from day one. I use a 10-foot straight edge on every single job. I don’t care if the builder says the floor is ready. It never is. I find the humps and I grind them. I find the valleys and I fill them. Only then do I start the layout. This is the part of the job no one sees, but it is the most vital. It is the foundation. If you get the foundation right, the polishing and the buffing are easy. If you get it wrong, you will be fighting that floor for as long as you live in the house. Precision is not a luxury. It is a requirement of the trade. Final inspection of the site proves that the extra hours spent on the subfloor are what separate a master from an amateur.