
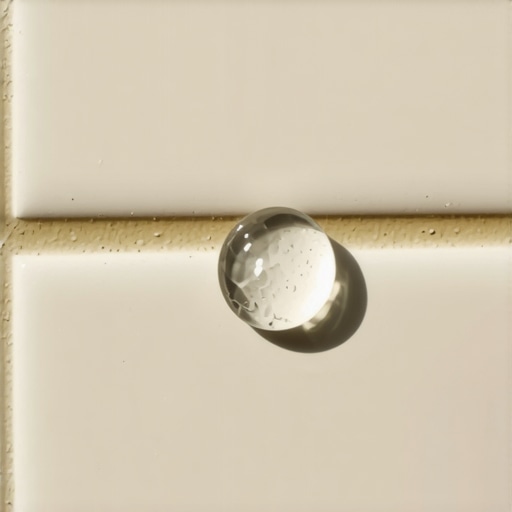
I spent three days grinding concrete on a job last month just so the floor wouldn’t click like a castanet. Most guys skip the leveling compound. They think the underlayment will hide the dip. It won’t. I have seen it time and again. I once walked into a luxury bathroom where the homeowner spent forty thousand dollars on Italian marble only to have the grout turn a muddy grey within three weeks. They thought their sealer was fine because water beaded up like a freshly waxed car. They were wrong. I took a drop of dish soap, mixed it with water, and watched the grout soak it up like a dry sponge. That is the reality of the dish soap test. It exposes the lies of surface tension and tells you exactly what is happening inside the microscopic pores of your cementitious substrate.
The hidden physics of the surfactant challenge
Grout sealer effectiveness is determined by the ability of a chemical barrier to repel low surface tension liquids. Most homeowners rely on the standard water bead test, but pure water has high surface tension. Adding dish soap creates a surfactant solution that more accurately mimics the oils, proteins, and soaps that actually cause grout staining in showers and high traffic areas. If the soapy mixture penetrates the grout, your sealer has failed at a molecular level and moisture is migrating into your subfloor. This migration is the primary cause of rot in the plywood layers beneath your tile. When I talk about flooring, I am not talking about the color or the texture. I am talking about the structural engineering of the assembly. Grout is a bridge. It bridges the gaps between rigid tiles. If that bridge is porous, it becomes a highway for moisture to travel into the thin-set and eventually the backer board. This is why I am a stickler for the standards set by the Tile Council of North America. They do not suggest sealing as a cosmetic choice; they suggest moisture management as a structural necessity.
“Cementitious grout is inherently porous and requires a liquid-applied barrier to prevent subsurface saturation.” – TCNA Handbook for Ceramic, Glass, and Stone Tile Installation
Why water beads are a false prophet
A water bead on a grout line does not guarantee that the internal pores of the cement are protected. Water has a natural tendency to stick to itself, a phenomenon known as cohesion. In many cases, a very weak or failing sealer can still support a bead of pure water simply because the water is holding onto itself better than it is being pulled into the grout. This is why many DIY enthusiasts think their showers are protected when they are actually one shower away from a mold colony. When you introduce dish soap, you are performing a rigorous stress test on the chemical bond of the sealer. The soap molecule has a hydrophilic head and a hydrophobic tail. It breaks the surface tension of the water. This forces the liquid to seek out any available void. If your sealer is a high-quality penetrating silane or siloxane, it should have lined those voids with a hydrophobic coating that resists even the soap. If it is a cheap, topical acrylic, the soap will often find a way through the micro-cracks and begin the wicking process. This is the same principle I apply when checking moisture in hardwood floors. You cannot trust the surface. You have to understand what is happening in the core of the material.
The chemical reality of cementitious bonds
Standard grout is a mixture of Portland cement, graded sand, and pigments that forms a rigid but breathable lattice. This lattice is filled with billions of tiny air pockets created during the evaporation of the mixing water. When you apply a sealer, you are attempting to fill those pockets or at least line them with a resin. There are two main types of sealers used in residential flooring. Topical sealers sit on the top like a skin. They are prone to peeling and are easily abraded by foot traffic. Penetrating sealers, which I always recommend, actually soak into the grout and bond to the sand particles. This creates a much more durable barrier. However, even the best penetrating sealer is not a permanent solution. Over time, the alkaline environment of the shower or the acidic nature of some cleaning agents will break down the resin. This is why I tell people to stop buying the generic jugs of floor cleaner at the grocery store. Those cleaners are often too harsh. They strip the sealer away, leaving your grout naked. I have seen laminate floors buckle because of moisture migration from an adjacent bathroom with unsealed grout. The water travels under the baseboards and into the fiberboard core of the laminate. It is all connected.
| Sealer Technology | Chemical Composition | Durability Rating | Surface Tension Resistance |
|---|---|---|---|
| Topical Acrylic | Water-based Resin | Low (1 year) | Moderate |
| Penetrating Silane | Silicon-based | High (5 years) | Extreme |
| Epoxy Grout | Two-part Resin | Permanent | Total |
| Fluoropolymer | Advanced Polymer | Very High (8 years) | Maximum |
Why showers demand higher performance standards
The shower environment is a constant cycle of thermal expansion and hydraulic pressure that tests grout integrity. Every time you turn on the hot water, the tile and grout expand. As they cool, they contract. This movement creates micro-fissures that are invisible to the naked eye. If you are not using a high-quality sealer, these fissures become entry points for soapy water. This is where the dish soap test is most critical. In a shower, you are constantly using surfactants in the form of body wash and shampoo. If your grout can only handle pure water, it is not actually sealed for a shower environment. I have torn out enough showers to know that the damage usually starts at the bottom two rows of tile. This is the splash zone. It is where the most water accumulates and where the soap concentration is highest. If the grout fails here, the moisture hits the waterproofing membrane. If that membrane was installed by a hack who did not tape the seams, the water hits the studs. Then you have a five-figure repair bill on your hands. I always tell homeowners that a ten-dollar bottle of soap and a little time can save them from a massive headache.
The 1/8 inch that ruins everything
Precision in grout application and sealing is the difference between a floor that lasts decades and one that fails in months. When I install a floor, I am looking at the 1/8 inch gap between the tiles as the most vulnerable part of the entire room. If that gap is not fully packed with grout, it leaves a void. If that void is then poorly sealed, it becomes a reservoir for stagnant water. This leads to efflorescence, which is that white crusty powder you see on old grout. Efflorescence is caused by minerals in the concrete or the grout being carried to the surface by moisture. Once the water evaporates, the minerals stay behind. If you see efflorescence, your sealer is long gone. It is a sign that moisture is moving freely through the substrate. I have seen this happen on hardwood floors too, particularly site-finished oak. If the humidity in the crawlspace is not controlled, the moisture moves up through the subfloor and causes the planks to cup. The floor is a system. You cannot treat the grout as an afterthought. It is a critical component of the moisture management strategy of the entire house.
“A floor is only as good as the subfloor beneath it; deflection is the enemy of every joint.” – Master Flooring Axiom
A technical guide to the dish soap test
Performing the dish soap test requires a clean, dry surface and a precise mixture of water and surfactant. You cannot do this on a dirty floor. The dirt and oils already on the grout will skew the results. Follow this checklist to get an accurate reading of your grout’s health. I do this on every maintenance call I go on. It is the only way to prove to a customer that their floor needs work. It is blunt, it is honest, and it does not lie. Most people are shocked when they see how fast the liquid disappears. They think grout is like plastic. It is not. It is more like a very hard sponge. If you do not believe me, try this tonight in your own bathroom.
- Clean the grout lines with a pH-neutral cleaner to remove surface oils.
- Allow the area to dry completely for at least twenty-four hours.
- Mix one drop of concentrated dish soap with two ounces of distilled water.
- Use a dropper to place three small beads of the solution on different grout lines.
- Observe the beads for ten minutes without touching them.
- If the beads flatten or darken the grout, the sealer has been compromised.
- If the beads remain spherical and the grout color does not change, your sealer is intact.
The relationship between grout and subfloor integrity
Unsealed grout allows moisture to reach the subfloor which can lead to structural deflection and tile cracking. When moisture sits in the grout, it eventually finds its way to the thin-set mortar. Standard thin-set is also cementitious and porous. From there, the moisture hits the substrate. If you have a plywood subfloor, that wood will begin to swell. Even a tiny amount of swelling is enough to break the bond between the tile and the mortar. This is when you start to hear those hollow sounds when you walk across the floor. Eventually, the tile will crack or the grout will pop out in chunks. This is not a product failure; it is an installation and maintenance failure. I have seen beautiful hardwood floors ruined because a nearby bathroom had a slow leak through the grout that traveled along the subfloor. People blame the wood, but the wood was just reacting to the environment. You have to be proactive. You have to think like an engineer. You are managing fluids and pressures. If you fail to manage them, the house will eventually win and your floor will lose.
Choosing sealers based on solid content
High-performance sealers are defined by their percentage of active solids and their carrier chemistry. When you go to a big-box retailer, you are often buying a product that is ninety-five percent water. It is cheap, it is easy to apply, and it does almost nothing. A professional-grade sealer has a higher concentration of resins. Solvent-based sealers generally have better penetration because the solvent molecules are smaller than water molecules, allowing them to carry the resin deeper into the grout pores. However, they have high VOCs and can be a pain to work with in small bathrooms. Water-based fluoropolymers are the modern standard. They offer excellent oil and water resistance without the nasty smell. When I am looking at a product, I do not look at the pretty picture on the front. I look at the technical data sheet. I want to know the solids by weight. I want to know the vapor transmission rating. If a company does not provide that data, I do not use their product. My reputation is built on floors that do not fail. I cannot risk that on a mystery liquid in a spray bottle.
The final word on moisture management
Maintaining a floor requires a disciplined schedule of testing and reapplication of protective coatings. Do not wait for the grout to look dirty before you act. By then, the damage is already done. Perform the dish soap test once a year. If you have a large family and the shower is running three times a day, do it every six months. It takes five minutes and costs practically nothing. If the test fails, do not just slap another layer of sealer on top. You have to clean the grout deeply, perhaps with a steam cleaner, to open up the pores and remove any embedded soap scum. Only then can the new sealer do its job. I have seen floors that are thirty years old look brand new because the owners followed this protocol. I have also seen six-month-old floors that need to be completely ripped out. The difference is always in the details. It is in the 1/8 inch. It is in the subfloor. It is in the drop of dish soap. If you take care of the physics, the aesthetics will take care of themselves. Stop thinking about what the floor looks like and start thinking about how it performs under pressure. That is the mark of a master installer.”