
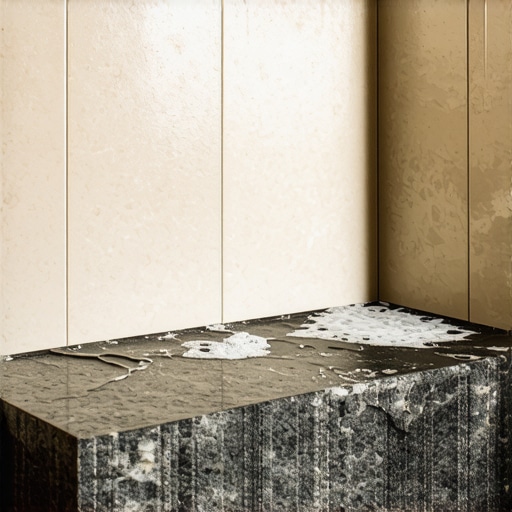
I have spent twenty-five years on my knees with a moisture meter and a level, grinding down concrete and fixing the expensive mistakes of builders who prioritize speed over structure. Most guys skip the leveling compound and think the underlayment will hide the dip, but it never does. I spent three days grinding concrete on a job last month just so the floor would not click like a castanet. That same culture of cutting corners is why your shower bench is probably a ticking time bomb. When you build a seat in a wet zone, you are not just making a place to sit. You are creating a structural shelf that must manage thousands of gallons of water over its lifetime. Most people slap some ceramic tile on top with a few grout lines and call it a day. They are wrong. A shower bench is a horizontal surface in a vertical world of water. It needs a solid stone top to survive the physics of moisture infiltration.
The structural lie of a tiled seat
A tiled shower bench is inherently prone to failure because it introduces dozens of tiny entry points for water through grout joints on a horizontal plane. Unlike vertical walls where water sheds quickly, a bench seat experiences standing water and slow drainage, which forces moisture into porous grout through hydrostatic pressure and capillary action. You have to understand the chemistry of the shower. Cement-based grout is essentially a hard sponge. Even if you use a high-quality sealer, that sealer eventually breaks down under the pH-shifting assault of shampoos, soaps, and body oils. Once the sealer fails, the grout begins to absorb water. On a wall, this is manageable because gravity is your friend. On a bench, gravity works against you. The water sits there. It dwells. It finds the microscopic pathways between the tile and the mud bed. Eventually, that moisture reaches the framing. This is why I always tell my clients that a bench is not a decoration. It is a piece of engineering. If you treat it like a kitchen backsplash, you will be ripping out your shower in five years. You need a single, solid, non-porous surface that eliminates the joints entirely. This is the only way to ensure that gravity pulls the water into the drain instead of into your subfloor.
“A floor is only as good as the subfloor beneath it; deflection is the enemy of every joint.” – Master Flooring Axiom
Why grout is a sieve for standing water
Grout joints on a horizontal shower bench act as channels for moisture to bypass the primary surface and saturate the setting bed below. This leads to efflorescence, mold growth, and eventually the structural failure of the waterproofing membrane due to constant saturation and the inability of the assembly to dry out. When we talk about the molecular level of a shower, we are talking about vapor and liquid transport. Standard grout is porous at a microscopic scale. When water sits on a grout line, it is pulled inward by capillary action. This is the same force that pulls water up into a tree. The water does not just stay in the grout; it travels down to the thin-set. Most thin-set is also cement-based and porous. You end up with a wet sandwich of tile, wet thin-set, and wet grout. This sandwich stays wet for days after your shower. This creates a playground for black mold. If you use a solid piece of stone, like granite or quartz, you eliminate those thousands of microscopic channels. You create a shield. A single slab of stone is an impenetrable barrier that keeps the water on the surface where it belongs. I have seen benches where the grout looked perfect from the top, but when I popped a tile, the mortar bed underneath was a black, slimy mess. That is the hidden reality of tiled benches. They never truly dry out. They just rot from the inside out until the smell becomes unbearable or the wood behind the wall starts to crumble.
[IMAGE_PLACEHOLDER_1]
The geometry of the pitch and the stone slab
Proper shower bench design requires a precise pitch of one quarter inch per foot toward the drain to prevent pooling, a task that is much easier to achieve and maintain with a solid stone slab than with individual tiles. A solid top ensures a perfectly flat plane that eliminates the lippage and low spots where water hides. Geometry is the most important part of my job. If the slope is not perfect, the floor fails. If the floor fails, the house suffers. When you tile a bench, every single tile has a slight edge. We call this lippage. Even a tiny fraction of a millimeter of lippage creates a dam. That dam holds back a few drops of water. Those drops of water host bacteria. Over time, those spots turn orange or black. A solid stone top is fabricated in a shop on a multi-ton CNC machine. It is perfectly flat. When I set that stone on a bench, I can dial in the pitch to exactly two percent. There are no bumps. There are no ridges. The water hits the stone and immediately begins its journey toward the drain. It is a continuous, unbroken slide. Furthermore, a solid stone top allows for a slight overhang. This is a pro move. By overhanging the stone by a half-inch and polishing a drip groove on the underside, you can force water to fall directly onto the floor rather than running down the face of the bench and hitting the sensitive joint where the bench meets the wall. It is about controlling the water, not just hoping it goes where you want.
| Material Type | Water Absorption Rate | Joint Frequency | Maintenance Level |
|---|---|---|---|
| Ceramic Tile | 0.5% to 3.0% | High (Every 2-12 inches) | High (Annual Sealing) |
| Natural Granite | Less than 0.5% | None (Single Slab) | Low (Periodic Sealing) |
| Engineered Quartz | Less than 0.05% | None (Single Slab) | Very Low (No Sealing) |
| Marble Slab | 0.5% to 2.0% | None (Single Slab) | Moderate (Etch Prone) |
Capillary action and the hidden rot in your wall
Capillary action allows water to travel upward and sideways through porous materials like grout and cement board, often bypassing the traditional waterproofing layers if they are not integrated perfectly at the bench-to-wall transition. A solid stone top reduces this risk by minimizing the number of seams where this transport occurs. I have spent my life fighting the physics of water. Most people think water only goes down. They are wrong. Through capillary suction, water can move up a wall by three or four inches if it finds the right medium. When you have a tiled bench, the water gets into the grout and then moves laterally. It finds the corner where the bench meets the wall. This corner is the most vulnerable spot in any shower. If the installer did not use a high-quality sealant or an epoxy-based grout in that corner, the water will migrate behind the wall tile. Once it gets behind the tile, it starts attacking the fasteners. It starts attacking the studs. I have seen 2x4s that looked like wet cardboard because of a single failed grout joint on a shower bench. By using a solid stone top, you reduce the perimeter of potential failure by eighty percent. You only have one continuous seam to manage at the back and sides. I always use a high-performance 100 percent silicone sealant at these junctions. Silicone is flexible and waterproof. Grout is rigid and porous. You should never use grout in a change of plane. It will crack. It will leak. It will fail. That is the law of the job site.
“Waterproofing is not a single layer; it is a redundant system of management that must account for the inevitable failure of surface finishes.” – Tile Industry Standard
The chemical bond of a leakproof bench
Achieving a permanent bond between a stone slab and the underlying waterproofing membrane requires specific thin-set chemistry, usually a large-and-heavy-tile (LHT) mortar with high polymer content to manage the weight and prevent shearing. This bond must be void-free to ensure no air pockets exist where moisture can condense. Let’s talk about the mud. You cannot just use any bag of thin-set from the local hardware store. When you are setting a heavy piece of granite or quartz on a bench, you need a mortar that can handle the sheer force and the weight. I use polymer-modified mortars that meet ANSI A118.15 standards. These are the gold standard for the industry. The polymers in the mortar act like tiny rubber bands. they allow the bond to flex slightly as the house moves and the temperature of the water changes. When you pour hot water on a cold stone slab, it expands. This is thermal expansion. If your mortar is too rigid, the bond will snap. If the bond snaps, you get a hollow sound. If you have a hollow sound, you have a gap. That gap will eventually collect condensation. I use a notched trowel to create ridges and then I collapse those ridges to ensure 100 percent coverage. There should be no air under that stone. It should be a solid, monolithic block. This is how you prevent the “ghost in the machine” where a shower feels damp even when it hasn’t been used in days. It is the moisture trapped in the voids of a bad installation. We do not do that. We build it to last a century.
Installing a solid top that stays dry
Proper installation of a solid stone bench top involves a multi-stage waterproofing process including a liquid-applied membrane, a specialized mortar bed, and a silicone-sealed perimeter to create a redundant barrier against moisture. Every step must be executed with a focus on the structural integrity of the seal. Follow this protocol if you want a shower that does not rot. First, you build the bench out of concrete block or a high-density foam structure like a Schluter-Kerdi-Board. Never use wood framing alone if you can avoid it, but if you do, wrap it in a waterproof membrane like it is a precious cargo. Second, apply two coats of a liquid waterproofing membrane. I like the stuff that turns from pink to red so I know it is dry. Third, cut your stone slab to fit with a 1/8 inch gap at the walls for expansion. Do not tight-fit it. The house moves, and that stone will crack your wall tile if it does not have room to breathe. Fourth, back-butter the stone. This is the process of spreading a thin layer of mortar on the back of the stone before setting it. This ensures every square millimeter is bonded. Fifth, set the stone with that crucial two percent pitch. Finally, seal the edges with a high-grade silicone. Do not use grout in the corners. If you follow these steps, you are not just a tiler; you are an architect of the wet zone.
- Select a non-porous stone like Quartz or high-density Granite.
- Ensure the bench structure is sloped before applying the stone.
- Use a liquid-applied waterproofing membrane over the entire bench surface.
- Apply a 100 percent silicone sealant to all changes of plane and corners.
- Maintain a 1/8 inch expansion gap between the stone and the wall tiles.
- Back-butter the stone slab to ensure a 100 percent mortar bond.
- Confirm the final pitch with a digital level after setting the stone.
At the end of the day, flooring and tile work are about respect. You have to respect the water. You have to respect the materials. If you think you can cheat the physics of a shower, you are mistaken. The water will find the path of least resistance every single time. It does not care about your aesthetic. It only cares about gravity and porosity. By choosing a solid stone top for your shower bench, you are making a decision to respect the structure of your home. You are choosing a solution that is physically superior to tile. It is cleaner, it is safer, and it is the only way I will build a bench in my own house. Stop looking at the price tag of the slab and start looking at the price tag of a full mold remediation and a bathroom gut job. The stone is cheaper every time. Build it once. Build it right.