
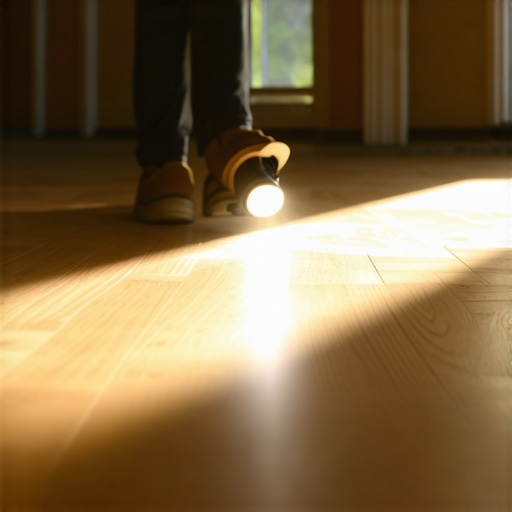
The Flashlight Trick for Finding High Spots in Your Subfloor
Most guys skip the leveling compound. They think the underlayment will hide the dip. It won’t. I spent three days grinding concrete on a job last month just so the floor wouldn’t click like a castanet. The homeowner thought I was crazy until they saw the dust. That dust is the price of a floor that stays quiet for thirty years. If you ignore the subfloor, you are not an installer, you are just a guy laying down expensive firewood. I have spent twenty five years on my knees with a moisture meter and a straight edge, and I can tell you that the difference between a luxury finish and a total failure is measured in the thickness of a nickel.
The shadow reveals the hidden floor
The flashlight trick identifies subfloor irregularities by casting long shadows across high spots and ridges when placed parallel to the surface. By positioning a high lumen LED light source on the floor, installers can visualize microscopic deviations in flatness that are invisible to the naked eye under standard overhead lighting. This method is the primary diagnostic tool for preparing a substrate for laminate, hardwood floors, or luxury vinyl plank. When the light hits a hump, it creates a dark zone behind it. That shadow tells you exactly where the grinder needs to go. If you see a shadow longer than two inches, your locking system is at risk. Modern click lock laminate is engineered with incredibly tight tolerances, and a high spot acts like a fulcrum. Every time someone walks over that spot, the joint flexes. Eventually, the plastic tongue snaps, and you are left with a gap that no amount of tapping will close.
Why your subfloor is lying to you
Subfloor flatness is the measurement of surface deviation across a plane, distinct from levelness which refers to the orientation relative to the horizon. A floor can be perfectly level but improperly flat, containing waves and ridges that prevent the proper adhesion of grout and tile or the stable seating of hardwood. Many rookies think a level is the only tool they need. They are wrong. A subfloor can be sloped toward a floor drain and still be perfectly flat. Conversely, a floor can be perfectly level at its ends but have a massive hump in the middle. This hump is often caused by the settling of the house or the swelling of OSB edges. When rain hits a construction site before the roof is on, the edges of the subfloor sheets soak up water like a sponge. They swell by an eighth of an inch, creating a ridge at every seam. If you lay hardwood floors over those ridges, the planks will bridge the gap, creating a hollow sound that will haunt the homeowner forever.
“A floor is only as good as the subfloor beneath it; deflection is the enemy of every joint.” – Master Flooring Axiom
The 1/8 inch that ruins everything
Deflection is the vertical movement of a subfloor under a load, and it is the primary cause of cracked grout and failing laminate joints. To prevent failure, a subfloor must meet the L/360 standard for ceramic tile or the L/720 standard for natural stone as defined by the Tile Council of North America. If your subfloor moves, your floor fails. It is that simple. In showers, this is even more critical. If the substrate under the tile flexes, the grout will crack. Once the grout cracks, water finds its way behind the tile, leading to mold and structural rot. I have seen million dollar homes where the showers had to be ripped out after six months because the installer didn’t understand the physics of deflection. They used 1/2 inch plywood when they should have used 5/8 inch or double layered the substrate. The chemistry of modern modified thin set is impressive, but it is not a structural substitute for a rigid subfloor.
The mathematics of subfloor tolerances
To ensure a professional installation, you must adhere to the following technical tolerances. These are not suggestions, they are the requirements for a floor that lasts a lifetime.
| Material | 10-Foot Tolerance | 6-Foot Tolerance | Preferred Substrate |
|---|---|---|---|
| Solid Hardwood | 3/16 inch | 1/8 inch | Plywood or OSB |
| Large Format Tile | 1/8 inch | 1/16 inch | Cement Backer Board |
| Laminate Flooring | 3/16 inch | 1/8 inch | Self-Leveling Concrete |
| LVP (Vinyl) | 3/16 inch | 1/8 inch | Smooth Concrete or Underlayment |
The ghost in the expansion gap
Expansion gaps are the intentional spaces left at the perimeter of a flooring installation to allow for the natural movement of wood and laminate due to humidity. Without these gaps, floors will buckle, peak, or cup as the material expands against the walls, leading to irreversible structural damage. People always want to hide the gap. They want the floor to go tight against the baseboard. That is a recipe for disaster. In a humid environment, a hardwood floor can expand by nearly half an inch across a twenty foot span. If it has nowhere to go, it will lift off the subfloor. I call this the ghost in the gap because the floor starts moving on its own. You will hear it creaking at night as the temperature drops. The only solution is to pull up the trim and cut the boards back. Save yourself the trouble and leave the gap during the initial install. Use a spacer. Use your head.
Preparation checklist for professional results
- Calibrate your moisture meter for the specific species of wood or concrete density.
- Use a 10 foot magnesium straight edge to find depressions.
- Execute the flashlight trick in a dark room for maximum contrast.
- Mark high spots with a red carpenter pencil and low spots with blue.
- Grind high spots using a diamond cup wheel with a vacuum shroud to contain silica dust.
- Fill low spots with a high compressive strength self-leveling compound.
- Ensure the subfloor is free of wax, oil, and drywall mud before applying adhesives.
“The installer must confirm that the subfloor is flat to within 1/8 inch in a 6 foot radius before the first plank is laid.” – NWFA Installation Guidelines
The chemistry of the moisture barrier
Moisture vapor transmission rate measures the amount of water vapor passing through a concrete slab, and it must be mitigated with a high quality vapor barrier or sealer. Hardwood floors and laminate are highly susceptible to moisture, which causes the wood fibers to swell and the adhesive bonds to break down. This is especially true in regions with high ground moisture. You might think a concrete slab is dry because it looks gray. It is not. Concrete is a sponge. It pulls moisture from the earth and breathes it into your home. If you trap that moisture under a layer of plastic or vinyl without a proper sealer, it will condense into liquid water. That water will grow mold and rot the underside of your floor. Always perform a calcium chloride test or use an in-situ probe to check the relative humidity of the slab. If the readings are high, you need a liquid epoxy moisture mitigator. Do not trust a thin sheet of poly to do the job of a chemical barrier.
A contrarian view on underlayment thickness
Most homeowners think the thickest, softest underlayment is the best choice. They want that cushiony feel under their feet. They are wrong. While a little bit of sound dampening is good, too much cushion is a death sentence for click lock floors. If the underlayment is too soft, the floor will deflect every time you step on it. This constant vertical movement puts immense stress on the locking mechanism. Over time, the thin plastic or fiberboard tongue will fatigue and snap. You want a high density, thin underlayment that provides support. A 2mm or 3mm high density foam or cork is far superior to a 6mm soft pad. The floor should feel solid, not like a trampoline. If you want softness, buy a rug. Do not compromise the structural integrity of your floor for a bit of squish.