
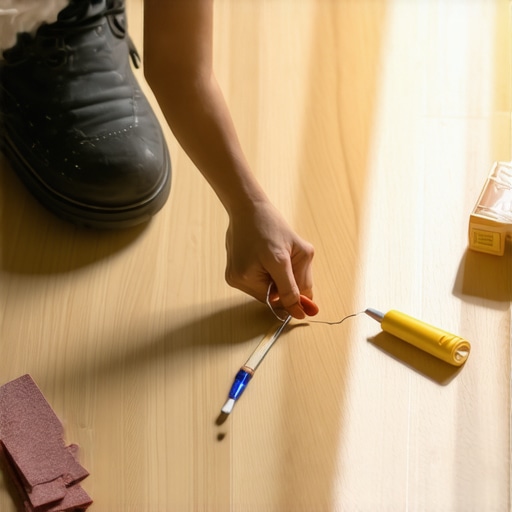
How to Repair a Cigarette Burn in Your Laminate Floor
I spent three days grinding concrete on a job last month just so the floor wouldn’t click like a castanet. Most guys skip the leveling compound. They think the underlayment will hide the dip. It won’t. I have seen countless DIY repairs fail because the person doing the work ignored the fundamental structure of the floor. When you are looking at a cigarette burn in your laminate, you are not just looking at a cosmetic blemish. You are looking at a localized failure of the aluminum oxide wear layer and the high density fiberboard core. This is a structural engineering challenge on a microscopic scale. Laminate is a sandwich of melamine resin, decorative paper, and compressed wood fibers. Once a cherry from a cigarette lands on that surface, it initiates a thermal reaction that melts the protective coating and begins to carbonize the wood fibers beneath. You cannot sand this out like a piece of solid oak. If you try to sand it, you will simply burn through the photograph of the wood and reach the brown pulp underneath. To fix this right, you have to understand the chemistry of the materials involved and the mechanical limits of the click-lock system.
The anatomy of a scorched wear layer
Fixing a cigarette burn in laminate requires removing the carbonized material without damaging the surrounding melamine resin or the underlying decorative layer. The wear layer of a laminate floor is typically composed of aluminum oxide crystals suspended in a resin matrix. This layer is designed to resist abrasion, not extreme point-source heat. When heat exceeds 400 degrees Fahrenheit, the resin undergoes a phase change. It becomes brittle and opaque. If the burn has reached the decorative paper, you are no longer just cleaning a stain. You are performing a surgical replacement of the surface design. You must decide if the damage is surface-level or if it has compromised the High-Density Fiberboard core. A deep burn creates a pocket of charred carbon that is hygroscopic. It will pull moisture from the air or from your cleaning mop, causing the core to swell. This swelling will eventually lift the edges of the repair, making your fix look like a scab. You must excavate every single grain of black char before you even think about applying a filler.
“A floor is only as good as the subfloor beneath it; deflection is the enemy of every joint.” – Master Flooring Axiom
The depth of the char determines the fix
Assessing the severity of a laminate burn involves testing the hardness of the scorched area with a sharp pick to see if the core has softened. If the pick sinks into the floor, the heat has destroyed the lignin that holds the wood fibers together. At this point, a simple wax fill will not suffice. You are dealing with a structural void. For minor singes where only the wear layer is yellowed, you might get away with a light scraping and a clear resin touch-up. For anything deeper, you are looking at a two-part epoxy or a full board replacement. The physics of the repair change as the hole gets larger. A small hole can rely on the mechanical bond of the filler against the vertical walls of the crater. A large hole requires a chemical bond to prevent the filler from popping out when the floor flexes under foot traffic. Remember that laminate floors are floating systems. They move. Every time you walk near that repair, the floor dips and rises. If your filler is too rigid, it will crack. If it is too soft, it will attract dirt and turn black within a month.
| Repair Type | Burn Severity | Material Used | Success Rate |
|---|---|---|---|
| Wax Fill | Surface Singe | Hard Wax Stick | High for small spots |
| Epoxy Resin | Deep Char | Two-Part Clear Epoxy | Moderate |
| Acrylic Putty | Medium Hole | Color-Matched Acrylic | High for aesthetics |
| Board Replacement | Total Failure | Spare Floor Plank | 100 percent if done right |
The surgical removal of damaged fibers
Removing a cigarette burn from laminate involves using a sharp chisel or a rotary tool to grind away only the blackened material. You need a steady hand and the right lighting. I prefer a small dremel with a diamond bit. You want to create a clean, vertical wall around the perimeter of the burn. Do not taper the edges. A tapered edge creates a thin layer of filler at the margin that will inevitably flake off. You need a shoulder for the filler to sit against. Once the char is gone, you must clean the area with denatured alcohol. Do not use water. Water will soak into the exposed HDF core and cause it to expand. If the core expands before you seal it, the repair will sit higher than the rest of the floor. This is why amateurs fail. They use wet cloths to clean up, and then they wonder why the floor looks like it has a blister. You are working with wood pulp that has been compressed under thousands of pounds of pressure. It is thirsty. It wants to grow. You have to keep it dry and sealed.
- Sharp 1/4 inch wood chisel
- Denatured alcohol for cleaning
- Color-matched laminate repair paste
- Clear satin or gloss lacquer pen
- Fine-grit sandpaper (800 grit or higher)
- Microfiber cloth
- Plastic putty knife
The chemistry of the color match
Matching the color of a laminate floor repair requires layering different pigments to mimic the natural variation of wood grain. No floor is a single solid color. It is a mosaic of tans, browns, and grays. If you fill the hole with one solid blob of brown putty, it will stand out like a sore thumb. I always tell people to buy a kit that comes with at least three shades. You start with the lightest base color to fill the bulk of the hole. Then, while it is still tacky, you use a fine brush or a toothpick to streak in the darker grain lines. This is where the artistry comes in. You are essentially painting a tiny picture on your floor. The goal is to break up the visual outline of the repair. The human eye is very good at spotting perfect circles and sharp edges. If you blur the lines of your repair into the existing grain of the laminate, the repair becomes invisible from a standing height. After the color is set, you must apply a wear layer. A clear lacquer or a specialized laminate sealer will provide the sheen match. If your floor is matte and your repair is glossy, it will catch the light every time you walk by.
Why your subfloor ruins your repair
The stability of your laminate repair is directly tied to the levelness of the subfloor and the amount of vertical deflection in the planks. If your subfloor has a dip of more than 1/8 inch over six feet, the planks will move significantly when stepped on. This movement puts immense stress on any filler or patch you have installed. Think about the physics. You have a rigid patch inside a semi-flexible plank. Every time the plank bends, the patch is being squeezed and pulled. Eventually, the bond fails. This is why I spent three days grinding concrete on that job I mentioned. I knew that if the floor wasn’t flat, the joints would eventually creak and the finish would fail. If you are repairing a burn in a high-traffic area, you might need to consider a more flexible filler like a high-performance acrylic that can handle the micro-movements of the floor. Most people want the thickest underlayment possible because they think it feels better. In reality, too much cushion actually causes the locking mechanisms on LVP and laminate to snap under pressure. It also makes your repairs pop out. A firm, flat base is the only way to ensure a repair lasts for years.
“Deflection is the silent killer of the perfect floor installation.” – Master Flooring Axiom
The plunge saw method for total board replacement
Replacing a single laminate board in the middle of a room requires a plunge saw and the removal of the locking tongues. This is the nuclear option. You only do this if the burn is too large to hide. You use a circular saw to cut a rectangle inside the damaged board, staying away from the edges. Then you carefully chip out the remaining pieces. You have to be careful not to damage the adjacent boards. Once the old board is out, you take a new board and cut off the locking tongues on the long and short sides. You are essentially turning a click-lock board into a drop-in board. You apply a high-quality wood glue or a specialized tongue and groove adhesive to the edges and drop the board into the hole. You need to weight it down with something heavy, like a stack of tile boxes, for at least 24 hours. The glue provides the structural integrity that the locking system used to provide. This is a permanent fix, but it requires a spare board from the original installation. If you don’t have a spare board, you are out of luck. You can’t just go buy a new one five years later because the dye lots will never match and the manufacturer probably changed the locking profile anyway.
The science of adhesive bonding in laminate repairs
Successful laminate bonding depends on the surface energy of the melamine coating and the moisture content of the HDF core. Melamine is a non-porous material. It is very hard for adhesives to stick to it. This is why you must scuff the edges of the burn area with high-grit sandpaper. You are creating a mechanical profile for the glue or filler to grab onto. At the same time, you have to be mindful of the moisture in the air. If the humidity is too high, the HDF core will expand slightly, and the adhesive will not bond correctly. Professional installers use moisture meters to check the slab and the air before doing any major repair. You want the floor to be in its neutral state. If you repair the floor when it is at its maximum expansion in the summer, the repair might crack when the floor shrinks in the winter. The expansion gap at the perimeter of the room is there for a reason. It allows the entire floor to move as a single unit. Your repair has to be part of that unit. It cannot be an island of rigidity in a sea of movement. Use a filler that maintains some elasticity after curing.
Preventing the ghost of the burn from returning
Protecting your repaired laminate floor requires a commitment to maintaining the correct indoor climate and using proper cleaning agents. Once the repair is finished, the floor is still vulnerable. The area around the repair will always be a weak point in the moisture barrier. Avoid using steam mops. Steam mops are the enemy of laminate. They force high-pressure moisture into the seams and into your repair. Within months, the edges of the planks will start to peak and the repair will fail. Use a dry or damp microfiber mop only. Keep your home humidity between 35 and 55 percent. This keeps the wood fibers in the laminate stable. If the house gets too dry, the planks will shrink and the gaps will open up, putting pressure on your repair. If it gets too humid, the planks will swell and crush the repair. Treat your floor like the precision engineered surface it is. It is not just a place to walk. It is a structural component of your living environment. If you treat it with respect, your repair will last as long as the house stands.