
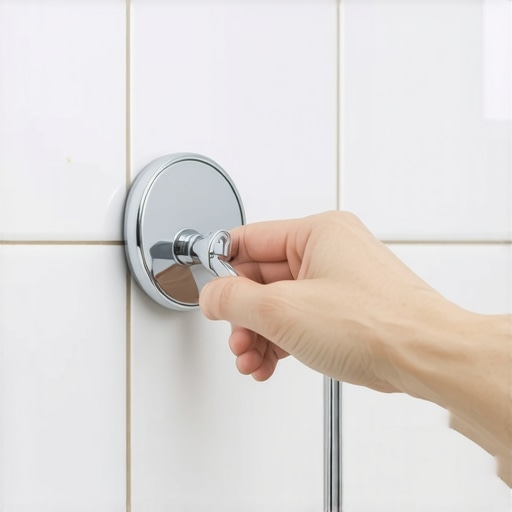
The mirror trick for tiling hard to reach shower corners
I spent three days grinding concrete on a job last month just so the floor wouldn’t click like a castanet. The homeowners thought I was crazy, but they didn’t see the quarter-inch dip in the slab that would have snapped their new planks in a week. Most guys skip the leveling compound and think the underlayment will hide the sins of the subfloor. It never does. That same philosophy applies to the shower. If you cannot see the back of the tile, you are probably failing the installation. Tiling a shower is an exercise in managing the unseen physics of water migration and bond strength. When you reach those tight, blind corners behind a plumbing stack or a built-in bench, you are flying blind. That is where the mirror trick comes into play. It is not about vanity, it is about ensuring that the mortar coverage is sufficient to prevent the tile from popping or the grout from crumbling under the pressure of daily thermal expansion. I have seen too many bathrooms that look like a million bucks on the surface but are rotting from the inside because an installer couldn’t be bothered to check his work in the corners.
The physics of a blind corner tile bond
A blind corner tile bond depends on the mechanical interlock of polymer-modified thin-set and the collapse of mortar ridges to eliminate air pockets. In wet environments, the National Tile Council standards require 95 percent mortar coverage to ensure there are no voids where moisture can accumulate. When you are working in a tight corner, your physical presence often blocks your line of sight. You might think you have applied enough pressure to collapse the ridges, but without visual confirmation, you are guessing. This is why a small inspection mirror is the most valuable tool in my bucket. I use it to look behind the tile after I have set it into the thin-set. If I see open channels or air gaps, I pull the tile and re-apply. The chemical bond of a modified mortar relies on the resin chains forming a continuous matrix. When air is trapped, those chains are broken, and the bond strength drops by half. It is the difference between a floor that lasts fifty years and one that fails in five.
“A floor is only as good as the subfloor beneath it; deflection is the enemy of every joint.” – Master Flooring Axiom
Why your subfloor is lying to you
Subfloors often appear level but contain subtle deflections that exceed the one eighth inch over ten feet tolerance required for large format tile. Even in a shower, where the slope is intentional, the transition from the pan to the wall must be perfectly managed. I have walked onto jobs where the previous installer tried to hide a dip with extra thin-set. That is a recipe for disaster. Thin-set is not a leveling agent. It is a bonding agent. When it is applied too thick, it shrinks as the water evaporates, pulling the tile out of alignment and creating lippage. I always carry a six-foot level and a straightedge. If the subfloor is not within tolerance, I am not laying a single tile until the grinder comes out or the self-leveler is poured. This is especially true when transitioning to hardwood floors or laminate in the adjoining room. If your bathroom subfloor is higher than the hallway, you are looking at a trip hazard that no transition strip can truly fix. [IMAGE_PLACEHOLDER]
The geometry of the vanity gap and the plumbing stack
The geometry of tight spaces requires precision cutting and a deep understanding of how mortar behaves under compression. When you are fitting tile around a drain or behind a toilet flange, the margins for error are razor thin. I have seen guys try to glob grout into a half-inch gap because they cut the tile too short. That grout will crack in a month. You need to maintain a consistent expansion gap, even in the corners. This is where the mirror trick really shines. You can see the relationship between the tile edge and the plumbing fixture from an angle that is physically impossible to reach with your head. I use an eight-inch automotive mirror. It allows me to verify that the tile is not touching the pipe, which would cause a crack when the house shifts. The physics of movement are non-negotiable. Every material in that bathroom expands and contracts at a different rate. If you lock them together, something has to give, and it is usually the expensive porcelain.
| Grout Type | Moisture Resistance | Flexibility Rating | Best Use Case |
|---|---|---|---|
| Sanded Cement | Moderate | Low | Wide joints over 1/8 inch |
| Unsanded Cement | Low | Low | Narrow wall joints |
| High-Performance Epoxy | Extreme | High | Steam showers and high traffic |
| Pre-mixed Urethane | High | Medium | Consistent color and DIY ease |
The 1/8 inch that ruins everything
An expansion gap of one eighth inch at the perimeter is mandatory to allow for the natural movement of the building envelope. Most homeowners want a seamless look, but a floor that is pinned against the walls will eventually tent or buckle. I see this all the time with laminate installations where the installer forgot to leave space under the baseboards. In a shower, that expansion gap is filled with high-grade silicone caulk, not hard grout. Grout is rigid. Silicone is flexible. If you grout the change of plane where the wall meets the floor, that grout will crack. It is a mathematical certainty. By using a mirror in the corners, I can ensure that the silicone bead is making full contact with both surfaces. If there is a void in the backing, the silicone will fail, and water will find its way into the wall cavity. That is how you end up with a mold problem that costs ten thousand dollars to remediate. I do not play games with moisture.
“Moisture vapor emission rates must be measured using anhydrous calcium chloride tests or in-situ probes before any adhesive application.” – TCNA Handbook Guidelines
Chemical composition of modern epoxy grout
Modern epoxy grout consists of a two part resin system that creates an impermeable barrier against water and bacteria. Unlike traditional cementitious grout, epoxy does not need to be sealed. It is essentially a plastic bond that is nearly impossible to stain. However, it is a nightmare to work with in tight corners. It is sticky, it sets fast, and if you leave a haze on the tile, you are going to be scrubbing with chemicals for days. When I am using epoxy in a shower corner, I use the mirror to check for any residue I might have missed during the wash-down. The mirror allows me to see under the lip of the tile and around the back of the fixtures. If you leave a glob of epoxy in a corner, it will harden into a rock that will ruin the aesthetic of the entire job. It is about the chemistry of the cure. Once those resins cross-link, they are permanent. You have a window of about forty-five minutes to get it perfect.
- Check subfloor levelness with a ten foot straightedge before starting.
- Ensure the waterproofing membrane is continuous and has no punctures.
- Use a small inspection mirror to verify back-buttering coverage in blind spots.
- Maintain a consistent expansion gap at all changes of plane.
- Use color-matched silicone in the corners instead of rigid grout.
- Verify that the thin-set has not skimmed over before placing the tile.
Hardwood floors and the moisture migration myth
Hardwood floors in a bathroom environment fail because of the hydrostatic pressure and high humidity that warp the organic fibers of the wood. People see these beautiful photos in magazines of clawfoot tubs sitting on oak planks. What they don’t see is the cupping and crowning that happens six months later. Wood is a sponge. Even if you seal the top, the moisture from the shower travels through the air and gets into the subfloor, attacking the wood from the bottom up. I always tell my clients that if they want the look of wood, they should go with a high-quality porcelain wood-look tile. The Janka hardness scale doesn’t matter when the wood is saturated with water. A piece of Brazilian Cherry is tough, but it will still rot if it is sitting in a swamp. If you must have wood near a wet area, you need a serious transition and a dedicated ventilation system that pulls moisture out of the room at a rate of at least one cubic foot per minute per square foot of space.
The microscopic reality of the installation
The microscopic reality of a shower installation is that water is always trying to win. It moves through capillary action. It finds the smallest pinhole in your grout and works its way behind the tile. Once it is there, it sits. If your mortar coverage is poor, that water creates a hydrostatic environment that slowly dissolves the bond. I have pulled up floors where the thin-set was so soft I could scrape it away with a fingernail. That happened because the installer didn’t collapse the ridges. He left little tunnels for the water to travel through. This is why the mirror trick is a structural engineering necessity. It allows the architect of the floor to verify the integrity of the bond at the most vulnerable points. I take my time. I smell the floor wax and the oak dust of the transition strips, and I make sure every square inch is solid. A floor shouldn’t just look good, it should be an impenetrable fortress against the elements. If you are not using every tool at your disposal, including a simple mirror, you are just a guy with a trowel, not a master of the craft. It is the attention to the unseen details that separates a professional from a hobbyist. When I walk away from a job, I know that floor is not going anywhere for a lifetime.”