
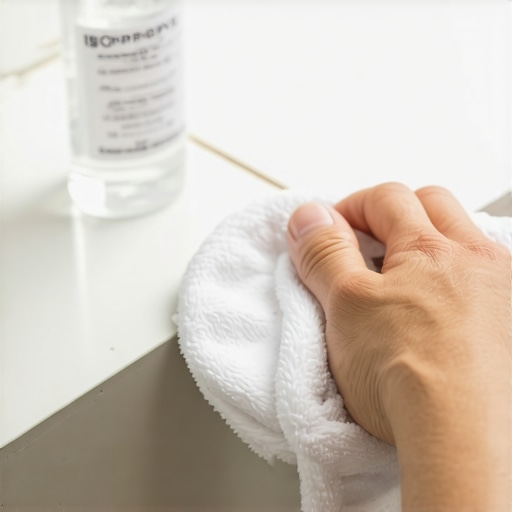
Professional floor installers know that the difference between a job that lasts twenty years and one that fails in twenty months is found in the preparation. I spent three days grinding concrete on a job last month just so the floor would not click like a castanet. That same level of obsessive detail applies to the wet areas of your home. If you think you can just scrape away old caulk and squeeze a new bead over the residue, you are setting yourself up for a catastrophic bond failure. The rubbing alcohol secret is not just a tip. It is a fundamental requirement for anyone who understands the chemistry of adhesion.
The invisible film that kills your bond
The rubbing alcohol secret involves using 91 percent isopropyl alcohol to strip away microscopic soap scum and residual oils from tile surfaces. This chemical cleaning ensures that the silicone sealant forms a primary bond with the silica in the tile or the glaze of the ceramic. Without this step, a thin layer of surfactants and body oils remains, preventing the caulk from ever truly sticking. You might see the caulk stay in place for a few weeks, but eventually, moisture will find its way behind the bead, leading to mold growth and substrate rot.
I once walked into a house where a homeowner had re-caulked their shower three times in one year. They were using the most expensive kitchen and bath silicone on the market. They could not understand why it kept peeling away like a dead skin. The problem was not the product. The problem was the invisible film of soap residue and mineral deposits they left behind. I took a lint free rag and some 91 percent isopropyl alcohol and showed them how much gray gunk came off a surface they thought was clean. Once we stripped it to the molecular level, the new bead stayed put forever. This is the difference between a DIY hack and a master installation.
The physics of evaporation and surface tension
When we talk about prepping showers or tiled floors, we have to talk about the evaporation rate of the solvent. Many people reach for mineral spirits or even paint thinner. This is a massive mistake. Mineral spirits leave behind an oily residue that is even worse than the soap scum you are trying to remove. Isopropyl alcohol, specifically the 91 percent or 99 percent variety, has a high vapor pressure. This means it evaporates almost instantly, leaving nothing behind but a bone dry and chemically neutral surface. It breaks the surface tension of water, allowing it to pull moisture out of the deep pores of the grout before you seal it in.
“A floor is only as good as the subfloor beneath it; deflection is the enemy of every joint.” – Master Flooring Axiom
If you are working near hardwood floors or laminate, you must be even more careful. Water migration from a poorly sealed shower can travel under the transition strip and ruin thousands of dollars of flooring. When I see cupping in a hallway outside a bathroom, I do not look at the hallway first. I look at the shower caulk. If that bond has failed because the installer skipped the alcohol wipe, the moisture is likely traveling through the subfloor and into the wood. Wood is a sponge. It will pull that water across the room through capillary action, and by the time you see the damage on the surface, the subfloor is already compromised.
Technical comparison of cleaning solvents
Not all cleaners are created equal. In the world of high performance flooring and tile work, we categorize solvents by their ability to degrease without leaving a film. Below is a breakdown of common substances used in the field.
| Solvent Type | Residue Level | Evaporation Speed | Safe for Grout |
|---|---|---|---|
| Isopropyl Alcohol 91% | Zero | Extreme | Yes |
| Mineral Spirits | High Oil | Slow | No |
| Acetone | Low | Instant | Warning (May damage acrylic) |
| Soap and Water | High Film | Very Slow | No |
The ghost in the expansion gap
Tile is a rigid material, but the houses we build are not. Every structure moves. This is why the TCNA (Tile Council of North America) mandates that change of plane joints, like where a wall meets a floor or two walls meet in a corner, must be filled with a flexible sealant rather than rigid grout. When that sealant fails, it is usually because the expansion gap was not cleaned properly. The rubbing alcohol secret ensures that the silicone can stretch and compress as the house breathes. If the bond is weak, the silicone will pull away during the first cold snap when the framing shrinks.
“Moisture is the primary catalyst for dimensional instability in all flooring assemblies.” – NWFA Technical Guide
The chemistry of the caulk itself matters too. Most pros prefer a neutral cure silicone over an acetoxy cure for sensitive stones. However, both require a surface free of oils. When you are prepping the area, you should use a three step process. First, mechanical removal of the old material. Second, a vacuum to pull dust out of the deep crevices. Third, the alcohol wipe. If you skip the vacuum and go straight to the wipe, you are just making a slurry of dust and alcohol that will dry into a bond breaking paste.
Step by step protocol for professional results
Following a strict sequence is the only way to guarantee a waterproof seal. Do not rush the drying time. Even though alcohol evaporates quickly, the moisture trapped inside the grout pores takes longer to escape. Use this checklist for your next project.
- Remove 100 percent of the old caulk using a plastic scraper to avoid scratching the tile glaze.
- Scrub the joint with a stiff nylon brush to dislodge dried soap and mineral scale.
- Vacuum the entire area with a HEPA filter to ensure no microscopic dust remains in the gap.
- Wipe the tiles and the joint thoroughly with a rag soaked in 91 percent isopropyl alcohol.
- Wait ten minutes for the alcohol to pull deep moisture out and fully evaporate.
- Apply a high quality 100 percent silicone sealant in a continuous bead.
- Tool the bead with a dry finger or a dedicated tool to avoid introducing saliva or soapy water into the bond.
Transitions to hardwood and laminate surfaces
In modern open concept homes, we often see tile bathrooms transition directly to laminate or hardwood floors. This is a high risk zone. If the tile caulk near the door or the shower base fails, the water will find the path of least resistance. Laminate flooring is particularly vulnerable. Most laminate is essentially compressed sawdust with a picture of wood on top. Once water hits the core, it swells and the floor is ruined. There is no fixing it. You have to tear it out. By using the rubbing alcohol secret to ensure a perfect tile seal, you are actually protecting the hardwood floors in the adjacent room.
I have seen guys try to use rubbing alcohol as a lubricant for smoothing the caulk bead. Do not do this. The alcohol will break down the silicone polymers before they have a chance to cross link and cure. This results in a bead that is brittle and prone to cracking. Use the alcohol for prep only. Once that bead is down, you want it to cure naturally. The goal is a chemical bond that is stronger than the materials themselves. When I pull on a properly prepped bead of silicone, the tile should break before the bond lets go. That is the standard we aim for in the Master Flooring Architect Engine. We do not build for today. We build for the next generation of the home.