
The concrete truth about subfloor preparation
Drilling through ceramic tile requires a stable foundation because any microscopic movement in the subfloor will cause the rigid surface to crack when vibration is introduced. Most guys skip the leveling compound. They think the underlayment will hide the dip. It won’t. I spent three days grinding concrete on a job last month just so the floor wouldn’t click like a castanet. That job was in a humid environment where the moisture in the slab was hitting eight percent on the calcium chloride test. If the subfloor isn’t flat to within an eighth of an inch over ten feet, your tile is a ticking time bomb. When you go to drill that hole for a shower curtain rod or a grab bar, that hollow spot under the tile will cause a fracture that runs across the entire bathroom floor. It is about the bond. It is about the support. If you have a void in your thin-set mortar, the mechanical stress of a drill bit acts as a wedge. I have seen fifteen thousand dollar installations ruined because someone wanted to save twenty dollars on a bag of self-leveler. You have to understand that ceramic is a crystalline structure. It handles compression beautifully, but it fails instantly under tension or shear force. When the drill bit spins, it creates a heat signature that expands the silica. If there is nowhere for that energy to go because of a hollow subfloor, the tile snaps. There is no fixing a hairline crack in a shower stall without compromising the waterproofing membrane. You do it right the first time or you do it twice. I prefer the former because my knees cannot handle the latter anymore. We are talking about the molecular reality of flooring. Thin-set isn’t just glue. It is a cementitious bond that relies on polymer chains to grip the microscopic pores of the tile backing. If those chains are broken by subfloor deflection, the tile is essentially floating. Drilling into a floating tile is a recipe for disaster. Every rotation of the bit sends a shockwave through the grout lines and into the neighboring units. This is why professional installers obsess over the substrate. We know that the pretty surface is only five percent of the story. The other ninety-five percent is the grit and the chemistry happening underneath where nobody looks until things go wrong.
“A floor is only as good as the subfloor beneath it; deflection is the enemy of every joint.” – Master Flooring Axiom
Why ceramic tile shatters under pressure
Ceramic tile shatters because the glaze is a glass-like coating that cannot handle the high-speed friction and heat of a standard metal drill bit. The surface tension of a glazed tile is incredibly high. When you place a bare drill bit on that surface, the metal wants to walk. It slides across the surface, scarring the finish. This is not just an aesthetic issue. These scars create micro-fractures that weaken the entire plate. The physics of the situation are simple. You are trying to penetrate a material that has a Mohs hardness rating of seven with a tool that is often only slightly harder. This generates massive amounts of heat. If you do not manage that heat, the ceramic undergoes a localized thermal expansion. The area under the bit expands while the surrounding tile remains cool. This differential creates a stress line. You need a way to stabilize the bit and manage the friction. This is where the painter’s tape comes into play. It is not just about protecting the surface from scratches. The tape provides a high-friction landing zone for the bit to bite into. It allows the carbide tip to gain a mechanical advantage without skating. Without this stabilization, you are basically playing Russian roulette with a hammer drill. I have seen guys try to use a center punch on ceramic. That is a fool’s errand. One tap and you have a spiderweb of cracks. You need a slow, controlled abrasion. You are not really drilling in the traditional sense. You are grinding your way through a layer of glass and fired clay. Understanding this distinction is what separates a master from a handyman who just bought his first set of bits at a big box store.
The tape method for precision holes
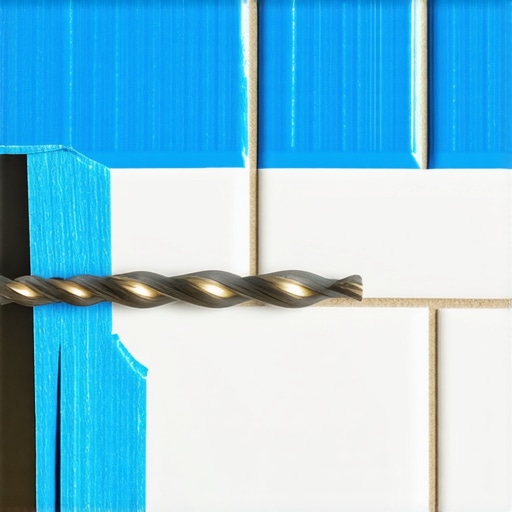
The painter’s tape hack involves placing two layers of masking tape in an X-shape over the target area to create a textured surface for the drill bit. This simple barrier serves three distinct purposes. First, it allows you to mark your exact measurement with a pencil without the lead sliding off the glaze. Second, it traps the fine ceramic dust that acts as an abrasive, actually helping the bit grind faster. Third, and most importantly, it holds the surface tension of the glaze together at the point of entry. It acts as a sacrificial layer. When the bit first impacts the tile, the tape absorbs the initial chatter. You should always use a high-quality blue or green painter’s tape. Do not use duct tape or packing tape. Those have adhesives that can leave a residue in the pores of the grout or the tile itself. I usually lay down one vertical strip and one horizontal strip. I then use a carbide-tipped masonry bit or, preferably, a diamond-core bit. You start the drill at a very low RPM. Do not use the hammer setting. If I see a guy using the hammer setting on a ceramic floor, I will kick him off the job site. The hammer action is for concrete and brick. On tile, it is a death sentence. You want a steady, firm pressure. You are looking for a fine white powder to emerge. If you see the bit glowing red, you are moving too fast. I keep a wet sponge nearby. Every ten seconds, I dab the bit to keep the temperature down. This preserves the life of the bit and prevents the tile from heat-stressing. It is a slow process. It takes patience. If you try to rush a hole through a porcelain tile, you will lose. The material is harder than you think. It is a battle of attrition between the diamond grit and the fired clay. The tape is your tactical advantage in that battle.
Managing moisture in wet area installations
Showers and bathroom floors require a continuous moisture barrier because grout is a porous material that allows water to migrate into the subfloor. People think grout is waterproof. It is not. Grout is a filter. It stops the big stuff, but on a molecular level, it is full of tiny holes. If you are drilling through tile in a shower, you are puncturing the primary defense of that wall. This is why the tape hack is so vital. It ensures the hole is clean. A jagged hole allows more water to seep behind the tile. Once water gets into the thin-set, it starts a process called efflorescence. This is where minerals are pulled out of the cement and deposited on the surface as a white crust. It looks terrible and it signals that your subfloor is rotting. In the humid South, I have seen shower stalls where the studs were completely gone because someone didn’t seal the holes they drilled for a soap dish. When you finish drilling your hole through the tape, you must fill that hole with a high-grade silicone sealant before you drive your screw or anchor. This creates a mechanical plug. You are essentially rebuilding the waterproofing envelope that you just destroyed with your drill. I recommend a 100 percent silicone product. Do not use a cheap caulk. Caulk shrinks as it dries. Silicone stays flexible. This flexibility is key because the house is always moving. The tile moves at a different rate than the wooden studs behind it. If your seal is rigid, it will pull away and leak. It is about managing the transition between different materials. That is the essence of flooring architecture.
| Material Type | Janka Hardness Rating | Moisture Resistance | Expansion Coefficient |
|---|---|---|---|
| Solid White Oak | 1360 | Low | High |
| Engineered Maple | 1450 | Medium | Low |
| Ceramic Tile | N/A (Mohs 7) | High | Very Low |
| Laminate Flooring | Varies (AC4/AC5) | Medium | Medium |
Hardwood and laminate vs the rigidity of ceramic
Hardwood floors and laminate products behave differently than ceramic because they are organic or semi-organic materials that expand and contract with humidity. While ceramic is rigid and brittle, hardwood is a living cell structure. It breathes. If you are drilling through hardwood, you don’t need tape. You need a sharp wood bit and an expansion gap. I once walked into a house where a fifteen thousand dollar wide-plank walnut floor was cupping so bad it looked like a potato chip because the installer didn’t check the crawlspace humidity. They didn’t leave a gap at the perimeter. The wood expanded, hit the drywall, and had nowhere to go but up. Ceramic doesn’t do that. Ceramic stays put until it breaks. Laminate is the middle ground. It is basically sawdust and resin. It is cheap and easy to install, but it hates water. If you get a leak in a laminate floor, the edges will swell like a sponge. You cannot fix it. You have to replace it. Ceramic is the king of longevity, but it demands a perfect installation. The rigidity is its greatest strength and its greatest weakness. When you drill into a hardwood floor, the wood fibers compress and move. When you drill into ceramic, the molecules are locked in a lattice. They cannot move. They can only separate. This is why we use different tools for different floors. You wouldn’t use a masonry bit on an oak floor any more than you would use a spade bit on a tile floor. You have to respect the material. You have to understand how it was made. Ceramic was born in a kiln at two thousand degrees. It is a product of fire. Hardwood was born in a forest. It is a product of water. They require opposite approaches to maintenance and modification.
The chemistry of modern thin-set adhesives
Modern thin-set mortar is a complex blend of Portland cement, fine sand, and water-retention agents that create a chemical bond with the tile substrate. We used to just use mud. Old-school installers would set tile in a thick bed of wet concrete. It worked, but it was heavy and slow. Today, we use thin-set with latex or polymer additives. These polymers are the secret sauce. They allow the mortar to flex just a tiny bit. This is vital when you are drilling. If the mortar was perfectly rigid, the vibration of the drill would shatter the bond instantly. The polymers act as tiny shock absorbers. They also help the mortar hold onto water longer. Cement needs water to hydrate. If the tile or the subfloor sucks the water out of the mortar too fast, the cement won’t cure properly. It becomes a dusty, weak mess. This is why we wipe the back of the tile and the subfloor with a damp sponge before we spread the mud. We want the chemistry to happen slowly. A slow cure is a strong cure. When you are drilling through a tile that has been set with high-quality modified thin-set, you can feel the difference. The tile feels solid. It doesn’t ring hollow. The drill bit moves through a unified structure. This is what we strive for. We want the tile, the mortar, and the subfloor to become a single monolithic slab. If you achieve that, you can drill a hundred holes and never see a crack. But that requires attention to detail at every step. You have to mix the mud to the right consistency. It should look like peanut butter. If it is too runny, it will shrink. If it is too thick, it won’t wet the back of the tile. It is a balancing act.
“A floor is only as good as the subfloor beneath it; deflection is the enemy of every joint.” – Master Flooring Axiom
Subfloor deflection and the geometry of failure
Subfloor deflection is the amount of bend in a floor system under a load, and it is the primary cause of grout failure and cracked tiles. The TCNA has strict rules for this. For ceramic tile, you need a deflection rating of L over 360. That means the floor shouldn’t bend more than the span divided by 360. For natural stone, it is L over 720. If your joists are too thin or spaced too far apart, your floor is a trampoline. You can’t put tile on a trampoline. This is why I often double up the subfloor with a layer of three-quarter inch plywood and a layer of backer board. Every layer is glued and screwed. I want that floor to be stiff. When you go to drill a hole, the stiffness of the floor determines how the energy of the drill is dissipated. In a bouncy floor, the energy is trapped in the tile. In a stiff floor, the energy passes through into the structure of the house. This is basic Newtonian physics. For every action, there is an equal and opposite reaction. If the floor can’t push back, the tile takes the hit. This is why the tape hack works best on a well-built floor. The tape handles the surface, but the subfloor handles the soul of the tile. If you are drilling and you feel the tile vibrating under your hand, stop. Something is wrong. Either your bit is dull or your subfloor is weak. You are about to ruin a floor. I have spent years explaining this to architects who want thin profiles and large format tiles. You can’t have both unless you are willing to spend the money on structural steel or high-modulus carbon fiber underlayments. Geometry doesn’t lie. A large tile has more leverage. It is easier to snap a twelve-by-twenty-four inch tile than a two-by-two inch mosaic. The bigger the tile, the flatter the floor must be. It is a simple ratio that many people ignore until they see the first crack crawling across their beautiful new kitchen.
Practical checklist for flawless tile penetration
- Select a diamond-core bit for porcelain or a carbide-tipped bit for standard ceramic.
- Apply two layers of painter’s tape in a cross pattern over the intended hole location.
- Mark the center point with a fine-point permanent marker to ensure accuracy.
- Set your drill to a low speed and verify that the hammer function is turned off.
- Maintain a spray bottle or wet sponge to cool the bit during the drilling process.
- Apply steady downward pressure without forcing the bit into the material.
- Fill the finished hole with silicone sealant before inserting any anchors or screws.
- Check the back of the tile for blow-out if you are drilling before installation.
Frequently asked questions about flooring durability
Common questions about flooring often revolve around the durability of various materials and the best practices for preventing long-term damage during renovation. Many homeowners want the look of hardwood in a bathroom. I tell them no. Even with the best sealants, wood and water don’t mix. You want a wood-look porcelain tile. It gives you the aesthetic without the rot. Another common question is about the thickness of the wear layer on LVP. People think a thicker wear layer means a better floor. Not necessarily. A thick wear layer on a soft core will still dent. You want a rigid core with a balanced wear layer. While most people want the thickest underlayment, too much cushion actually causes the locking mechanisms on LVP to snap under pressure. You need a thin, high-density foam that doesn’t compress. When it comes to drilling, people always ask if they can use a regular metal bit. You can, but it will be ruined in five seconds and you will probably break the tile. Use the right tool for the job. Spend the fifteen dollars on a diamond bit. It is cheaper than replacing a tile. In the dry heat of Phoenix, you have to worry about the grout drying too fast and cracking. In the humidity of Florida, you have to worry about mold behind the baseboards. Every region has its challenges. The physics of the floor remains the same, but the environmental variables change. You have to adapt. That is what a master does. We don’t just follow a manual. We read the room. We read the slab. We understand the molecular dance of the materials we are working with. If you treat your floor with respect, it will last a hundred years. If you treat it like a decoration, it will fail in five. The choice is yours, but I know which one I would choose. I would choose the one that involves blue tape and a slow drill bit every single time.