
I spent three days grinding concrete on a job last month just so the floor would not click like a castanet. Most guys skip the leveling compound. They think the underlayment will hide the dip. It will not. I have seen $20,000 installations of hardwood floors fail because someone thought a 1/4 inch deviation over 10 feet was acceptable. It is not. My hands are permanently stained with the dust of thousand year old stone and the chemical bite of epoxy resins. When you walk onto a job site, you should smell the sharp tang of WD-40 and the heavy, earthy scent of oak sawdust. That is the smell of a professional environment. Most people treat flooring as a cosmetic layer, like a coat of paint. That is a dangerous mistake. A floor is a structural performance surface. It is a machine that you walk on. When we talk about mosaic tiles, we are talking about a complex network of thousands of tiny joints. If you mess up the grouting process, you are not just making a mess. You are compromising the structural integrity of the wear surface. This is why the painters tape trick is not a luxury. It is a technical necessity for anyone who values their reputation and their knees.
The hidden lie of the level subfloor
Subfloor preparation determines the success of mosaic tile installations because the small footprint of mosaics cannot bridge gaps or dips in the concrete or wood substrate. Failure to address subfloor deflection leads to grout cracking and tile delamination. I once saw a mosaic shower floor fail within three weeks because the installer ignored a minor slope issue. The physics of small tiles require a substrate that is essentially perfect. We are looking for a tolerance of 1/8 inch over 10 feet. If your subfloor is wavy, your mosaics will follow those waves. This creates lippage. Lippage is the enemy. It creates edges that catch dirt, toes, and cleaning tools. When I say I spent three days on a grinder, I mean it. I was removing high spots in a slab that the builder said was ready for flooring. Builders lie. Levels do not. You need to check the moisture content of that slab too. A moisture meter is your best friend. If that slab is exhaling water vapor, your thin-set will never reach its full chemical potential. It will remain brittle.
“A floor is only as good as the subfloor beneath it; deflection is the enemy of every joint.” – Master Flooring Axiom
Why mosaic tiles turn into a structural disaster
Mosaic tiles create more grout surface area than large format tiles which increases the risk of moisture penetration and cleaning difficulties if the installation is messy. The surface tension of grout is a fickle thing. When you spread a cementitious slurry over a sheet of mosaics, you are battling time and chemistry. The mesh backing on most mosaics is often made of fiberglass or paper. This mesh can interfere with the bond between the tile and the thin-set if not managed correctly. I have seen guys slop grout everywhere, thinking they can just wipe it off later. By the time they start wiping, the grout has already begun to leach pigments into the porous surface of the stone or glass. This is especially true in showers. In a shower, the grout is the first line of defense against water infiltration. If the grout is not packed tight, it will fail. Most homeowners think waterproof laminate or LVP is a shortcut. It is not. Those click-lock systems are fragile. If you want a real floor, you build it with tile and grout, but you do it with the precision of a machinist. You do not let the grout smear over the face of the tile because it ruins the Coefficient of Friction (COF) and the aesthetic clarity of the stone.
The chemistry of the painters tape barrier
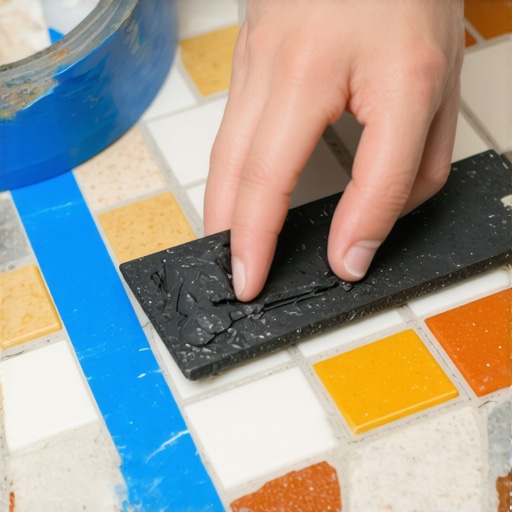
Applying high quality painters tape to the surface of mosaic tiles before grouting prevents the cementitious slurry from bonding to the tile face and preserves the finish. This is about the molecular interaction between the adhesive on the tape and the surface of the tile. You want a tape with a medium tack. If the tack is too high, you leave residue. If it is too low, the grout will bleed under the edges. When the tape is applied, it creates a physical shield. Think of it as a sacrificial layer. The grout can only enter the joints. This forces the installer to focus on the packing of the joint rather than the cleaning of the surface. It changes the physics of the installation. You are no longer fighting the clock to scrub the tile clean before the grout hazes. You are focusing on the density of the grout within the 1/8 inch gaps. This is the difference between a floor that lasts ten years and a floor that lasts a hundred. You are protecting the microscopic pores of the tile from the fine aggregates in the grout mix. Sanded grout is essentially liquid sandpaper. You do not want to rub that across a polished glass mosaic.
| Grout Type | Aggregate Size | Water Resistance | Best Use Case |
|---|---|---|---|
| Sanded Grout | Large silica | Moderate | Joints wider than 1/8 inch |
| Unsanded Grout | None | Low | Narrow joints and glass tile |
| Epoxy Grout | Fine quartz | Highest | Showers and high traffic zones |
| High Performance | Varies | High | Commercial kitchens and mudrooms |
Physics of the grout joint and surface tension
Grout joints function as expansion joints for the mosaic system and must be filled completely to distribute the load of foot traffic across the entire subfloor. When you press grout into a joint, you are displacing air. If you leave air pockets, you create weak spots. These weak spots will eventually collapse under the weight of a chair leg or a heel. The painters tape trick allows you to use a firmer grout mix because you do not have to worry about the difficulty of cleaning it off the tile face. A firmer mix usually means a higher polymer-to-cement ratio. This results in a stronger, more flexible joint. Flexibility is key. Everything in a house moves. The wood framing moves. The concrete expands and contracts. If your grout is too brittle, it will turn to dust. I have seen floors where the grout was so poorly mixed it could be vacuumed out of the joints. That is a failure of basic chemistry. You need to follow the manufacturer’s water-to-powder ratio exactly. Do not eye-ball it. Use a measuring cup. Use a digital scale if you have to. Precision is the mark of a master.
- Ensure the subfloor is flat within 1/8 inch over 10 feet using a straight edge.
- Vacuum all debris out of the joints before applying tape or grout.
- Apply medium-tack painters tape across the entire surface of the mosaic sheet.
- Use a sharp utility knife to cut the tape along the grout lines, exposing only the joints.
- Mix grout with a low-speed drill to avoid introducing air bubbles into the slurry.
- Pack the joints using a hard rubber float at a 45 degree angle.
- Remove the tape while the grout is still in its primary set phase.
The specific protocol for clean mosaic lines
Executing the painters tape method requires a meticulous cleaning of the tile edges to ensure the grout bonds to the side of the tile rather than the tape residue. This is where the amateurs fail. They leave bits of tape in the joint. That tape becomes a bond breaker. When the grout dries, it will pop out of the joint because it is not actually touching the tile. You must be surgical. I use a fresh blade for every sheet of mosaic. This process is slow. It is tedious. It is exactly why I charge three times more than the guy with the big-box store van. But when I am done, the grout lines are crisp. They are uniform. There is no haze. There is no pigment staining. The tile looks like it was born in the grout. We are talking about the difference between a project and a masterpiece. This is especially vital when dealing with natural stone like Carrara marble. Marble is thirsty. It will drink the dirty water from the grout bucket and change color forever. The tape stops that. It keeps the surface pristine. You are managing the hydration of the cement. If the tile sucks the water out of the grout too fast, the grout will not reach its full strength. The tape acts as a vapor barrier, keeping the moisture in the joint where it belongs.
“A mosaic is a conversation between the tile and the void; the grout is what makes that conversation permanent.” – Master Flooring Axiom
Selecting the right grout for high moisture zones
Showers and entryways require high performance grouts with low absorption rates to prevent the growth of mold and the degradation of the subfloor. In a shower, you are dealing with constant hydrostatic pressure on a micro scale. Water is trying to find a way to the subfloor. If you used a cheap, standard grout, the water will find a way. I prefer epoxy grouts for mosaics in wet areas. Epoxy is a different beast. It is a two part chemical reaction. It does not dry; it cures. Once it cures, it is essentially plastic. It is waterproof. It is stain proof. It is also a nightmare to clean up. This is where the painters tape trick becomes a life saver. Cleaning epoxy grout off the face of a mosaic tile is like trying to remove dried superglue. It is miserable. But with the tape, you just peel the mess away. You are left with a perfect, waterproof joint. The durability is unmatched. It will outlast the house. This is how you build for the future. You do not look for shortcuts. You look for the best chemical bond. You look for the strongest structural assembly. That is what a master floor installer does.