
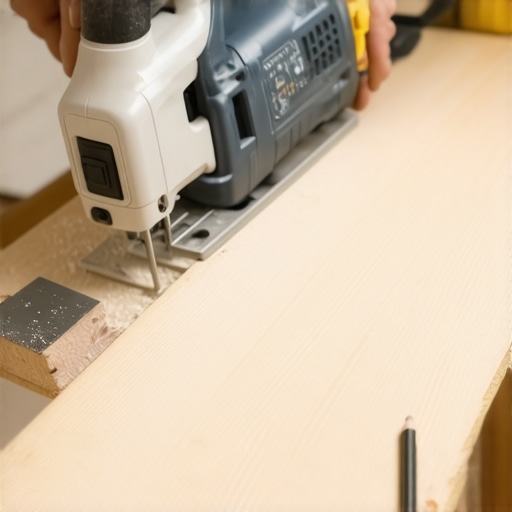
The quiet revolution of the laminate shear
You can achieve perfectly clean cuts on laminate flooring without a table saw by utilizing a professional laminate shear, a high-quality jigsaw with a reverse-tooth blade, or the score-and-snap method with a heavy-duty utility knife. These alternatives reduce hazardous airborne dust, eliminate the need for expensive power tool setups, and allow for precise notches around door frames and heating vents. Selecting the right tool depends on the thickness of the plank and the specific type of cut required for the layout.
I spent three days grinding concrete on a job last month just so the floor wouldn’t click like a castanet. Most guys skip the leveling compound. They think the underlayment will hide the dip. It won’t. I remember a job in a tight Victorian hallway where the homeowner was sensitive to dust. I couldn’t set up the table saw on the sidewalk because it was pouring rain. I had to rely entirely on my manual shear and a sharp jigsaw. My knees were screaming, but that floor went down tighter than a drum. That experience taught me that the table saw is often just a noisy crutch. Real floor layers know how to manipulate the material using its own structural weaknesses.
The physics of the melamine wear layer
Laminate is not wood. It is a composite of high-density fiberboard, decorative paper, and a protective wear layer made of melamine resin and aluminum oxide. This top layer is incredibly brittle. When you use a high-speed table saw blade, you risk chipping this layer if the tooth count is too low or the feed rate is too fast. Molecularly speaking, cutting laminate is a battle against heat and friction. Manual tools like shears work by applying concentrated pressure to a single point, bypasses the heat generation of a spinning blade and resulting in a cleaner edge that remains hidden under the baseboard. The high-density fiberboard core, which typically has a density between 800 and 1000 kilograms per cubic meter, responds well to the compression of a guillotine style shear. This tool does not remove material in the form of sawdust. Instead, it displaces it, which is why you get zero dust and a perfectly straight edge every single time.
“A floor is only as good as the subfloor beneath it; deflection is the enemy of every joint.” – Master Flooring Axiom
Why the jigsaw is your best friend for complex notches
A jigsaw equipped with a specialized laminate blade is the most versatile tool for cutting planks around door jambs, pipes, and irregular wall shapes. Unlike a table saw, which only handles straight lines, the jigsaw allows for the orbital movement needed to navigate the tight radii of a bathroom vanity or a stone fireplace hearth. The secret is the blade. You need a T-shank blade with reverse teeth. Standard blades cut on the upstroke, which will shred the decorative surface of your laminate. A reverse-tooth blade cuts on the downstroke, pressing the melamine layer firmly against the core and preventing those ugly white chips that ruin a professional look. I always tell my apprentices to slow down the speed and let the blade do the work. If you force it, the blade heats up, the resin melts, and you end up with a charred edge that might interfere with the locking mechanism.
The tool kit for a table saw free installation
| Tool Type | Best Use Case | Dust Level | Precision Rating | ||||||||
|---|---|---|---|---|---|---|---|---|---|---|---|
| Laminate Shear | Standard cross-cuts | Zero | High | ||||||||
| Jigsaw | Notches and curves | Low | Moderate | Utility Knife | Thin planks (under 8mm) | Zero | Low | Oscillating Multi-tool | Door jamb undercutting | Medium | High |
The hidden geometry of the expansion gap
Maintaining a consistent expansion gap of at least one quarter inch at every vertical obstruction is mandatory to prevent the floor from buckling or peaking. Laminate is a floating floor. It expands and contracts with the relative humidity of the room. In the Pacific Northwest, where the air is heavy with moisture, that floor will grow. In the dry heat of Phoenix, it will shrink. If you cut your planks too tight to the wall because you were proud of your precision, the floor will have nowhere to go when the humidity spikes. It will lift off the subfloor and create a hollow sound. I have seen entire living rooms ruined because the installer forgot that the floor is a living, moving entity. Use spacers. Never guess. The expansion gap is the ghost in the machine that keeps the joints tight and the surface flat over decades of use.
Precision techniques for the score and snap method
The score and snap method is a viable technique for thin laminate planks and involves using a carbide-tipped scoring tool or a heavy utility knife to slice through the wear layer. Once the wear layer is breached, you apply firm downward pressure on the overhanging section of the plank while it is supported by a straight edge. The HDF core will snap cleanly along the scored line. This is the same principle used by glass cutters. It requires a steady hand and a very sharp blade. I usually reserve this for the final row of a closet or a quick rip cut when the shear is too far away. It is not ideal for the 12mm premium planks with attached padding, but for a 7mm budget floor, it is the fastest way to work without making a mess. You must ensure your score line is deep enough to guide the break, otherwise the core might splinter and ruin the locking tongue.
Mastering the rip cut without a fence
Executing a long rip cut along the length of a plank requires a steady guide and a circular saw with a fine-finish blade if a table saw is unavailable. You can use another plank as a straight edge, clamping it down to your work surface. This provides a physical barrier for the circular saw shoe to follow. The physics of a rip cut are different than a cross-cut. You are cutting along the grain of the HDF fibers. This creates more friction and more heat. I recommend using a blade with at least 60 teeth and an ultra-thin kerf. This minimizes the amount of material being turned into dust and reduces the load on the saw motor. Always cut from the back of the plank if you are using a circular saw to ensure the teeth enter the finished surface from the top, which protects the melamine layer from splintering.
“Hardwood flooring should be the last trade on the job, and the environment must be controlled to its service conditions.” – NWFA Technical Guidelines
The essential installation checklist
- Acclimate the planks in the room for at least 48 hours prior to cutting.
- Check subfloor levelness with a 10-foot straight edge; no more than 3/16 inch deviation.
- Vacuum the subfloor three times to ensure no grit interferes with the underlayment.
- Inspect every plank for damage to the locking profile before making a cut.
- Use a tapping block and pull bar to secure joints without damaging the edges.
- Verify that the underlayment seams are taped and not overlapping.
The chemical reality of underlayment compression
While most people want the thickest underlayment, too much cushion actually causes the locking mechanisms on laminate to snap under pressure. This is a contrarian fact that many homeowners ignore. They think a thick foam pad will make the floor feel like carpet. It wont. It creates a vertical movement known as deflection. When you walk across a floor with too much squish, the tongue and groove joints are stressed. Over time, the HDF will fatigue and the joints will separate. You want a high-density underlayment with a low compression set. This provides the sound dampening you need without sacrificing the structural integrity of the floor. Look for products with high IIC (Impact Insulation Class) ratings but thin profiles. It is the chemistry of the foam, not the thickness, that determines performance. A thin, dense rubber or cross-linked polyethylene is far superior to a cheap, thick open-cell foam.
The final row and the art of the pull bar
The last row of the installation is often the most difficult and requires a pull bar to snug the final planks into place against the wall. Since you cannot use a tapping block in the narrow space, the pull bar transfers the force of your hammer to the edge of the plank from a distance. You must be careful not to mar the wall or the baseboard. I always place a scrap piece of laminate between the bar and the wall to distribute the pressure. If your rip cut on the final row was slightly off, the pull bar will help hide minor errors by pulling the joint tight. However, if the cut is too wide, no amount of force will make it fit. Measure twice at both ends of the plank, as walls are rarely ever perfectly parallel. This is where the true craftsman is revealed, in the hidden corners and the tightest gaps where nobody else looks. A floor is a structural engineering challenge that requires patience, the right tools, and a deep respect for the materials involved.