
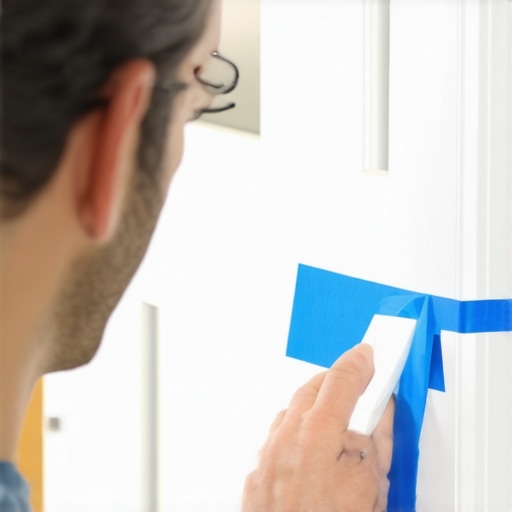
The Painter’s Tape Trick for Scribing Straight Lines on Cabinet Trim
You’ve spent weeks planning your kitchen remodel, thousands of dollars on custom cabinetry, and hours ensuring every box is level. But as you go to install the final pieces of trim, you’re met with a frustrating reality: your “straight” walls look like the rolling hills of Indiana. When you hold a straight piece of molding against the wall, there’s a gaping 1/4-inch hole in the middle, while the ends are tight. This is where many DIY projects lose their professional luster.
My name is Andy Danforth, and with over 16 years of experience as a house painter indianapolis, I’ve seen how these small gaps can make or break the aesthetic of a home. Scribing is the process of shaping the edge of a piece of wood to match an irregular surface exactly. While it sounds intimidating, the “Painter’s Tape Trick” is a secret weapon that professional the painter guys use to achieve a seamless, high-end finish without the stress of traditional methods. In this guide, I’ll show you how to master this technique to ensure your kitchen cabinets look like they were installed by a master craftsman.
Why “Straight” Walls are a Myth in Kitchen Remodeling
If there is one thing an indianapolis house painter learns early in their career, it’s that a truly straight wall is a myth. Whether you are living in a historic home in Meridian-Kessler or a brand-new build in Fishers, walls are rarely perfectly plumb or flat. Framing lumber can bow as it dries, drywall mud can be applied unevenly at the joints, and houses naturally settle over time.
Data suggests that even in new construction, settling and thermal expansion can cause 1/8 to 1/4 inch variances in wall flatness across a standard 10-foot run. These variances become glaringly obvious when you press a factory-straight piece of cabinet trim against them. If you ignore these gaps, you’re left with a shadow line that screams “amateur.” Furthermore, relying solely on caulk to fill large gaps is a recipe for disaster; caulk shrinks and cracks over time, especially in kitchens where humidity levels fluctuate. If you’re dealing with floor-level issues as well, check out The Nickel Test for Checking Subfloor Levelness Before Laminate. Understanding that your walls are imperfect is the first step toward achieving a perfect finish. Much like how Why Your New Hardwood Floor Has Gaps Between the Planks can be traced back to subfloor irregularities, cabinet gaps are a symptom of the structure, not the cabinetry itself.
Traditional Scribing vs. The Painter’s Tape Method
The old-school way of scribing involves using a compass or a pencil to trace the wall’s contour directly onto the wood. While this method has worked for decades, it has several pitfalls. First, graphite marks are notoriously difficult to see on finished wood, especially on dark cherry, walnut, or trendy navy blue cabinets. Second, if you slip, you’ve just scratched the expensive factory finish of your trim.
This is where the painter guy approach changes the game. By applying painter’s tape to the trim before you mark it, you create a high-contrast surface where the line is incredibly easy to see. It also protects the finish of the wood from the scribe tool and the baseplate of your saw or sander. As a leading painting company indianapolis, we always advocate for methods that prioritize the protection of the substrate. The tape method isn’t just about accuracy; it’s about insurance against costly mistakes. It allows you to visualize the cut before you ever pull the trigger on a saw.
Essential Tools for the Perfect Scribe
To pull off this trick like the painters Indianapolis pros, you need the right kit. Don’t settle for whatever is in the junk drawer; precision requires quality tools.
- High-Quality Painter’s Tape: I highly recommend Yellow FrogTape (Delicate Surface). Its PaintBlock technology ensures that if you decide to touch up the paint later, you won’t get bleed, but more importantly, the yellow tape is thin enough to allow for extreme precision while being bright enough to show pencil marks clearly.
- A Scribe Tool or Metal Washer: While professional scribes exist, a simple 1-inch metal washer is often more effective for DIYers. It provides a consistent offset from the wall.
- A Sharp Pencil or Utility Knife: Use a mechanical pencil for a consistent line width.
- A Belt Sander or Jigsaw: A jigsaw with a “down-cut” blade is best for removing bulk material, while a belt sander allows for fine-tuning the edge.
Having these tools ready is half the battle. If you are worried about the painters Indianapolis cost, remember that investing $50 in tools is much cheaper than replacing a $200 piece of custom-finished crown molding.
Step-by-Step: The Painter’s Tape Scribing Technique
Ready to get to work? Follow these steps to achieve a hair-thin fit between your trim and the wall.
1. The Dry Fit
Position your trim piece exactly where it is intended to go. Use a few pieces of tape or a helper to hold it perfectly plumb. You will notice the gaps where the wall bows away from the wood. Ensure the piece is level and aligned with the cabinet face before proceeding.
2. The Tape Application
Cover the edge of the trim that faces the wall with your Yellow FrogTape. Make sure the tape wraps slightly around the front face of the trim. This protects the finish and provides the “canvas” for your scribe line. Avoid using standard high-tack blue tape on pre-finished cabinets to prevent finish damage; refer to The Blue Tape Mistake That Peels the Finish Off Your Hardwood Floors for more on tape safety.
3. The Transfer
Place your metal washer against the wall, with your pencil lead inside the center hole. Slowly slide the washer down the wall, keeping it flat against the surface. The outer edge of the washer follows the wall’s bumps and dips, while the pencil transfers that exact movement onto the tape. This creates a perfect “map” of your wall on the trim.
4. The Cut and Back-Bevel
Take the trim to your workbench. Use a jigsaw to cut about 1/16th of an inch away from your line. Then, use a belt sander to “creep up” on the line. Pro Tip: Angle your sander so you are removing more material from the back of the wood than the front (this is called a back-bevel). This ensures that only the very front edge of the trim touches the wall, making for a much tighter fit. For more complex scribing, such as stone surfaces, see How to Scribe a Perfect Line on Hardwood Bordering a Stone Fireplace.
5. The Reveal
Once you’ve sanded down to the line, press the trim back against the wall. It should snap into place with no visible gaps. Peel the tape away at a 45-degree angle to ensure no finish is lifted. The result is a custom-contoured edge that looks like it grew out of the wall.
Professional Finishing: Painting Your Scribed Trim
Once the fit is perfect, the final step is the finish. If your trim isn’t pre-finished, you’ll need to consider the interior house painting cost for your kitchen. Precision at the wall line is vital because it minimizes the amount of caulk needed. In professional circles, we say “caulk is for gaps, not for canyons.”
When calculating the cost to paint kitchen cabinets, many homeowners overlook the labor involved in trim work. If you are painting the trim yourself, use a high-quality trim enamel. If you find yourself overwhelmed by the technicality of the finish, reaching out to kitchen cabinet painting companies can save you the headache of brush marks and drips. A professional finish on a perfectly scribed piece of trim creates that “factory” look that defines high-end renovations. For those looking to achieve a similar level of perfection in other areas, like the bathroom, don’t miss The Painter’s Tape Hack for Perfect Silicone Beads in Shower Corners.
When to DIY vs. Hiring a Professional Indianapolis House Painter
Scribing is a high-stakes task. Unlike painting a wall, where a mistake can be sanded and repainted, a bad cut on a piece of custom cabinet trim often means the piece is ruined. If your cabinets are made of expensive exotic woods or have a complex factory-applied glaze, the margin for error is razor-thin.
There is no shame in calling a painting company indianapolis to handle the final details. A professional indianapolis house painter brings the tools, the steady hand, and the insurance to ensure the job is done right the first time. Whether you need columbus interior painting or a local expert in Hamilton County, hiring a pro can actually save you money by preventing material waste.
If you’re in the Fishers area, you can find more specialized services at guypainting.com to help bring your vision to life.
Conclusion & Final Tips for a Flawless Kitchen
The Painter’s Tape Trick is a testament to the fact that professional results often come from simple, clever techniques rather than expensive machinery. By taking the time to scribe your cabinet trim, you eliminate the unsightly gaps that plague DIY projects and create a kitchen that feels solid, intentional, and high-quality.
Remember: measure twice, scribe once, and always use high-quality tape. If you’re ready to take your home to the next level but want the peace of mind that comes with professional expertise, contact us today for a paint quote. We’d love to help you put the finishing touches on your dream kitchen!