
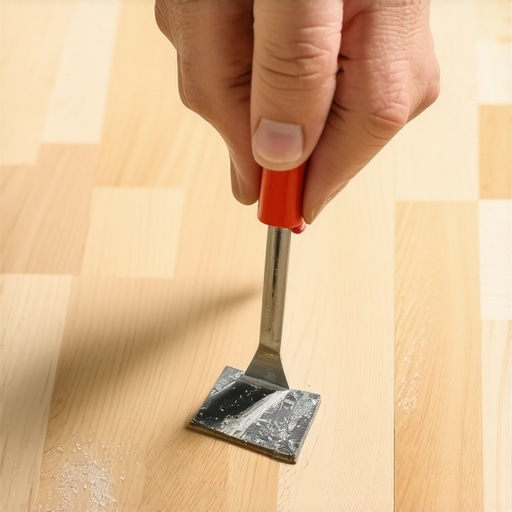
The Putty Knife Trick for Fixing Gouges in Engineered Hardwood
There is a specific, sinking feeling that every homeowner knows. It’s the sound of a heavy cast-iron skillet slipping from a counter, or the sharp crack of a dropped hammer hitting the floor. You hold your breath, look down, and there it is: a deep, jagged gouge in your beautiful engineered hardwood. In that moment, the floor feels ruined, and the cost of professional repair or board replacement starts flashing in your mind like a neon sign. If you’ve spent any time searching for an INTERIOR PAINTER NEAR ME to freshen up your walls, you know that the smallest blemish on a surface can distract from an otherwise perfect room.
My name is Jeremy Maher, and my goal is to help homeowners navigate the complexities of home improvement with clarity and fewer regrets. Over the years, I’ve seen homeowners spend thousands on unnecessary floor replacements because they didn’t know the “Putty Knife Trick.” This technique is a low-cost, high-impact DIY fix that can make even the most intimidating gouges virtually disappear. It’s about restoring your home’s value and your peace of mind without the dust, noise, and expense of a full-scale renovation.
Why Engineered Hardwood Requires a Specialized Repair Approach
Before you grab a sander and start grinding away at your floor, you must understand the anatomy of what you’re standing on. Engineered hardwood is not the same as solid hardwood. While solid oak or maple is a single thick piece of wood from top to bottom, engineered flooring is a masterpiece of layers. It typically consists of a high-quality wood veneer – the “wear layer” – bonded over a core of high-density fiberboard or plywood layers.
This construction makes engineered floors more stable in humid environments, which is a major plus for LIVONIA HOUSE PAINTERS and contractors working in the variable Michigan climate. However, it also means your margin for error during a repair is razor-thin. If you attempt to sand out a deep gouge, you risk “sanding through” the veneer. Once you hit the core material, the board is effectively destroyed and must be replaced. This is why traditional refinishing methods often fail or aren’t even an option for modern engineered products. If you aren’t sure what you’re working with, you should check out our guide on How to Tell if Your Hardwood is Solid or Engineered in Seconds before proceeding.
Because the wear layer is often only 2mm to 4mm thick, we cannot use aggressive abrasion. Instead, we must use a “fill and sculpt” philosophy. The Putty Knife Trick is designed specifically to address the depth of the damage without compromising the integrity of the surrounding finish or the thin veneer layer.
The Essential Toolkit: Why the “Plastic” Putty Knife is King
Success in floor repair is 10% technique and 90% having the right tools. If you’ve ever watched an INTERIOR PAINTING NOVI MI crew at work, you’ve noticed they don’t just use one brush for everything. The same logic applies here. To execute this trick properly, you need a specific set of supplies:
- A Plastic Putty Knife: This is the most important tool in your kit. While professional EXTERIOR PAINTING NOVI MI experts often use metal scrapers for siding, a metal knife on a finished hardwood floor is a recipe for disaster. Metal can leave “tracks” or secondary scratches in the aluminum oxide finish of your floor. A plastic knife is flexible and soft enough to glide over the finish without leaving a mark.
- High-Quality Wood Filler or Putty: Look for a non-hardened putty that matches your floor’s secondary grain color (usually the darker tone in the wood).
- Floor Repair Wax: For deeper gouges, a wax-based filler provides better adhesion and flexibility.
- White Cotton Cloth: Lint-free is essential. Old T-shirts work perfectly.
- Painter’s Tape: To protect the “healthy” parts of the floor.
- Alternative Tooling: Research suggests that if a plastic putty knife isn’t available, a thin piece of hardwood shaped like a knife or even an old credit card can work, though the specialized plastic tool is preferred for its specific edge geometry.
Using a metal putty knife is the ultimate “rookie mistake.” The goal is to fill the hole, not create five new scratches around it. The plastic tool allows you to apply significant pressure to “pack” the filler without the risk of gouging the surrounding wood veneer.
Step-by-Step: Executing the Putty Knife Trick
Now that you have your tools, it’s time to perform the repair. This process requires patience and a steady hand. If you are currently working with a KITCHEN REMODELER NEAR ME or planning a BATHROOM REMODELING LIVONIA MI, you might even ask your contractor to show you their preferred filler brands, as they often have access to professional-grade color palettes.
1. Preparation and Cleaning
The filler will only bond if the surface is clean. Use a vacuum with a brush attachment to suck out any splinters or dust from the bottom of the gouge. Wipe the area with a slightly damp (not wet) white cotton cloth. Once dry, surround the gouge with painter’s tape, leaving about an 1/8th of an inch of “buffer” wood around the damage. This minimizes the cleanup area.
2. Perfect Color Matching
Wood is rarely one solid color. It has highlights, lowlights, and grain patterns. When selecting a putty, don’t try to match the brightest part of the wood. Instead, match the medium-dark tones. A repair that is slightly too dark looks like a natural knot; a repair that is too light looks like a mistake. You can often mix two colors of putty together to achieve a custom match.
3. The Application
Take a small amount of putty on the tip of your plastic putty knife. Press it firmly into the gouge. Don’t just wipe it over the top; you need to “pack” it. Engineered hardwood cores can be porous, and you want the filler to bite into those fibers for a long-lasting hold.
4. The “Trick”: The 45-Degree Scrape
This is the core of the technique. Hold your plastic putty knife at a 45-degree angle to the floor. In one smooth, firm motion, scrape across the gouge. The angle is critical – if the knife is too flat, it will pull the putty back out of the hole. If it’s too vertical, it won’t clear the excess. By maintaining that 45-degree pitch, the edge of the knife shears off the excess filler perfectly flush with the surface of the floor.
5. Accounting for Putty Shrinkage
According to industry data from sources like FlooringKing, almost all wood putties and fillers shrink as the moisture or solvents evaporate. If you scrape it perfectly flush while wet, you will likely end up with a slight “divot” once it dries. The trick is to “overfill” the gouge ever so slightly – just a hair above the surface. Once it is fully cured, you can do a final light pass with the plastic knife or a buffing cloth to level it out.
Advanced Techniques: Burn-In Kits and Hard Fill Wax
Sometimes a standard wood putty isn’t enough, especially for gouges that are deep enough to expose the plywood core or for floors in high-traffic areas like a hallway or a kitchen. If you are in the middle of a BATHROOM REMODELING TROY MI and notice damage near the transition strips, you might want to step up to a “Hard Fill” or “Burn-In” kit.
These kits are the professional standard for high-end furniture and floor repair. They use hard wax sticks that are melted into the gouge using a battery-operated heating tool. The advantage of hard fill wax is that it does not shrink. Once the wax cools and hardens (which takes seconds), it becomes as durable as the wood itself. You then use a specialized leveling tool – often a ribbed plastic scraper – to shave the wax flush without damaging the finish. For more complex repairs involving grain reconstruction, you might consider The Wood Glue and Sanding Dust Trick for Making Hardwood Patches Invisible, though this is typically reserved for raw wood or solid planks.
Hard fill kits also allow for “layering.” You can melt a base color, then “draw” grain lines with a darker wax stick to mimic the natural look of oak or hickory. This level of detail is what separates a DIY “patch” from a professional “restoration.”
Common Mistakes to Avoid During Floor Repair
Even with the right tools, it is easy to go wrong. When homeowners in Oak Park hire OAK PARK HOUSE PAINTERS, they expect a flawless finish, and you should expect the same from your floor repair. Avoid these common pitfalls:
- Using the Wrong Color: As mentioned, always err on the side of darker. Light-colored filler sticks out like a sore spot and is very difficult to darken after it has dried.
- The Metal Scraper Temptation: You might think you can be careful with a metal blade, but one slip is all it takes to create a scratch that requires an EXTERIOR PAINTER NEAR ME to help you hide (just kidding, but the damage is real). Stick to plastic.
- Impatience with Curing: Walking on a repair before it has fully cured will compress the filler and ruin the level. Give it at least 24 hours before allowing foot traffic or replacing furniture.
- The Tape Mistake: While painter’s tape is helpful, leaving it on too long can be dangerous. Be sure to read about The Blue Tape Mistake That Peels the Finish Off Your Hardwood Floors to ensure you don’t trade one problem for another.
Another mistake is failing to clean the excess filler from the “valleys” of the wood grain surrounding the repair. If you leave a “haze” of filler on the surface, it will catch the light and make the repair obvious. Use your white cloth to gently wipe *around* the repair while the filler is still slightly pliable.
When DIY Isn’t Enough: Coordinating with Your Remodel
While the Putty Knife Trick is a miracle worker for isolated gouges, there are times when the damage is a symptom of a larger issue. If your engineered floors are showing widespread wear, delamination, or deep scratches across the entire room, it might be time to look at the bigger picture. Homeowners in Canton, Livonia, and Farmington Hills often find that localized floor repairs are the perfect catalyst for a larger home refresh.
If you are already planning a KITCHEN REMODELING CANTON MI or a BATHROOM REMODELING FARMINGTON HILLS MI, that is the ideal time to address flooring. A professional KITCHEN REMODELER NEAR ME can help you decide if the existing floor can be saved or if a new installation would better serve the updated aesthetic. For instance, during a kitchen remodeling livonia mi project, you might find that the layout changes leave gaps in your flooring where cabinets used to be. In these cases, the Putty Knife Trick won’t help, and you’ll need a professional transition strategy. You can learn more about this in our article on The Floor Transition Strategy That Saves Your Canton Kitchen Remodel From Looking Disjointed.
Integrating floor restoration into a larger remodel ensures that the colors, textures, and finishes all work in harmony. It also allows you to tackle structural issues – like subfloor squeaks – that a simple putty repair can’t fix.
Conclusion & Final Thoughts
The Putty Knife Trick is more than just a repair technique; it’s a way to maintain the value and beauty of your home with minimal investment. By using a plastic putty knife, choosing the right color match, and mastering the 45-degree scrape, you can handle the inevitable “life happens” moments that occur on engineered hardwood. These small details are what keep a home looking pristine and well-cared for over the decades.
However, if the damage to your floors is extensive, or if you’re looking to transform your space entirely with a professional renovation in the Michigan area, don’t hesitate to reach out to the experts. Whether you need a BATHROOM REMODELER NEAR ME or a full kitchen overhaul, starting with a clear plan is the best way to ensure a result with no regrets. Take care of the small gouges today, and your floors will continue to provide a beautiful foundation for your home for years to come.